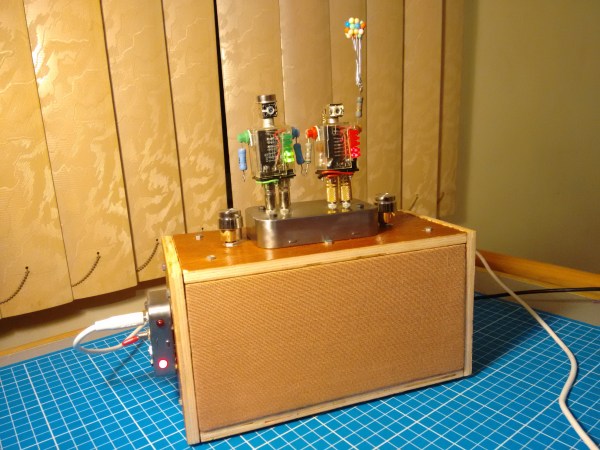
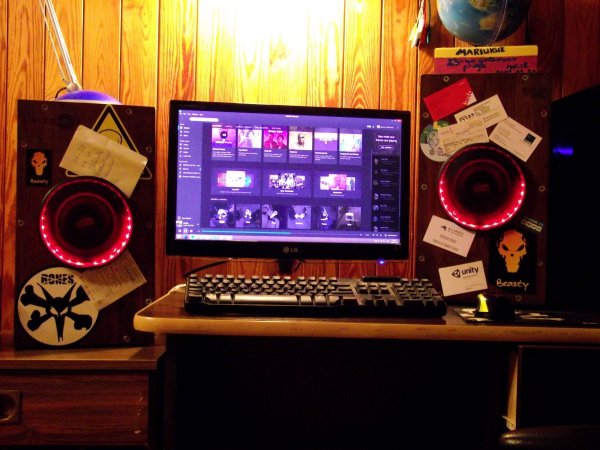
A VU-meter Indicator For A Commodore 1530 Datasette

For present-day owners of vintage Commodore computers, keeping data and programs safe and backed up is top priority. Disk drive storage was more common in the US, whereas in Europe, the audio cassette was the preferred medium of storage.

The Datasette device was what allowed interfacing the cassettes to the computer. Tape head alignment was critical to successfully writing and reading data to the cassette. Some models of the Datasette came with a small hole above the keys, to allow access to the adjustment screw of the tape head azimuth position. Tweaking this while looking at a signal meter could help you improve the signal from a bad cassette and prevent load errors. [Jani] tried a commercial solution called “Load-IT” which had a LED bargraph, but it couldn’t help much dealing with tapes with very bad signals. So he built a signal strength meter for his Datasette. He calls it the VU-sette since it uses an analog style meter quite similar to the VU-meters found in many audio equipment.

The hardware is simple and uses commonly available parts. The analog meter is extracted from a Battery Checker sourced from eBay. An op-amp drives the analog meter, and another transistor drives a separate speaker. This can be used to listen in on the cassette, if the speaker is enabled via a push button. [Jani] first breadboarded and tested the circuit before ordering out prototype boards.

To test performance, [Jani] used FinalTAP, a tool for examining, cleaning and restoring digitized data cassette tapes (TAP files) for the Commodore 64 computer. The “LOAD-IT” version worked well with tapes that were in fairly good condition. But his VU-sette version allowed him to adjust the head more precisely and get out a much better read from bad tapes. While on the subject, check out this nice 7-segment bubble LED digital counter for the 1530.

Continue reading “A VU-meter Indicator For A Commodore 1530 Datasette”

3D Spectrum Analyzer Uses 1280 LEDs

One of [Dooievriend]’s friends recently pressed him into service to write software for a 3d spectrum analyzer/VU that he made. The VU is a fairly complex build: it’s made up of 1280 LEDs in a 16x16x5 matrix controlled by a PIC32 clocked at 80MHz. [Dooievriend] wrote some firmware for the PIC that uses a variation on a discrete Fourier transform to create a 3D VU effect.

j6v2i 
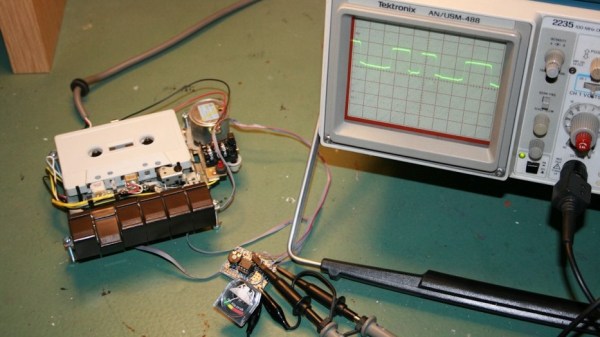
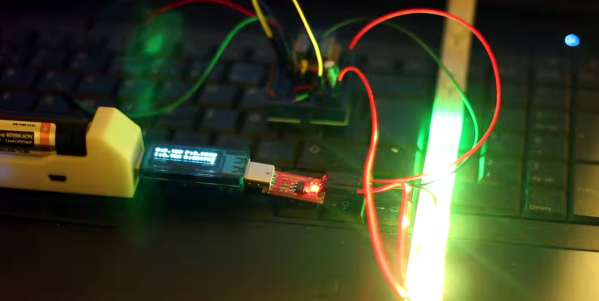
When [Dooievriend] set out to design the audio analyzing portion of the firmware, his mind jumped to the discrete Fourier transform. This transform calculates the amplitude in a series of frequency bins in the audio—seemingly perfect for a VU. However, after some more research, [Dooievriend] decided to implement a constant Q transform. This transform is very similar to a Fourier transform, but it takes into account the logarithmic way that the human ear interprets sound.

[Dooievriend] started implementing the constant Q transform using an interrupt-based sampler, but he quickly ran into issues with slow floating-point math on his PIC32 (which doesn’t have a hardware floating-point unit). Thankfully he rewrote his code using fixed-point math, and the transform runs nearly real-time. Check out the video after the break to see the VU in action, and a second video that gives some details on the hardware build.

Continue reading “3D Spectrum Analyzer Uses 1280 LEDs”

A Real-Time Networked VU Running On The ESP8266

Even though the ESP8266 WiFi chipsets are really cheap (and can be somewhat challenging to work with), they still pack a lot of processing power. For instance, [Mr.jb.swe] took one of these modules and made a stand-alone live VU meter with WS2812B LED strip. The VU runs entirely on the ESP chip, without any additional microcontroller. It’s an example we think a lot of projects could follow to do away with unused horsepower (extra microcontrollers) sometimes used to avoid programming directly on the ESP. The stuff you can do with these modules is wild… did you see this WiFi signal strength mapping project?

The ESP chipset acts as a UDP client which receives packets from a WinAmp plugin that [Mr.jb.swe] wrote. The plugin continuously calculates the dB of whatever track is playing and streams it over WiFi to his ESP8266. He also mentions that the ADC of the ESP chipset could be used to sample audio as well, although that pretty much eliminates the need for WiFi.

The whole setup is very responsive even though the processor is parsing UDP messages, driving the WS2812 strip, and driving a small OLED display for debug—and it doesn’t even use a separate microcontroller. [Mr.jb.swe] also posted snippets of his code to get you started on your own project. Check out the videos after the break to see it in action.

Continue reading “A Real-Time Networked VU Running On The ESP8266”

CNCs And Acrylic And LEDs Oh My!

Looking for something unique to spice up his music room [Est] decided he wanted to try making a light that responds to the music — kind of like a VU meter, but a little different. He calls it the Light Effect Tower.

The main structure of the tower was cut out of 6mm acrylic using [Est’s] homemade CNC router. He used a V router bit to do the engraving, which when combined with light, produces a high contrast dynamic with the plastic.

He designed the circuit to fit into the triangular base, which uses a PIC micro controller to sample a microphone to produce the lighting effect. The cool thing is, he’s designed it to calculate the max level of noise, to scale the sample accordingly — that way if you’re playing loud music or quiet music, it’ll still work without any adjustments to the microphone gain.

Oh yeah, did we mention this thing is big? It’s actually 1.5 meters tall! Check out the different modes he programmed in — it’s pretty bumping.

Continue reading “CNCs And Acrylic And LEDs Oh My!”

Party Ready Mini LED Volume Tower

Audio LED Light Tower

There are many very cool visual effects for music, but the best are the kind you build yourself. [Ben’s] mini LED volume towers adds some nice bling to your music.

[Ben] was inspired to created this project when he saw a variety of awesome stereo LED towers on YouTube (also referred to as VU meters). We have even featured a few VU meters, one very recently. [Ben] goes over every detail, including how to test your circuit (a very important part of any project). The schematic is deceptively simple. It is based on the LM3914 display driver IC, a simple chained comparator circuit is used to control the volume bar display. All you really need is a 3D printer to make the base, and you can build this awesome tower.

See the completed towers in action after the break. What next? It would be cool to see a larger tower that displays frequency magnitude!

Continue reading “Party Ready Mini LED Volume Tower”

VU Meter Record Player Lights It Up

vu_intro-image

[Michaël Duerinckx] was given a turntable for his last birthday from his fiancée — since then he’s started collecting records like nobodies business. But about a month ago he started itching to do an electronics project — he decided to upgrade his record player to include a VU Meter!

As he began designing he soon realized he didn’t have all the tools he needed to do this project right — a perfect excuse to go check out his local makerspace, SoMakeIt!

He started prototyping the VU Meter on a breadboard, and opened up the record player – it was like this thing was made to be hacked. Two free connections off the power supply to power his circuit, bingo! Continue reading “VU Meter Record Player Lights It Up”

VU Meter Prom Dress

vu meter prom dress

[Kyle] has just put the finishing touches on this VU Meter Prom dress, and it looks great!

The dress makes use of 70 feet of aquamarine EL wire, a 2600mAh li-on battery, a repurposed DB9 cable, an Arduino knock off, an Adafruit microphone pre-amp, and features eight addressable triac channels through an EL Escudo Dos by Sparkfun. Each loop of EL wire was sewn into the dress using clear thread. The separate segments were then daisy chained together near the zipper in the back using ribbon cables. To top it all off, [Kyle] has a cheap thermoforming setup utilizing a toaster oven which he used to make an acrylic case for the electronics.

The dress is for his lucky friend [Diane] and we think it will make for quite a memorable prom! To see this awesome VU Meter in action, stick around after the break for the video.

Continue reading “VU Meter Prom Dress”