Detecting Cars With An ESP8266 Magnetometer

Having a motorized gate on your driveway is great, but only if there’s an easy way to trigger it. [Andrew] says the gate at his parent’s place could only be controlled by manually pushing a button on the panel or with a dinky remote that didn’t have nearly the range they wanted. So he decided to build his own magnetometer allowing the gate to automatically open when a car was trying to leave.

Naturally, there are commercial offerings that would solve this problem. But with a sticker price of more than $150 USD, [Andrew] was more than happy to spend a bit of time tinkering to get the job done for less than 1/10th the cost with an ESP8266 and a QMC5883X series magneto-resistive sensor. Of course, this is one of those projects that seems simple enough in your head, but ends up taking a bit of finesse to pull off in the real-world.
For one, [Andrew] had to figure out how to prevent false positives. Pretty much any object brought close enough to the sensor, including his hand, would cause it to react. He ended up coming up with a way to use a rolling average to prevent the gate from firing off just because a squirrel ran past. The built-in safeties are designed to ensure that the gate only opens when an actual car is sitting in the appropriate spot for long enough.

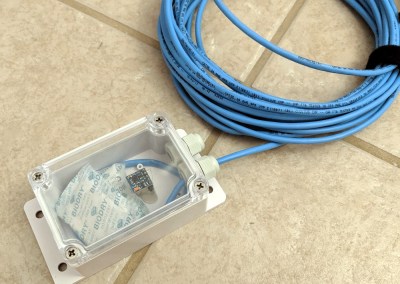
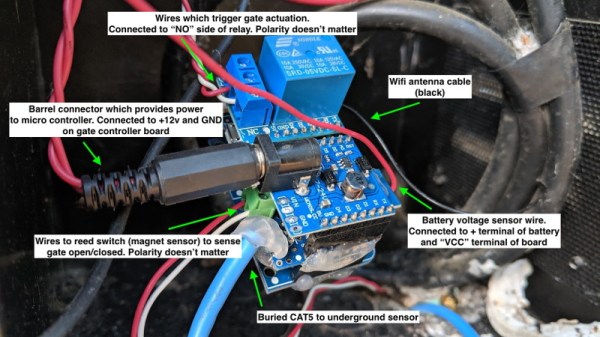
Speaking of, we love how [Andrew] deployed the QMC5883X sensor for this project. The small sensor board and a few moisture-absorbing packets were placed in a Sonoff IP66 waterproof enclosure, and buried under the rocks of the driveway. A standard CAT5 cable is used to tether it to the ESP8266, relay, and assorted other goodies that now live in the gate’s control box. In the future he says the cable will likely have to go into a conduit, but for now the system is working more or less how he expected.

If your estate isn’t quite palatial enough to have a motorized gate out front, we’ve seen plenty of projects that add some much-needed intelligence to the humble garage door opener which might be more your speed.

He Comes To Bury Sensors, Not To Praise Them

[Adosia] has some interesting videos about their IoT platform controlling self-watering plant pots. However, the video that really caught our eye was the experience in sealing up sensors that are going to be out in the field. Even if you aren’t using the exact sensors, the techniques are useful.

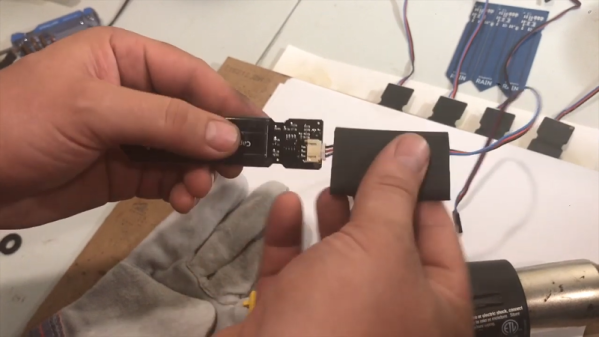
We would have expected to see potting compound, but that’s messy and hard to use so their process is simpler. First, a few coats of clear urethane sealant goes over the electronics. Next, heat shrink goes over the assembly. It isn’t ordinary heat shrink though, instead it’s the kind that has heat-activated adhesive inside.

Continue reading “He Comes To Bury Sensors, Not To Praise Them”

Exploring Options For DIY Waterproofing

TL;DR — Don’t use silicone to pot electronics.

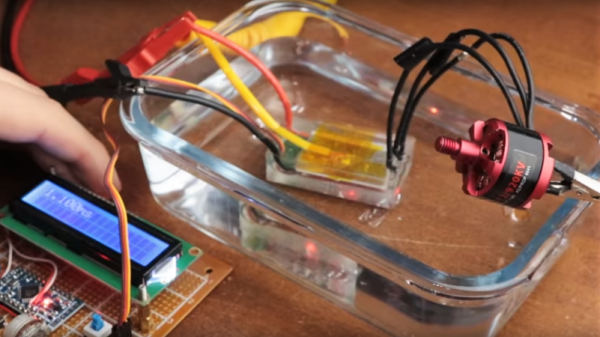
That’s the conclusion [GreatScott!] comes to after trying out several methods for waterproofing electronics. His efforts stem from a recent video in which he discovered that water and electricity sometimes actually do mix, as long as the water is distilled and the electronics in the drink are relatively simple. He found that the main problem was, unsurprisingly, electrolytic corrosion, so he set out to experiment with various waterproofing coatings. In a series of careful experiments he goes through the pros and cons of both conformal coatings and potting compounds. The conformal tests used simple clear nail polish on an ESC board; that worked pretty well, but it was a little hard to reach all the nooks and crannies. He also tried potting with a thick black silicone compound, but that ended up never really curing in the middle. A final attempt with legitimate two-part epoxy potting compound sealed up the ESC tight, although we doubt the resulting brick would perform well on a quadcopter.

If you want to explore potting a bit further, check out this introduction to the basics.

Continue reading “Exploring Options For DIY Waterproofing”

Quantifying Cloudiness With OpenCV

What Can I see From the Shard?

The Shard is the tallest building in Western Europe, and has a great view of London.  The condos in the building are very expensive, and a tourist ride to the top of the building costs £24.95.

Since the value of the view is so high, [Willem] wanted to quantify the quality of the view at any given time. His solution is the Shard Rain Cam. This device combines a Logitech webcam with a Raspberry Pi to capture a time-lapse set of images. These images are fed to a Python script using OpenCV which quantifies the cloudiness.

[Willem] also had to build a weatherproof enclosure with a transparent window for the camera and RPi. ‘Clingfilm’, which is British for saran wrap, and mineral oil is used to improve the waterproofing of an IP54 rated enclosure.

The resulting data is displayed on www.whatcaniseefromtheshard.com, which provides an indication of whether or not the view is worth £24.95. All of the Python code is available, and is a good starting point for learning about image processing with OpenCV.