One Soldering Controller To Rule Them All

If your favourite programming language is solder, they you’ve surely worked your way through a bunch of irons and controllers over your hacker existence. It’s also likely you couldn’t pick one single favourite and ended up with a bunch of them crowding your desk. It would be handy to have one controller to rule them all. That’s just what [sparkybg] set out to do by building his Really Universal Soldering Controller. His intent was to design a controller capable of driving any kind of low voltage soldering iron which used either an in-line or separate temperature sensor (either thermocouple or resistive PTC).
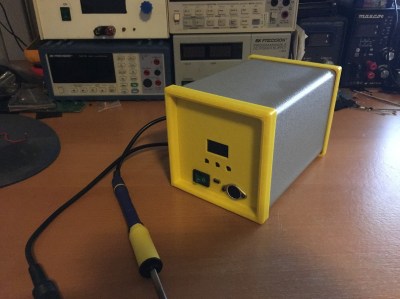
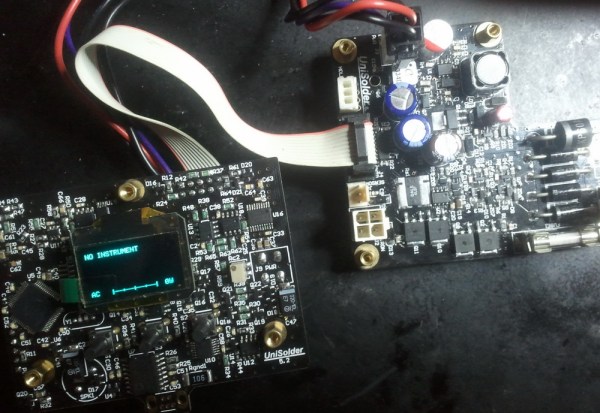
This project has really caught on. [sparkybg] announced his build about two years back and since then many others have started posting details of their own Unisolder 5.2 builds. [zed65] built the version seen to the right and [SZ64] assembled the boards shown at the top of this article.

The controller has been proven to work successfully with Iron handles from Hakko, Pace, JBC, Weller, Ersa, as well as several Chinese makes. Getting the controller to identify one of the supported 625 types of iron profiles consists of connecting two close tolerance resistors across the relevant pins on the 9-pin shell connector. This is a brilliant solution to help identify a large variety of different types of irons with simple hardware. In the unlikely situation where you have a really vague, unsupported model, then creating your own custom profile is quite straightforward. The design is highly discrete with an all analog front end and a PIC32 doing all the digital heavy lifting.

To get an idea of the complexity of his task, here is what [sparkybg] needs to do:

“I have around 200 microseconds to stop the power, wait for the TC voltage to come to its real value, connect the amplifier to this voltage, wait for the amplifier to set its output to what I want to read, take the measurement from the ADC, disconnect the amplifier from the TC, run the PID, and eventually turn the power back on. The millivolts to temperature calculation is done using polynomial with 10 members. It does this calculation using 32bit mantissa floating point numbers and completes it in around 20 microseconds. The whole wave shaping, temperature calculation, PID and so on is completed in around 50-60 microseconds. RMS current, voltage and power calculations are done in around 100 microseconds. All this is done between the half periods of the mains voltage, where the voltage is less than around 3 volts.”
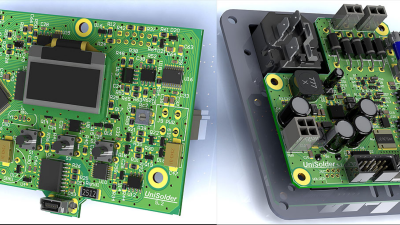
The forum is already over 800 posts deep, but you can start by grabbing the all important schematic PDF’s, Gerbers, BoM and firmware files conveniently linked in the first post to build your own Unisolder5.2 controller. This Universal Controller is a follow up to his earlier project for a Hakko T12/T15 specific controller which gave him a lot of insight in to designing the universal version.

[sparkybg] has posted several videos showing the UniSolder5.2 controlling several types of Irons. In the video after the break, he demonstrates it controlling a Weller WSP80.

Continue reading “One Soldering Controller To Rule Them All”

How To Make Your Weller Wireless

On occasion I have encountered portable soldering irons and my impressions of them have ranged from nearly usable to total rubbish. While using a popular butane powered model and pondering if it was really any better than a copper wire and a candle a thought occurred to me. A regular old Weller station runs on 24 volts AC and performs all of its temperature regulation in a magnetically activated thermostatic fashion and all of that goodness occurs within the hand piece itself. It stood to reason that it could perform just as well with a DC source.

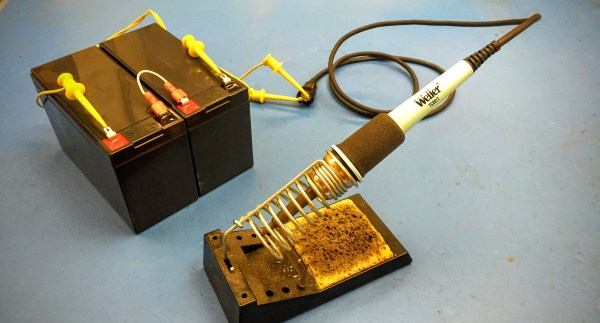
In this instance we are ignoring the negative effects of switching DC current over AC current on mechanical contacts. After all we are “In the Trenches” wherever we might have need for such a device. Using a couple of gel cell 12 volt 7 amp hour batteries freshly removed from a UPS I strung them up, and there you have it, a totally battery operated  iron with performance equal to that of the one at my bench.

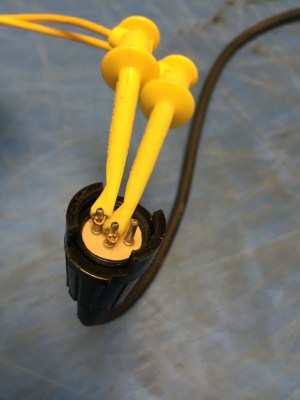
Connecting SMPS to the Weller Iron
Connecting Power to the Weller Iron

Right at 24 volts the iron Thermocycles at the same rate as it would be while using the bench top supply for it. Just sitting under no load it cycles about every ten seconds and there was no perceptible difference in heat capacity or performance. A fully charged pair of batteries will last all day. The on state current draw from a full charge (13.5 volts on each of the batteries) yielded about a 2 amp draw. As the voltage began to decrease the current off cycle would get shorter as one would expect, but no drop in heat transfer was noticed until the batteries were well depleted and that took most of a work day.

For this instance I used the hand piece from the venerable Weller WTCPT station. For ongoing use I would not recommend this due to the use of a mechanical contact within the unit and switching of DC can reduced the life of most mechanical switches. Currently I am awaiting the arrival of some cheap eBay Hakko handpieces; I am sure they are knockoffs, but fine to experiment with a simple PWM with a feedback loop controller as the basic Hakko design also utilizes a 24 volt source. An automatic shut off timer would also be handy to avoid premature battery abuse due to a forgetful operator.

IMG_2505

Long-Term Review: Weller Magnastat Soldering Iron

One of the things you find yourself doing as a young engineer is equipping yourself with the tools of your trade. These will be the foundations upon which your career is built in a way that a diploma or degree certificate will never be, for the best degree in the world is less useful if the quality of your tools renders you unable to capitalise upon it. You may be lucky enough to make some of them yourself, but others you’ll lust after as unaffordable, then eventually put the boat out a little to buy at the limit of your meager income.

Your bench may have a few of these lifetime tools. They could be something as simple as screwdrivers or you may have one of those indestructible multimeters, but in my case my lifetime tool is my soldering iron. At some time in 1992 I spent about £60($173 back then), a lot of money for a student, on a mains-powered Weller Magnastat. The World Wide Web was still fairly fresh from Tim Berners-Lee’s NeXT in those days, so this meant a trip to my university’s RS trade counter and a moment poring over a telephone-book-sized catalogue before filling in an order slip.

The Magnastat is a simple but very effective fixed-temperature-controlled iron. The tip has a magnet on its rear end which holds closed a power switch for the heating element. When the tip has heated to the Curie temperature of the magnet, it loses its magnetism and the switch opens. The temperature falls to below the Curie temperature and the magnetism returns, the switch closes, the tip warms up again, and the cycle repeats itself. The temperature of the tip is thus dictated by the magnet’s Curie temperature, and Weller provides a range of tips fitted with magnets for different temperatures.

The result is an iron with enough power to solder heat-sucking jobs that would leave lesser irons gasping for juice, while also having the delicacy to solder tiny surface-mount components without destroying them or lifting tracks. It’s not a particularly small or lightweight iron if you are used to the featherlight pencil irons from today’s soldering stations, but neither is it too large or heavy to be unwieldy. In the nearly quarter century I have owned my Magnastat it has had a hand in almost everything I have made, from hi-fi and tube amplifiers through radio transmitters, stripline filters, kits, and too many repairs to mention. It has even been pressed into service plastic-welding a damaged motorcycle fairing. It has truly been a lifetime tool.

Continue reading “Long-Term Review: Weller Magnastat Soldering Iron”

Hackaday Prize Entry: A Cheaper Soldering Solution

Everyone goes through a few phases during their exploration of electrons, and nowhere is this more apparent than the choice of soldering iron. The My First Soldering Iron™ is an iron that plugs directly into the wall, and doesn’t have temperature control. They’re cheap, and electronics isn’t for everyone, giving the quitters the opportunity to take up woodburning as a hobby. The next step up is a temperature controlled iron, probably an Aoyue or Hakko. The best soldering iron? You’re looking at a Metcal or Weller, and your wallet will become a few hundred dollars lighter.

Your My First Soldering Iron™ need not be terrible, though. For his project for The Hackaday Prize, [HP] is working on a soldering iron that is cheap, accurate, and uses the very nice Weller RT tips. No, it’s not as good as a Metcal or proper Weller, but it’s good enough for some fine soldering work and will give the Aoyues and Hakkos a run for their money.

If price is a reasonable measure of the quality of a soldering iron, the irons that use these Weller RT tips are the best irons around. The tips, though, are pretty cheap: about $30, which gets you a heater and thermistor and not much else. There have been numerous reverse engineering efforts for this iron ([1] and [2]), and even a few Arduino-based circuits that replicate the functionality of the Weller base unit.

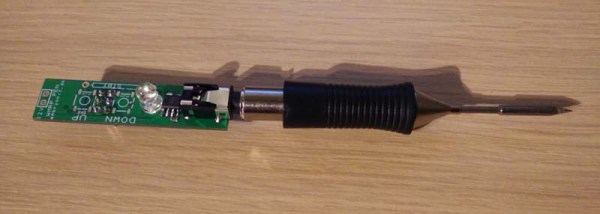
[HP] is going in a different direction to heat these iron tips. Instead of building a big box to hold the electronics, he’s building everything into the handle of the soldering iron. With brains donated from an ATMega168, a few op-amps, MOSFETS, and a single power jack, [HP] can heat up this soldering iron tip in a compact, hand-held unit.

For his Hackaday Prize entry, [HP] did a rundown of soldering pen in a video. You can check that out below.

Continue reading “Hackaday Prize Entry: A Cheaper Soldering Solution”

Soldering Iron Cauterization

Medical hacks are not for the weak of stomach, so read further at your own risk. [Todd Harrison] shows you how to remove a stubborn skin wart using a good ol’ soldering iron, and a fair endurance for pain. After all, cauterization is a well known and documented medical procedure. If you have the stomach for this, read on, or better, check out his 9 minute video after the break. If there are kids around, turn down the volume between 1:40 to 2:20.

Continue reading “Soldering Iron Cauterization”