Zero To Custom MacroPad In 37 Easy Steps

[Jeremy Weatherford] clearly has a knack for explaining projects well enough for easy reproduction but goes way further than most and has created a four-part YouTube series detailing every step from project inception to the final assembly, covering all aspects of 3D modelling and PCB design for a custom MacroPad design. Many tools are introduced along the way, all of which help reduce complexity and, by extension, the scope for errors. As every beginner hacker knows, early successes breed confidence and make for better and more ambitious projects.

Part 1 covers the project motivation and scope and introduces a keyboard layout editor tool. This tool allows one to take a layout idea and generate a JSON file, which is then used to drive keyboard tools. XYZ to produce a usable KiCAD project. The tool only generates a PCB project and an associated netlist file. No schematic is created; you don’t need one for a simple layout.
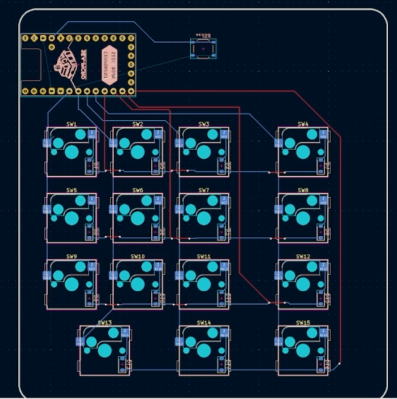
A very basic keyboard layout

Part 2 is a walkthrough of the design process in KiCAD, culminating in ordering the PCB from JLCPCB and assembling the surface-mount parts. This particular design uses a controller based on the Sea-Picro RP2040 module, but there are many options if you have other preferences. [Jeremy] shows what’s possible with the selected suppliers, but you need not follow this step precisely if you have other ideas or want to use someone local.

Part 3 covers exporting the mechanical aspects of the PCB out of KiCAD and into a 3D CAD program, specifically OnShape. [Jeremy] covers some crucial details, such as how to read the mechanical drawing of the keys to work out where to place the top plate. It’s very easy to plough straight in at this stage and make a design which cannot be assembled! The plan is to use a simple laser-cut box with a bottom plate with mounting holes lining up with those on the PCB. A Top plate is created by taking the outline of the PCB and adding a little margin. An array of rectangular cutouts are designed for the keys to protrude, lining up perfectly with where the keys would be when mounted on the PCB below.  The sides of the case are formed from laser-cut sections that lock into each other and the laser-cut base—using the laser joint feature-script addon tool from the OnShape community channel. A second feature script addon is used to auto-layout the laser-cut components onto a single sheet. A CAM application called Kiri Moto is used to export for laser cutting and is available on the OnShape store.

Continue reading “Zero To Custom MacroPad In 37 Easy Steps”

Wine Is For Windows And Darling Is For MacOS

Wine has become a highly optimized and useful piece of software for those that live in Linux, but occasionally need to walk on the Windows side. In case you’d wondered, there’s a similar tool for when you need to run a MacOS program in your Linux environment. Enter Darling, the translation layer you’ve needed all along.

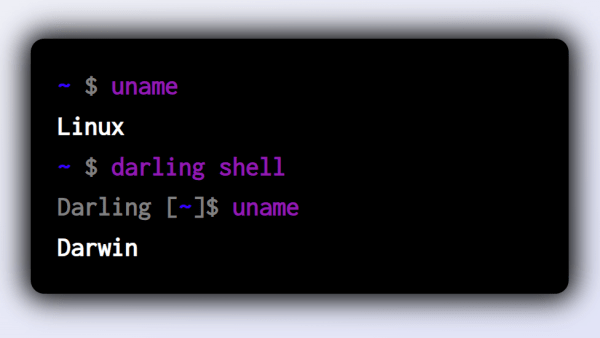
Just as Wine is not an emulator, nor is Darling. As a translation layer, it duplicates functions of the MacOS operating system that programs need to operate but within Linux. It’s fast, because it’s effectively running the MacOS software directly. Initially, Darling was mostly only capable of running MacOS apps at the console level. However, there is rudimentary support for running graphical applications that are based on the Cocoa framework.

Hilariously, if you’re into weird recursive situations, you can go deeper and run Darling within Windows Subsystem for Linux, itself running within Windows. Why? Well, you’re probably bored or just trying to for the sake of it. Regardless, we don’t judge. If you’ve got your own nifty translation or virtual machine hacks in the works, don’t hesitate to let us know!

Linux On The Windows 11 Desktop

A month ago Microsoft officially released Windows 11. One of its features is the ability to run Linux GUI applications side by side as peers to normal Windows desktop apps. [Jim Salter] of Ars Technica took a closer look and declared it works as advertised.

This is an evolution of the Windows Subsystem for Linux (WSL), which has existed for a few years but only in command-line form. Linux being Linux, it was certainly possible to put visuals onscreen, but doing so required jumping through some hoops and dealing with limitations. Now “WSLg” gives a smoother and more accessible experience.

While tremendously valuable for those who need it, WSLg is admittedly a niche feature. The circumstances will be different for different needs. Around these parts, one example is letting us work with pieces of proprietary Windows software (such as low level hardware drivers or hardware-specific dev tools) while still retaining Linux tools for the rest of our workflow.

It’s also interesting to take a peek behind the scenes for an instructive look at bridging two operating systems. A Microsoft blog post describes the general architecture, where we were happy to see open-source work leveraged. And by basing this work on Wayland, it is more forward-looking than working with just X11.

The bad news is that WSLg is limited to Windows 11, at least for now. WSL users on Windows 10 will have to continue jumping through hoops (We described one method using X11.) And opening this door unfortunately also opened the door to security issues, so there’s still work ahead for WSL.

Linux Fu: The Windows X11 Connection

The life of a Linux user can be a bit difficult. Sometimes you have to — or want to — run Windows. Why Windows? Sometimes you have a work computer or a laptop that Linux doesn’t support well. Or it might be software. Although there are plenty of programs that can edit, say, Word documents, there’s always that one document that doesn’t quite translate correctly. Things like videoconferencing software sometimes works on Linux but might have fewer features.

So what do you do? You can dual boot, of course, but that’s not very handy. You can run Windows in a virtual machine if you have enough horsepower. There’s also Wine, but that often has its own set of problems with features and stability of complex programs. However, recent versions of Windows provide the Windows Subsystem for Linux (WSL).

With WSL, you can have most of what you like about Linux inside your Windows session. You just have to know how to set it up, and I’m going to show you one way that works for me with reasonably stable versions of Windows 10. Continue reading “Linux Fu: The Windows X11 Connection”

Linux Fu: WSL Tricks Blur The Windows/Linux Line

We have to admit, we have an odd fascination with WSL — the Windows subsystem for Linux. On the one hand, it gives us more options on Windows 10 for running the software we love. On the other hand, we wonder why we aren’t just running Linux. Sometimes it is because our cool laptop doesn’t work well on Linux. Other times we are using someone else’s computer that we aren’t allowed to reload or dual boot. Still, as long as we have to use Windows, we are glad to have WSL. A recent blog post by [Hanselman] shows some very cool tricks for using WSL that make it even better.

Exploring WSL

Did you know you can use WSL to run Linux commands in a Windows command shell? For example, you have a long directory and you want to run grep:

dir c:\archive\* | wsl grep -i hackaday

Of course, from bash you could access the same directory:

ls /mnt/c/archive | grep -i hackaday

Continue reading “Linux Fu: WSL Tricks Blur The Windows/Linux Line”