Electric Bike (earplugs Not Included)

It’s obvious this bike has some extra parts. But look closely and you’ll see the chainring has no chain connecting to it. Pedaling will get you nowhere since [PJ Allen] rerouted the chain in order to drive this bicycle using an electric motor.

He’s got beefy motor which pulls 350 Watts at 24 Volts. For speed control he opted to use an Arduino, pumping out PWM signals to some MOSFETs. This results in an incredibly noisy setup, as you can hear in the bench test video after the break. But once this is installed on the bike it doesn’t quiet down at all. You can hear the thing a block away.

The original road test fried the first set of 7A MOSFETs when trying to start the motor from a standstill. It sounds like the 40A replacements he chose did the trick through. We didn’t see any information on the battery life, but if he runs out of juice on the other side of town we bet he’ll be wishing he had left the chain connected to the crankset.

Continue reading “Electric Bike (earplugs Not Included)”

A Tale Of (un)bricking A $10k Microsoft Surface Unit

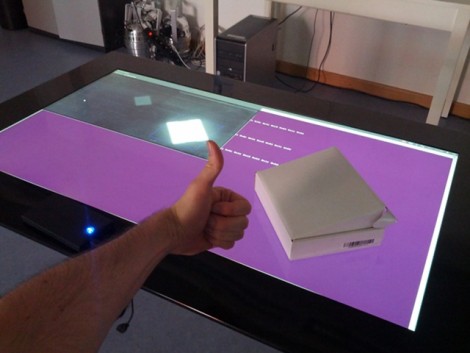
We’ve all had that sinking feeling as a piece of hardware stops responding and the nasty thought of “did I just brick this thing?” rockets to the front of our minds. [Florian Echtler] recently experienced this in extremis as his hacking on the University of Munich’s Microsoft Surface 2.0 left it unresponsive. He says this is an 8,000 Euro piece of hardware, which translates to around $10,000! Obviously it was his top priority to get the thing working again.

So what’s the first thing you should do if you get your hands on a piece of hardware like this? Try to run Linux on the thing, of course. And [Florian] managed to make that happen pretty easily (there’s a quick proof-of-concept video after the break). He took a Linux kernel drive written for a different purpose and altered it to interface with the MS Surface. After working out a few error message he packaged it and called to good. Some time later the department called him and asked if his Linux kernel work might have anything to do with the display being dead. Yikes.

He dug into the driver and found that a bug may have caused the firmware on the USB interface chip to be overwritten. The big problem being that they don’t just distribute the image for this chip. So he ended up having to dump what was left from the EEPROM and rebuild the header byte by byte.

Continue reading “A Tale Of (un)bricking A $10k Microsoft Surface Unit”

Using Your Bench Tools To Test A New Display

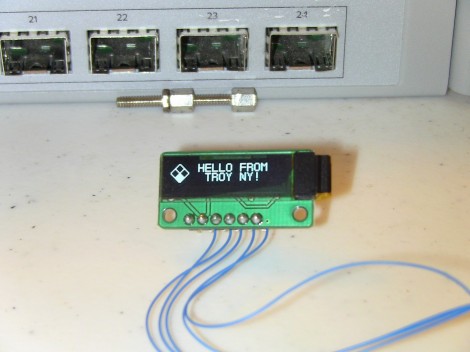
It usually takes a bit of work to gain confidence when it comes to using new parts. [Glitch] got his hands on this OLED display which is manufactured by Sabernetics and wanted to give it a whirl before building a project around it. He grabbed his Bus Pirate to help learn the ins and outs of the new part.

The 96×16 Dot-Matrix display uses the i2c protocol, keeping the pin count really low (six pins for: ground, reset, clock, data, chip select, and voltage). Since the Bus Pirate gives you command-line-like access to i2c it’s a natural choice for a first test. In fact, the tool has been our go-to device for that protocol for most projects.

The first commands sent are configuration values for the SSD1306 that drives the display. These configure contrast, voltage conversion, and other important values necessary to power on the display. It sprung to life, showing random pixels since the RAM had not yet been initialized. With that success [Glitch] moved on to the Bus Pirate’s scripting capabilities and ended up with a Python script that drives the demo seen above. Now that he knows the commands he needs, it’ll be a lot easier to write code for a microcontroller driver.

Fighting Over The Frat’s TV Remote

[Colin Bookman] lives in a Fraternity house and apparently the remote for the cable box has a way of walking off. He figured out a method to give everyone control of the TV channel in one form or another.

The cable box can be seen perched on that shelf, and [Colin’s] addition is the wooden box sitting on the floor. Inside is an Arduino board, and the cable snaking out of the enclosure is an IR LED. This give the Arduino the ability to send remote control commands to the TV box. The two arcade buttons on the front will switch the channel up or down.

But this is hardly a remote control replacement since you have to get up to use it, so he went a few steps further. The Arduino board was paired with an Ethernet shield. It serves up a web page that has a virtual keypad. So anyone with a smart phone or laptop can log into the server and start changing the channels. We’re not sure if this provides relief from a missing remote, or promotes impromptu fist fights when brothers can’t agree on what to watch. It certainly opens up the possibility of long-distance trolling as you could be sitting in class and decide to change the channel to Lifetime every ten minutes or so.

If you don’t have an Ethernet shield handy we’ve seen a similar setup that uses Bluetooth instead the network.

Self Balancer Does It Differently Than We’re Used To Seeing

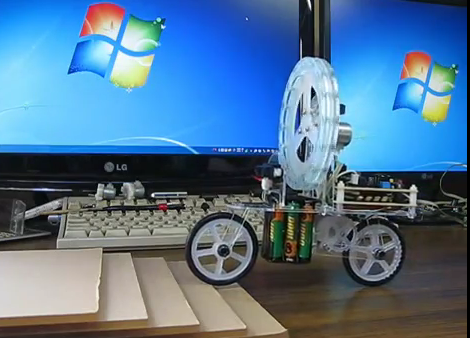
This self balancing robot still uses just two wheels, but it’s balancing very differently than we’re used to seeing. Where most of the projects use a form factor that’s similar to a Segway, this works just like a bicycle. But it doesn’t need to keep the front and rear wheels spinning to stay upright. In fact, the video after the break shows it balancing perfectly while at a complete standstill. [Aoki2001’s] creation isn’t stuck in one place. He included distance sensors on the front and back which are used to move the bike as if by repulsion.

The large wheel where the rider would be is what makes sure the vehicle doesn’t topple over. It acts as an inverted pendulum, pushing against the large wheel’s inertia by rotating the motor to which it is attached. The same concept was seen back in march on a full-sized bike. But why use two wheels when you only need one? His unicycle version can also be seen embedded after the break.

It’s worth looking at [Aoki’s] other YouTube offerings too. He’s got a small robot which balances on top of a ball. It’s the desk-sized version of this hack.

Continue reading “Self Balancer Does It Differently Than We’re Used To Seeing”

Two Retro Successes With A Commodore 64

Slowly but surely, Hackaday readers have been logging onto our retro edition with some very old hardware. Of course we’re featuring the coolest as retro successes. [azog] and [logik] entered the pantheon of brave souls who loaded up Hackaday with a Commodore 64 this week, and their builds are pretty impressive to say the least.

[logik]’s build was nearly doomed from the start: he used a C64 found dumpster diving one day with a bad power supply and half-dead VRAM chips. The first order of business was getting the C64 talking to a PC with the help of a MAX232 serial IC and loading up 64HDD to transfer a copy of Novaterm. From there it was a simple matter of connecting to an Ubuntu box and pulling up our retro site with the help of a text-only web browser.

[azog] didn’t want to abuse Lynx with his submission so he connected a Commodore 64 Ethernet card and loaded up Contiki. The banner image (above) is the ASCII Hackaday logo rendered with the C64’s PETSCII character set, something I did not foresee when I created our retro edition. Still, freakin’ awesome.

As a small aside, we’re going to open up the comments for this post to suggestions and recommendations you’ve got for the Hackaday retro edition. What would you like to see? The Retrocomputing guide is woefully inadequate, we know, but there’s a project in the works (getting WiFi over a serial port on a 68k Mac) that should be well received.

Raspberry Pi Enclosure Turns It Into A Desktop PC

While you’re still waiting for your Raspberry Pi to be delivered, why not build an enclosure for it? This build comes from the fruitful workshop of [builttospec], and gives the Raspi a very nice case well-suited for being placed on your desktop.

Like most of [builttospec]’s case builds, this enclosure was made on a laser cutter out of acrylic and features everything you would expect in a good Raspi enclosure. All the hardware ports are available, and there’s also a slot for a GPIO ribbon cable, perfect for connecting an enclosed Raspi to whatever hardware project you’re working on.

One thing we’re loving about [builttospec]’s enclosure is the tasteful use of light pipes that funnel the light from the LED indicators on the Raspi to the surface of the case. Sure, they’re just a few bits of laser-cut polycarbonate, but its little touches like this that transform a good case build into a great one.

Files available on Thingiverse.