Ambilight Clone Has Meaningful Amount Of Resolution

james-bond-ambilight-clone

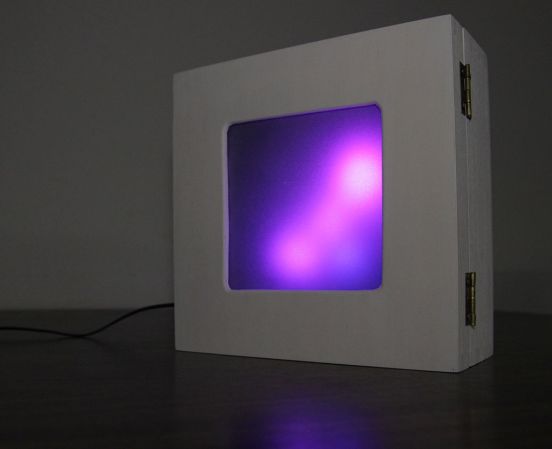
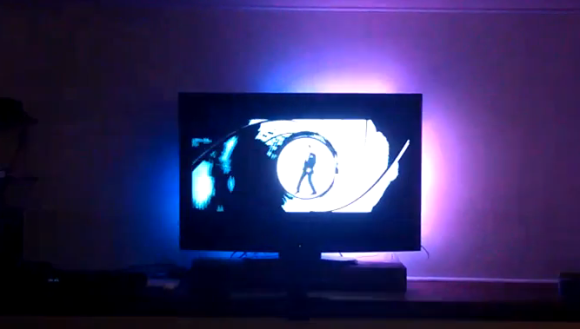
We don’t have an Ambilight clone on our own home theater, but seeing this one in action makes us wonder if we shouldn’t add it to the ever-growing list of projects we need to tackle (right below that POV display we’ve been putting off for years). [Falldeaf] built the colored light augmentation system using a set of WS2801 controlled LED pixels. There are a lot of them, and this results in the ‘meaningful resolution’ we mentioned in the title. The image on the screen is the opening to a James Bond film. You’ll remember that the camera shot down a rifle barrel follows him as he walks across the screen. There’s enough LEDs here to have to the light follow him across the screen as well. This is a nice touch that we don’t see in every Ambilight clone project.

A frame of fake-wood angle bracket holds each LED pixel in place. The entire assembly attaches to the VESA mounting holes on the back of the television. An Arduino addresses the lights while the Boblight package processes the video to acquire the lighting instructions. We think the hue is a bit off, but otherwise it’s a solid offering.

We’re still hoping the Microsoft IllumiRoom becomes a thing.

Continue reading “Ambilight Clone Has Meaningful Amount Of Resolution”

Announcing LIFE.hackaday

life-logoOver the years we’ve had a tons of tips sent in that were more along the lines of “lifehacks”. Simple little tips to make life better. While we would occasionally squeeze them into hackaday, many got left behind. Now we’ve created an entire site called LIFE.hackaday that we’re filling with all these great ideas. Finally, a place for all those docks people send us!

Occasionally, there might be something that we feel works for the “classic” hackaday and “LIFE.”, in which case, we may just mention it here. We hope that by creating another site, we can give people the “lifehacks” they want while keeping hackaday focused on hardware hacking.

We have some other tricks up our sleeve, but they aren’t quite ready to be revealed yet.

One Man’s Adventures In Custom Keyboard Development

BlueCube-flat

As a software developer, [suka] spends a lot of time every day in front of a keyboard. He had been trying out different keyboard layouts far less common than even the moderetly obscure Dvorak layout, and after some time decided a custom ergonomic keyboard was what he wanted. His progress of designing his own custom ergonomic keyboard is a fascinating read, made even cooler by the fact these are real, professional-quality keyboards with mechanical switches and custom enclosures.

After starting off with a few USB numpads, [suka] dove in to the world of Cherry switches by crafting his own wing-style keyboard. [suka] works for one of the larger manufacturers of laser-sintering machines, so he was able to create the enclosures for his keybaord – as well as the key caps – fairly easily. The technology behind laser sintering allowed [suka] to create some strange bowl and trough-shaped keyboards before settling on his daily driver, seen above.

The Blue Cube, as [suka] calls it, includes an integrated stand, an integrated IBM trackpoint mouse, and is powered by a Teensy microcontroller. [suka]’s keyboards might not be heafty enough for melee combat like the venerable IBM Model M, but it’s exactly what [suka] wants, and that’s just fine by us.

Wireless Rover With Android Control

android-rover

[Radu] spend the first portion of this year building and improving upon this wireless rover project. It’s actually the second generation of an autonomous follower project he started a few years back. If you browse through his old postings you’ll find that this version is leaps and bounds ahead of the last.

He purchased the chassis which also came with the gear-head motors and tires. Why reinvent the wheel (har har) when you’ve got bigger things on your plate? To make enough room inside for his own goodies he started out by ditching the control board which came with the Lynxmotion chassis in favor of an AVR ATmega128 development board. He also chose to use his own motor controller board. Next he added a metal bracket system to hold the battery pack. Things start to get pretty crowded in there when he installed his own Bluetooth and GPS modules. Rounding out his hardware additions were a set of five ultrasonic sensors (the grey tubes on top), a character display, as well as head and tail lights. The demo video shows off the control app he uses. We like that tic-tac-toe design for motion control, and that he added in buttons to control the lights.

Continue reading “Wireless Rover With Android Control”

Arduino Particle Light Box Generates Animations From Sound

arduino-particle-display

Simple tools used well can produce fantastic results. The hardware which [Gilad] uses in this project is the definition of common. We’d bet you have most if not all of them on hand right now. But the end product is a light box which seems to dance and twirl with every sound in the room. You should go watch the demo video before reading the bill of materials so that the simplicity doesn’t spoil it for you.

A wooden craft box serves as the enclosure. Inside you’ll find an Arduino board, microphone, and an 8×8 RGB module. The front cover of the project box diffuses the light using a sheet of tracing paper on a frame of foam board. It’s the code that brings everything together. He wrote his own particle system library to generate interesting animations.

If you don’t have a project box on hand this might work with an extra-deep picture frame.
Continue reading “Arduino Particle Light Box Generates Animations From Sound”

An Overkill Network Adapter For Retrocomputers

amiga

If you want to get an old Apple, Commodore 64, Amiga, or any other retrocomputer up on the Internet, this is for you. [Stian] had an Amiga 500 lying around and wanted to put it on a network. The A500 isn’t expandable, so he needed to look at some sort of adapter to put it on a network. The solution came to him in the form of a Raspberry Pi, a null modem cable, and a few bits of software.

To connect his Amiga to his network, [Stian] made a small serial converter board for his Raspi that breaks out the Tx and Rx pins on the Pi to a 9-pin serial port. With the physical connection to the Pi made, the only thing left to do was to get some software for the Amiga, namely AmiTCP and PPP. It’s not exactly a fast network connection, but this build allows [Stian] to connect to WiFi networks with ancient hardware.

One interesting aspect of [Stian]’s build is the fact it’s completely transferable to other retrocomputers – everything from old S-100 bus computers to classic macs, apples, and pretty much anything else with a serial port that supports PPP. Even with the expense of a Raspberry Pi, it’s much cheaper than absurdly expensive second-hand SCSI to Ethernet controllers and other tomfoolery.

Shocking Your Brain And Making Yourself Smarter

tds

Transcranial Direct Current Stimulation – or tDCS – is the technique of applying electrodes to the skull and running a small but perceptible current through them. It’s not much current – usually on the order of 1 or 2 mA, but the effect of either increasing or decreasing neural activity has led to some interesting studies. [Theo] over on Instructables wrote a tutorial for making his own tDCS suppy that will supply 2 mA to electrodes placed on the skull for everyone to experiment with.

The basic idea behind tDCS is to put the positive electrode over the part of the brain to be excited or the negative electrode over the part of the brain to be inhibited. This is a well-studied technique that can be used to improve mathematical ability. It’s not electroshock therapy (although that is a valid treatment for depression and schizophrenia) in that a seizure is induced; tDCS just applies a small current to specific areas of the brain to excite or inhibit function.

[Theo]’s device is a simple circuit made of a transistor, resistors, and a few diodes to provide about 2 mA to a pair of electrical contacts. With this circuit and a few gel electrode pads for your head, you too can experiment with direct current stimulation of your brain.

Of course we need to warn you about putting electricity into your head. In any event, here’s a quadcopter / stun gun mashup we made. Don’t do that, either. You might get a takedown request.