New Part Day: LED Driver Is FPGA Dev Board In Disguise

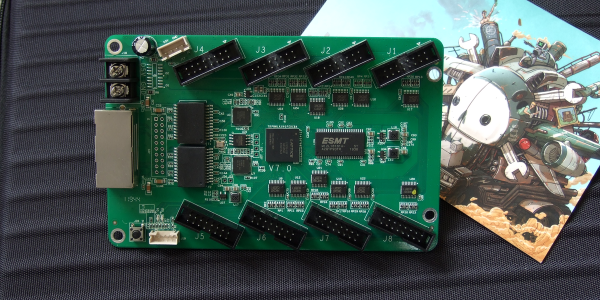
Our new part of the day is the ColorLight 5A-75B, a board that’s meant to drive eight of those ubiquitous high-density color LED panels over gigabit Ethernet. If you were building a commercial LED wall, you’d screw a bunch of the LED panels together, daisy-chain a bunch of these boards to drive them, supply power, and you’d be done. Because of that high-volume application, these boards are inexpensive, around $15 each, and available as quickly as you can get stuff shipped from China.
But we’re not here to talk commercial applications. Managing fast Ethernet and pushing so many pixels in real time is a task best handled by an FPGA, and [Tom Verbeure] noticed that these things were essentially amazing FPGA development boards and started hacking on them. [q3k] put it up on GitHub, and you can follow along with the chubby75 reverse engineering project to dig into their secrets.

While the first generations of these boards used the old-standby Spartan 6, things got interesting for fans of open FPGA tools when newer versions were found using the Lattice ECP5-25 chips, the little brother of the stonking big chip [Sprite_TM] used on the 2019 Hackaday Supercon badge. If you want to grab one you’re looking for ColorLight boards marked with revision 6 or 7 as of this writing.

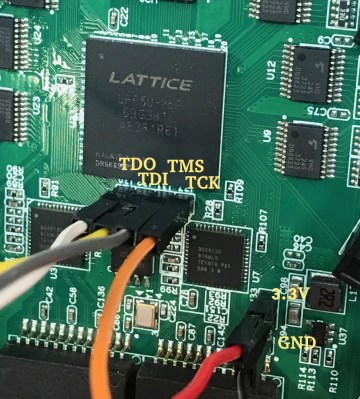
What does this mean? For the price of a gourmet hamburger, you get an FPGA that’s big enough to run a RISC-V softcore, two 166 MHz, 2 MB SDRAMS, flash for the FPGA bitstream, a bazillion digital outputs on 5 V level shifters, and two gigabit Ethernet ports. The JTAG port is broken out in 0.1″ headers, and it works with OpenOCD, which is ridiculously convenient. How’s that for a well-stocked budget FPGA dev board that’s served by a completely open toolchain? Continue reading “New Part Day: LED Driver Is FPGA Dev Board In Disguise”

Learning ARM Without Dev Board

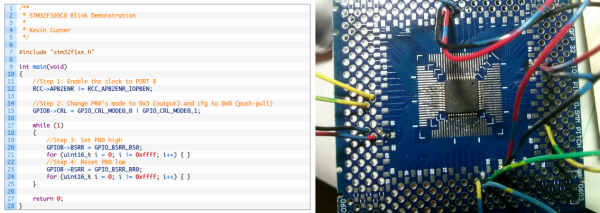
There’s a tremendous amount of value in using pre-built, known-good development environments. It saves you hours of potential headaches when things aren’t working. Is the bug in the hardware or the software? If you bought a dev kit, you can be pretty sure it’s your software. But sometimes using a dev kit also feels like there’s a black box in the system. [Kevin] wanted to peer inside the black box, so he ordered a tray of cheap STM32F103 chips on eBay, and did the rest himself.

“The rest” isn’t all that much, but figuring that out is half the battle. [Kevin] soldered the TQFP chip onto a breakout board, added some decoupling capacitors, and connected four pins up to a dirt-cheap ST-Link programmer clone. The rest of the article describes the toolchain he used to compile for and program the chip. The end result is, natch, a blinking LED.

If you’re a bit experienced with microcontrollers and want to dive head-first into an ARM chip, [Kevin]’s writeup is just the ticket. In a single (long) blog post, he walks you through all the steps. If this is your first rodeo, you might be tempted to cheese out and buy a pre-built board on eBay (search “STM32F103” and you’ll find many options to choose from) and we don’t think that’s a bad idea either. Still, there’s just something to be said for the confidence that you’ll have once you’ve built the whole system from scratch.

Pandora Dev Unit Unboxed

pandora

[skeezix] has got his hands on one of the first Pandora dev kits to make it out the door and took a few photos. This is 1 of the 20 MK2 devboards that were produced. Although, not final it certainly is close to the version they’ll be shipping. Pandora is a Linux based portable game console. The main chip in the clamshell device is a TI OMAP3530. It has OpenGL hardware acceleration and an 800×480 touchscreen. A QWERTY keyboard is included along with analog and digital game controls. WiFi, bluetooth, USB host, TV-out, and dual SDHC card slots round out the package. The team has already presold 4000 devices.

Weasure, A Scale That Weighs And Measures

weasure

[John Peterson] created this postal scale device for a Renesas design contest. The Weasure not only calculates the package’s total weight but the dimensions as well. He built it using a SKP16C62P evaluation board that had an LCD, pushbuttons, and indicator LEDs. The original DigiWeigh parcel scale was modified to provide PWM output and tare control. He embedded photoresistors every inch along each axis. They were angle slightly upward and the surroundings were painted black to minimize reflection. The Weasure outputs everything via a serial connection so it can be used with shipping software to generate postage.