The Ultimate Guide To Artisan USB Cables

If you’ve gone through the trouble of building your own customized mechanical keyboard, the last thing you want to do is plug it into your computer with some plebeian USB cable from the local electronics shop. Your productivity, nay livelihood, depends on all those 1s and 0s being reproduced with the crisp fidelity that’s only possible with a high-end USB cable. Anything less would be irresponsible.

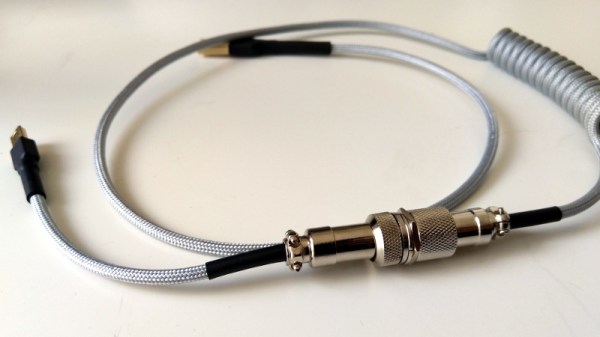
Or at least, that’s what the advertising on the back of the package would say if we tried to sell the custom USB cables built by [Josef Adamčík]. But alas, he’s decided to give away all the details for free so that anyone can build their own delightfully overengineered USB cables. Do you need a paracord USB cable with GX12 aviation connectors in the middle? Of course not. But you still want one, don’t you?

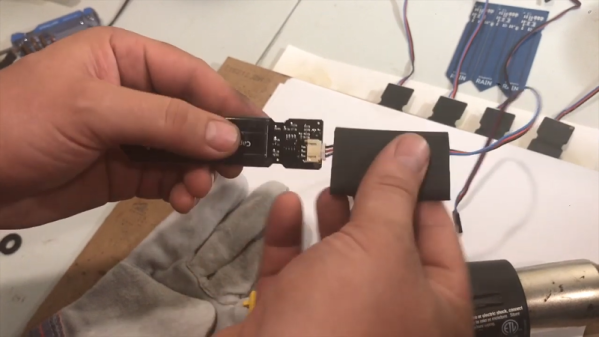
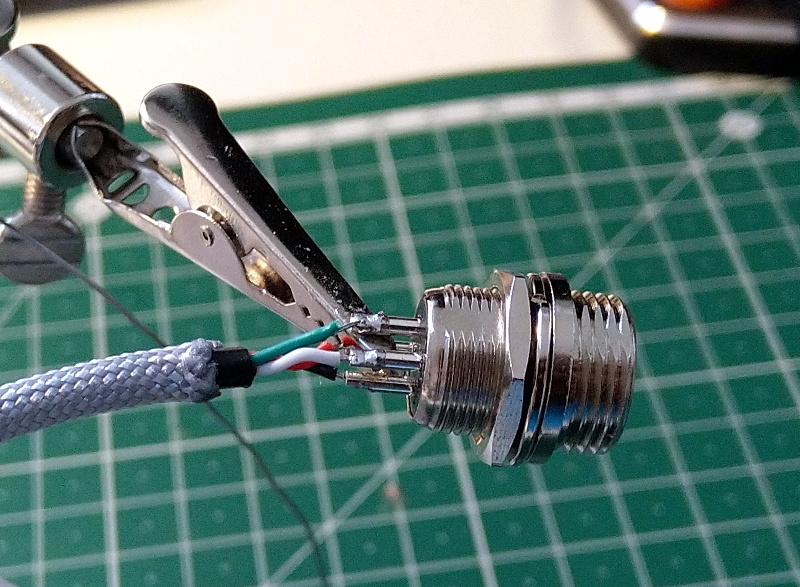
As [Josef] admits in his blog post, there’s nothing particularly special about what he’s doing here. If you can splice wires together, you can build your own bespoke USB cables. But what attracted us to his write-up was the phenomenal detail he goes into. Every step is clearly explained and includes a nice, well-lit, photo to illustrate what he’s doing. Honestly, when the documentation for soldering some USB connectors onto a wire looks this good, there’s no excuse why more substantial projects get little more than a few blurry shots.

Of course, even for those of us who are no stranger to the ways of the soldering iron, there’s likely a few ideas you can pull from this project. We particularly liked his tip for taping the USB connector to the workbench while soldering it rather than trying to get it to stay in a vise, and his method for adding a coil the cable with a wooden jig and a heat gun is definitely something to file away for future use.

Then again in an era where even the lowly-USB cable can potentially be a security threat, or simply not live up to published specifications, rolling your own might not be such a bad idea.

Print Your Own Heat Shrink Labels For Factory-Chic Wire Naming

Heat shrink tubing is great for insulating wires. Labeling wires in a bundle is always useful, too. [Voltlog] has a cheap Brother label printer and discovered he can buy knock off label cassettes for a lot less from China. However, he also found something else: cassettes with heat shrink tubing in them made for the same kind of printer. Could he use the heat shrink cassettes to make neat wire labels? In his first video the answer was sort of, but not really. However, he later had a breakthrough and made a second video explaining how to do it. You can see both videos, below.

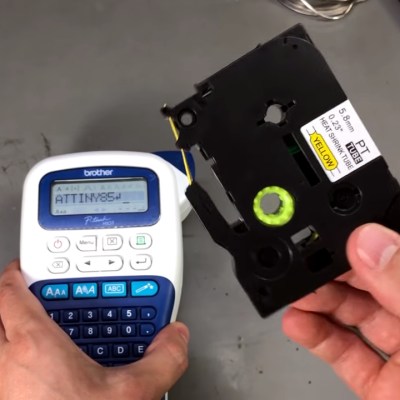
At first, the printer didn’t even want to recognize the cassette. It seems like Brother doesn’t want you using exotic tapes with cheap printers. No worry, this isn’t sophisticated DRM, just a sense hole that you need to cover with tape. This discovery was made using the extremely scientific trick of covering all the holes that were not on a regular cassette.

Continue reading “Print Your Own Heat Shrink Labels For Factory-Chic Wire Naming”

He Comes To Bury Sensors, Not To Praise Them

[Adosia] has some interesting videos about their IoT platform controlling self-watering plant pots. However, the video that really caught our eye was the experience in sealing up sensors that are going to be out in the field. Even if you aren’t using the exact sensors, the techniques are useful.

We would have expected to see potting compound, but that’s messy and hard to use so their process is simpler. First, a few coats of clear urethane sealant goes over the electronics. Next, heat shrink goes over the assembly. It isn’t ordinary heat shrink though, instead it’s the kind that has heat-activated adhesive inside.

Continue reading “He Comes To Bury Sensors, Not To Praise Them”

The Incredible Shrinking Coin Cell Battery Pack

How’s it going with your project for the coin cell challenge? You can only use a single one, but Hackaday alum [Jeremy S Cook] has a great way to package coin cells into a sleek little power packs whether you need one, two, or even four.

[Jeremy] is building a wireless Wii nunchuk, so he needs a small battery that won’t short out or get punctured in the confines of the controller body. A single coin cell holder is already a bit bulky, and he needs to use two in series. He thought, why not try shrink wrapping them together? The only downside here is that the biggest tube that came with your average heat shrink multi-pack is probably a bit too tight to fit around them, so you might have to buy more (aw, shucks!).

After trying a few ways to make a good connection between the leads and the bare coin cell faces, [Jeremy] settled on generously stripping stranded wire and wrapping the long strands around the end to form a conductive swab. This slides in nicely between the coin cell and preshrunk tube. A little more heat will make a good connection, and some hot glue secures the wires. Click past the break for his build video and the other connection methods he tried. Have you come up with something better? Let us know in the comments.

Stray a bit further from the bench and you might come up with something like this googly eye battery holder we saw a few months ago.

Continue reading “The Incredible Shrinking Coin Cell Battery Pack”

Heat Shrink Tubing And The Chemistry Behind Its Magic

There’s a lot to be said in favor of getting kids involved in hacking as young as possible, but there is one thing about working in electronics that I believe is best left as a mystery until at least the teenage years — hide the shrink tube. Teach them to breadboard, have them learn resistor color codes and Ohm’s Law, and even teach them to solder. But don’t you dare let them near the heat shrink tubing. Foolishly reveal that magical stuff to kids, and if there’s a heat source anywhere nearby I guarantee they’ll blow through your entire stock of the expensive stuff the minute you turn your back. Ask me how I know.

I jest, but only partly. There really is something fun about applying heat shrink tubing, and there’s no denying how satisfying a termination can be when it’s hermetically sealed inside that little piece of inexplicably expensive tubing. But how does the stuff even work in the first place?

Continue reading “Heat Shrink Tubing And The Chemistry Behind Its Magic”

Soda Bottles Used As Heat-Shrink For Wood Joinery

Nobody is likely to confuse it with the beautiful joinery that makes fine furniture so desirable. But as a practical technique, using plastic bottles as heat-shrink tubing for composite joints is pretty nifty, and the pieces produced are not without their charm.

Undertaken as an art project to show people what can be done with recycled materials, [Micaella Pedros]’ project isn’t a hack per se. She started with bottles collected around London and experimented with ways to use them in furniture. The plastic used in soda and water bottles, polyethylene terephthalate (PET), turns out to shrink quite a bit when heated. Rings cut from bottles act much like large pieces of heat-shrink tubing, but with more longitudinal shrinkage and much more rigidity. That makes for a great structural component, and [Micaella] explored several ways to leverage the material to join wood. Notches and ridges help the plastic grip smoother pieces of wood, and of course the correct size bottle needs to be used. But the joints are remarkably strong – witness the classic leaning-back-in-a-chair test in the video below.

Its aesthetic value aside, this is a good technique to file away for more practical applications. Of course, there are plenty of ways to recycle soda bottles, including turning them into cordage or even using them as light-pipes to brighten a dark room.

Continue reading “Soda Bottles Used As Heat-Shrink For Wood Joinery”