Sound-sensitive Android Figure Speaks In Morse Code

mechanized_android_figure

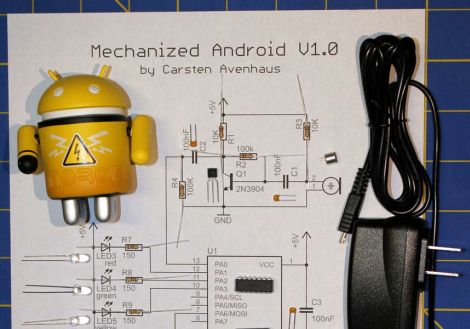
Instructables user [tanbata] recently got his hands on a Google Anroid figurine and thought that while it looked great, it served no real purpose. He decided to change that, and converted this once-useless hunk of plastic into a miniature robot that moves and responds to sound.

He pried of the head of the figure and got busy fitting a servo into the Android’s body to enable head movement. An ATiny was added to control the figure, along with a microphone to enable it to respond to sound. A piezo was inserted to relay Morse code messages, and a handful of LEDs were installed in the body cavity and eyes of the figure just for kicks.

When the bot is powered on and senses a loud enough sound, the eyes light, the head spins from side to side, and the robot spouts off a random message in Morse code as you can see in the video below.

It’s not the most advanced project out there, but with a few tweaks, it could make for a great USB-powered email or IM notification system for your PC. Better yet, it’s a great project to do with a child who is interested in electronics, since they get to make a cool robot toy they can keep.

Continue reading “Sound-sensitive Android Figure Speaks In Morse Code”

Give KiCAD A Try. Here’s How

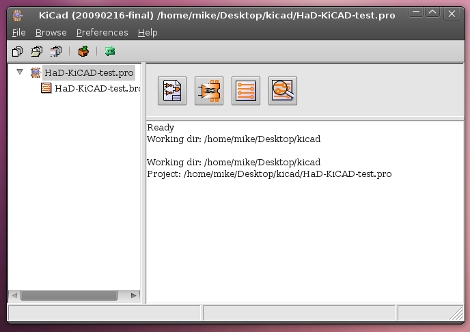
Up to this point we’ve used Eagle CAD as our exclusive PCB design and schematic layout tool. But [Brian] has inspired us to try something different thanks to his KiCAD tutorial.

KiCAD is an open source printed circuit board design tool. Since we like to rock the Linux here at Hackaday getting our hands on this was as easy as:

 sudo apt-get install kicad

The version in the Ubuntu 10.04 repositories is a bit older but seemed to work just fine. [Brian] jumps right in with one of our most dreaded tasks on Eagle, designing your own parts. He knows of a nice online tool for automatic KiCAD part generation and walks through the process of building a voltage regulator and importing it for use in your own personal library From there it’s off to layout a power supply schematic for a breadboard PSU. The lesson continues with board layer, as well as the process used for exporting data for PCB fab house. We think this tutorial works well if you’re already familiar with PCB layout using a different software package but it moves a bit fast if this is your first time.

KiCAD seems like a nice tool and we’ve heard from many advocates in the comments over the years. Look for our next PCB design to be on KiCAD as we just need to use it for a while before passing judgement.

DIY Hot Air Reflow Station

Add to you bench tools by building this hot air reflow station. [Tobi] had a difficult time and was getting frustrated with the reflow oven he was building. He ditched that and set out on this project after drawing inspiration from a hot-air pencil project.

Pictured above is the business end of the device. On the right you can see the tubing that delivers air from an aquarium pump. At the center of the probe is a glass tube containing the heating element. A thermocouple is monitored by an ATmega644 to maintain the desired air temperature which can be dialed in on the base unit. This thing can put out air that’s around 500 degrees Celsius which has cause some problems with melted tubing and singed spacers. The final design includes a cover that fits over everything and hopefully provides adequate thermal isolation for the user’s hand.

[Tobi’s] base unit include faceplates for the front and back milled out of copper clad board. This really makes the tool look a bit more trustworthy. He assures us that there is a demonstration video on the way.

GSM Tracking Without GPS

If you use the Google Maps Mobile function then the big G knows where you are even if your phone doesn’t have a GPS module in it. So the next time you want geolocation capabilities in a project consider building around GSM functionality which can also be used for Internet connectivity. That’s exactly what this module does and luckily the hard work has already been done for you.

The method really hinges on a couple of things. First of all, any GSM capable device knows the information about the cell it is currently communicating with. Secondly, Google knows the coordinates of radio towers used in the cellular mobile network. A little bit of data sniffing on Google Maps Mobile app communications confirms how and when cell information is transferred between the device and the maps server. Take a look at this series of write-ups which go into detail about hardware, software, cell network location data, and communication protocols which Google hasn’t publicly documented. Sure you’re not going to have the accuracy we’ve come to enjoy with GPS, but this can get you pretty close.

[Thanks Boris]

Keyboard Converter 2 Pack

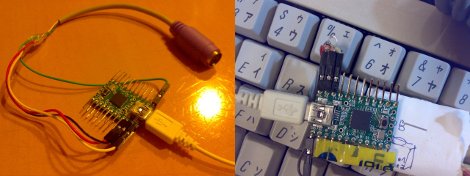
[REVENGE] pointed out a couple cool little project posts from the geekhack fourms converting vintage keyboards to USB with a Teensy. They both have VUSB support, so any avr micro controller that meets VUSB’s requirements in theory could be used.

First up is a PS/2 to USB keyboard converter, and while yes this has been done many times before, this one sports some extra features not often seen, like mouse keys, system and multimedia keys, and keymap customization. Instructions are also provided for use with a non USB enabled avr controller (like a mega 168, or 328) through the VUSB library (though with not all features available).

Next is pretty much the same thing, but it converts Apple Desktop Bus to USB, which is not exactly rare, but its lack of a clock serial signal, somewhat variable timing, and the fact that you wont find a bucket of Apple keyboards for a buck at the thrift store makes any ADB converter worth mentioning.

VUSB instructions seem to be the same for either, source is available and there are some cool pictures and info listed, and besides what is more fun than being able to plug your Model M into your netbook, or your Apple Extended Keyboard into your mac mini.

Interactive Punching Bag

If you need a sparring partner, and do not want to be dependent on finding a willing partner at any random time, then maybe this Interactive Punching Bag will be some interest to you. [Lior], having studied Karate for a while now, originally envisioned a robotic arm that would punch at you using the Texas Instruments Chronos or the Microsoft Kinect as input, though after some initial messing around he decided to scrap that plan and thought “how hard is it to place some LEDs inside a punching bag and sense some force using an Arduino?”

After about a day and a half, using parts from around the shop and a trip to radio shack, he was able to complete his goal, and left some room to expand in the future. The bag currently features 3 resistive sensors, 3 LED’s, and is using a laptop for feedback, though an LCD is on its way. The expansion room allows for 3 more sensors and LED’s for twice the action and more complex games.

Speaking of games, the punching bag currently has 3 different exercise programs, as many punches as you can in 30 seconds mode, a programmable sequence mode, and random which occasionally punches back. Join us after the break for a quick video, and check out the page for details and a pile of pictures.

Continue reading “Interactive Punching Bag”

Hackerspace Camera Rig Auto-alerts The Internets When Projects Are Finished

alerttheinternets_cam

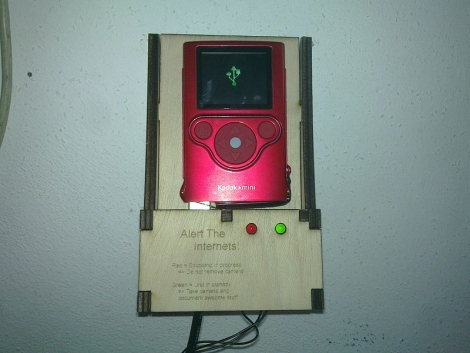
It seems like every hackerspace has their own means of communicating status messages to their members. The hackers at [MetaLab] in Vienna have put together a rather novel way (Google translation) of letting the world know they have completed a project. While some hackerspaces simply notify their members that they are open for business, this hack takes things a step further.

When a project is deemed complete, the camera is removed from the dock, and any number of videos can be recorded. When the camera is returned to the dock, a canned introduction video is added to the recordings, then everything is automatically uploaded to YouTube. No extra time is required, no video editing needs to be done – their work hits the Internet immediately once they have finished filming it.

It’s a great idea, and something that every hackerspace should have. It would be even better to see these things installed in public areas to allow for immediate reporting of events as they occur.

If you are so inclined, be sure to check out [MetaLab’s] YouTube channel.

[via Make]