Installing Linux On A 386 Laptop

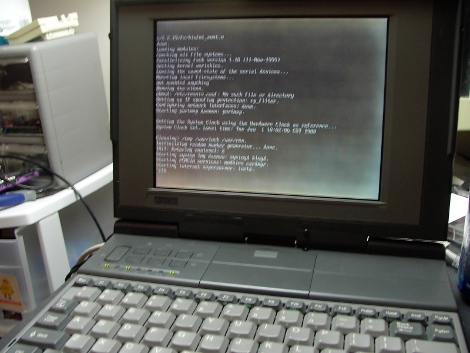
The “cheap” and “easy” way in about an hour! A question that pop’s up from time to time is “I somehow ended up with an archaic old laptop / computer, can it run Linux?” Well of course it can, but that totally depends! On what? Well machine CPU, CPU speed, hard disk space, RAM and most importantly what you are expecting it to do.

Okay, why a Intel 386? Well number one I own a 386, but more importantly its the absolute bottom Intel CPU you can run Linux on. While it wont be able to do much, it will give you a basic system to kick around and “get to know” the insides of Linux without a million things installed and the worry of breaking it.

Unfortunately a 386 requires some special moves as the actual chip was dropped from almost all distributions long ago. All of the modern distributions I have looked at require at least a 486 CPU. This tutorial will be strictly for installing a basic bare bones Linux on a 386. Have a 486? Pentium? Faster? Never fear I will be covering that in a part II later this week.

Linux on a 386 in about an hour? Madness you might think, it probably takes Linux longer to boot on a 386 (and in some cases you are correct)! Want to know the trick? Simple, cheat!

Join me after the break for the parts and steps needed to get you started.

Continue reading “Installing Linux On A 386 Laptop”

Beer Chilling In The Name Of Science

We’ve all been there. The day is done and it’s time for a cold one but you neglected to put more beer in the fridge after imbibing the last bottle the night before. You could chuck it in the freezer and revisit your attempt at refreshment in an hour. But if you need a malty beverage right now there’s no faster route than a beer chiller.

This particular beer chilling device is [Michael’s] entry in DEFCON 19’s Beer Chilling Contraption Contest. It can take a pint of beer from 90 degrees down to 45 degrees in just four seconds. Of course there’s a fair amount of setup time before you’re ready to use it. The device is a pipe within a pipe. The inner pipe houses the beer and the pipe surrounding it provides a containment area for a chilling liquid. [Michael] chose to use liquid carbon dioxide as a coolant because of it’s boiling temperature when under pressure. That is to say, the hottest part of the CO2 liquid is around the walls of the center pipe. By carefully dialing in the pressure of that outer chamber, the CO2 will boil away into gas as it cools the beer, making room for more liquid CO2 to contact the pipe and continue the cooling process.

Stream Music Anywhere In Your House With These WiFi Speakers

wifi_speakers

[Rui] needed an easy way to play music in several different zones from one centralized location, but he didn’t want to run any new wiring in the process.

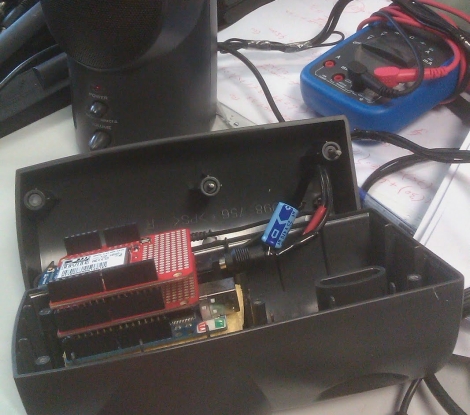
He figured that the best way to do this would be to stream his music directly to his speakers over Ethernet. Earlier this year, he put together a handful of Ethernet-connected speaker nodes using a few Arduinos equipped with both Ethernet and MP3 shields. To interface with these speaker nodes, he wrote an application utilizing VLC’s network streaming engine. This software monitors his network for newly attached speakers, adding them to his inventory automatically. He can choose to play music on any set of speakers using a multicast audio stream.

The setup was pretty slick, but what about locations that didn’t already have Ethernet drops? He thought of that too, revising his design just recently. The newest set of speakers he constructed ditches the Ethernet board for a Wifly shield, all of which he crammed inside the speaker cabinets. Now, he has the ability to stream music anywhere he’d like, no matter what sort of infrastructure is in place.

If you have a need to do this in your home, [Rui] has made his software available for free on his site, so be sure to grab a copy.

Continue reading to see a short video of the speakers in action.

Continue reading “Stream Music Anywhere In Your House With These WiFi Speakers”

Two-axis Panning Time Lapse Rig Built From Lego

2_axis_lego_timelapse_dolly

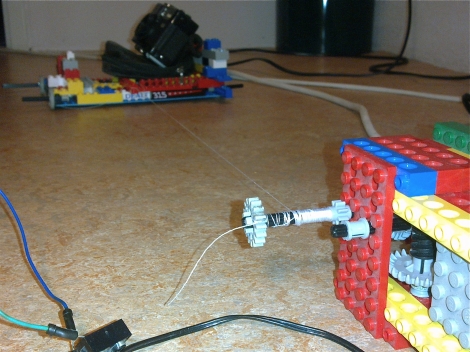
[Jochem] wrote in to share a neat time lapse camera dolly he constructed out of Lego bricks. He is a big fan of the two-axis panning time lapse effect where the camera moves while recording images. He figured it would be easy enough to construct one of his own, so he dug out his pail of Lego and got to work.

The rig consists of a stationary motor platform which pulls a movable sled using a simple gear and string. The motor platform is controlled by an Arduino, which pulls the movable sled along every so often, snapping pictures along the way. [Jochem’s] Nikon D80 supports shutter release via IR, so he programmed the Arduino to send a quick IR pulse each time it has finished moving the dolly.

The rig looks like it works pretty well as you can see by the video below, but [Jochem] says that it still needs a bit of work. We just can’t wait to see what other time lapse movies he puts together once he finds an “interesting” time lapse subject.

Continue reading “Two-axis Panning Time Lapse Rig Built From Lego”

Overhaul An Old Mechanical Keyboard

Deskthority forum user [lowpoly] recently posted a writeup on his complete overhaul of an Apple M0110  mechanical keyboard.  Any one familiar with the satisfying clack of a good mechanical key under their fingers can appreciate the effort put into this project.

[lowpoly] removed the keyboard’s PCB, rewired the key matrix adding diodes, built in a teensy USB board, broke apart the mechanical switches and fit replacement springs and finally applied a generous portion of retr0bright to all of the aging plastic. Since the teensy has no mounting holes [lowpoly] had to create a mounting assembly out of some spare plastic. A usb mini cable is even fitted into the original RJ-11 connector.  To compensate for the lack of PCB the key assembly was fitting with some rubber washers. To top off the whole thing some nice new rubber feet were taped to the underside of the M0110.

[lowpoly] reports that with the foam, new springs, and lack of PCB the keyboard is much quieter and easy to use.  The end result is a slick retro looking modern keyboard. If you’ll excuse us we have to go rooting through some old storage bins to find our own ancient keyboards.

We have seen our share of vintage keyboard hacks which can be useful, impressive and sometimes just odd. This build keeps it down to a nice simple, functional, useful retrofit. Nice work!

Wii Homebrew Hack – No Game Discs Required

Jailbreaking hacks have come and gone for the Wii, ever changing as Nintendo tweaks their software to prevent homebrew from running. Piracy concerns aside, there is a legitimate Wii homebrew scene, and a  new, easy to use tool has been released for those looking to give it a try.

Many of the previous jailbreaks relied on bugs found within official Wii games, but there’s a new kid on the block that requires nothing more than an Internet connection and an SD card. LetterBomb is the latest jailbreaking tool, which was created by an individual named [blasty]. It seems incredibly easy to use, requiring little more than entering your Wii’s MAC address into a web form. The site generates a customized jailbreak file, which your run on your Wii via the SD card – that’s all there is to it!

If I had a Wii, I would be hesitant to enter any sort of globally-unique number that could identify my console into a random web site, but perhaps I am being overly paranoid. Either way, it would be great to see an open-source version of this tool released so that jailbreaks could be done offline, without any risk of having your MAC address recorded.

[Thanks, blurry]

Arduino Link Libraries

Arduino is great, but it sometimes gets in the way due to its entry level style of doing things. One limitation is making your own library that also includes other libraries.[Scott] has sent in a great tutorial that deals with just that issue.

He covers how to make your own custom libraries while building off of preexisting ones. That’s something Arduino’s automatic magic wont touch.He covers getting your library to compile while including aanother library, linking versus compiling, and getting it all linked up.

Add in clear examples, lots of explanation and a hand full of good practices for C with libraries (like Forward Class Declaration vs Includes, and Using Brackets vs Quotation Marks for Includes), and this is one tutorial that any aspiring AVR or Arduino developer should check out.