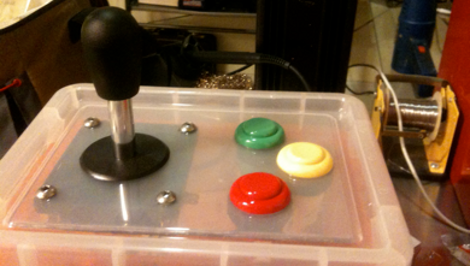
Arcade Controller In A Box

[Alex] wanted to play video games with an arcade stick and buttons, but got sticker shock after seeing the price of commercially available controllers that connect to a computer via USB. He set out to build his own and ended up with the controller-in-a box that you see above.

At first he tried using an mbed microcontroller board but was unhappy with the latency built into the system that detected a button press, sent it via USB as a keyboard press, which was then interpreted as input by the game. He ditched the microcontroller completely and picked up a couple of 4021 parallel-to-serial shift registers. He had previously used this method to make his own SNES controller. The SNES uses two 8-bit shift registers to generate an 16-bit serial packet to send to the console. [Alex’s] reused that system, adding an SNES controller plug to his arcade box, and using the SNES to USB converter he already had to connect to the computer. Now he’s got a portable controller for the cost of three buttons, the stick, and two IC’s.

He explains the project himself in the clip after the break.

Continue reading “Arcade Controller In A Box”

Anthropomorphizing An Ikea Lamp (like Pixar But In Real Life)

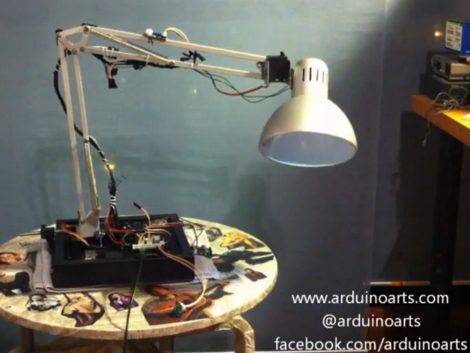
ArduinoArts is animating an inexpensive Ikea lamp as a contest entry. Seeed Studio’s Toy Hacking Contest calls for the competitors to work their magic using the Grove Toy Kit, which is an extensible sensor connection system for the Arduino. Most of the items in the kit were used to add interactivity to the lamp. Check out the video after the break to see the motion that two servos provide. The lamp can move its shade back and forth as if shaking its head, and the whole arm assembly can rotate in relation to the base. The sensors detect when you’ve repositioned the lamp head and the device will yell at you if it doesn’t appreciate its new pose. It also reacts to noise and motion, switching on the LED that replaces the original bulb in both cases, and asking: “Are you Sarah Connor”  when motion is detected. These basic modifications really make for some fun animatronic behavior.

Continue reading “Anthropomorphizing An Ikea Lamp (like Pixar But In Real Life)”

super_sized_3d_printer

Huge DIY 3D Printer Predictably Prints Huge 3D Items

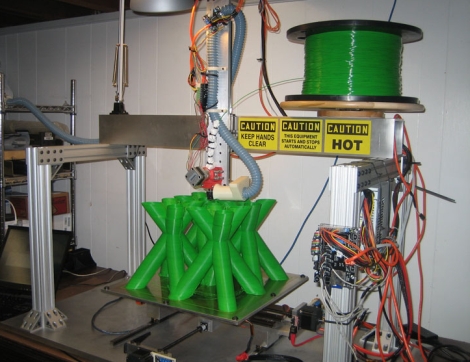
Well, if we ever need something huge built on a RepRap, now we know who to call. [Jim] over at Grass Roots Engineering wrote in to share a large 3D print he just finished, which was extruded by an equally impressive home-built 3D printer.

The part he built consists of a bunch of hollow green tubing in a criss-cross pattern and was printed in just under 2 days. He never mentions what the part is going to be used for, but at 376 x 376 x 250mm (14.8 x 14.8 x 9.84in), he estimates that this is the biggest single part printed with a DIY 3D printer.

The printer itself is based on the RepRap, but is obviously far larger. It prints using ABS plastic utilizing a maximum build area of 403 x 403 x 322.7mm (15.86 x 15.86 x 12.7in). Built over the course of 3 years, it was fully operational in 2010 but has undergone several improvements as [Jim’s] needs have changed.

It’s a fantastic looking machine, and it seems to print quite nicely. We would sure love to have one of these in our workshop.

Continue reading to see [Jim’s] 3D printer in action.

Continue reading “Huge DIY 3D Printer Predictably Prints Huge 3D Items”

DIY Portable Charger/generator

portable_charger_generator

[Glenn] from The Back Shed has built a lot of windmills and stationary generators over the years, but recently decided to try his hand at building something a bit more portable.

The charger is based of a relatively simple design, employing a 5.2 HP Kubota 4 stroke motor and a 12v car alternator to provide power. While you might be inclined to point out that his charger does exactly what an alternator and motor are built to do, there was a bit more to it than simply slapping the two parts together.

A laser cut adapter plate holds the motor and alternator together, but once [Glenn] wrapped things up and gave the motor a spin, he realized that he was driving the alternator backwards. This would eventually cause the alternator to overheat since the cooling fan was running the wrong way. He removed the fan and reversed the fins with a hammer so that he could get the cooling he needed without having to reinstall the alternator in the opposite orientation.

The whole kit was mounted on a hand truck for portability, and [Glenn] says that the charger/generator only needs to run about 5 minutes before a dead battery has enough juice to crank an engine.

[via HackedGadgets]

TSC230 Color Light-to-Frequency Module

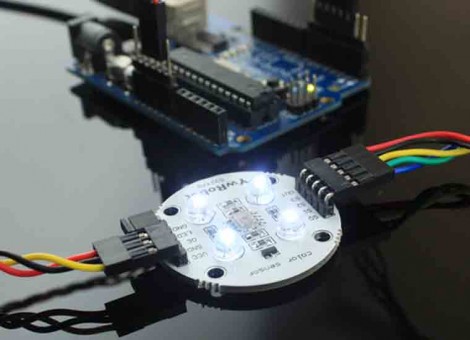
ElecFreaks is selling a new color sensing module based on the TSC230 sensor. They’ve posted a demonstration using an Arduino that shows off what this sensor is capable of. The module includes four white LEDs which give a baseline of light to help normalize readings when reflected off of differently colored surfaces. The white balance of the sensor needs to calibrated in software in order to ensure accurate readings, but once that’s done you’ll be cable to pull RGB values off of whatever you put in front of the sensor.

What a nice addition to sorting machines like this LEGO sorter. Of course you can do something like this yourself using an RGB LED as a detector, but the TSC230 is extremely sensitive and should be quite reliable in comparison. They’re selling the module for $15, a price point that’s hard to beat if you need precise color detection in your next project. A colored token reader for your MAME cabinet perhaps?

Turning Pixels Into LEGO Pieces

Looking to spice up his living room with some modular plastic pieces, [Quentin] came up with a way to take digital pixels and convert them to LEGO building plans. The end result is a coffee table top that uses a font complete with anti-aliasing.

The first thing he did was figure out physical dimension and color palettes available from the popular building blocks. His search yielded all of the answers after he spent some time on Brickipedia. Armed with that knowledge he started bargain hunting, settling on a brick size that yielded adequate resolution without breaking the bank (he budgeted 87 Euros or about $125 for materials). From there he used Photoshop, along with a custom color palate that matches the LEGO colors, to generate the design. Image in hand, he finished the planning stage by writing a program to count the pixels, convert them into LEGO bricks, and spit out an order list and build instructions. He’s saving others the trouble of doing the same by releasing his source code.

Of course the project wouldn’t be nearly as fun if he hadn’t made a fast-time build video. We’ve embedded it after the break.

Continue reading “Turning Pixels Into LEGO Pieces”

Spectrum Analyzer Users Custom Characters On An HD44780 Display

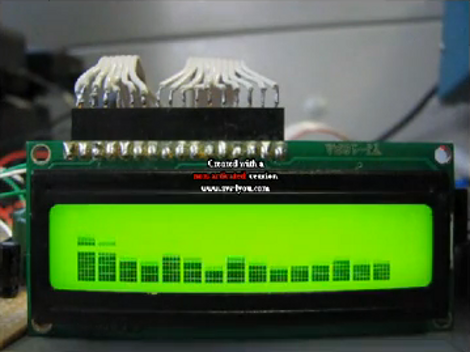
[Camilo] built a spectrum analyzer to use with his audio system (translate). The hardware is quite simple, using an op-amp, microcontroller and LCD display. He chose an LMV324M low-voltage op-amp which connects to the incoming audio signal and feeds its output to the microcontroller’s ADC. In this case, he chose a Freescale microcontroller from the HCS08 family which is running at 20 MHz. This gives the project enough speed to properly analyze the incoming audio. He mentions that he’s following the guidelines set forth in the Nyquist-Shannon sampling theorem and using the Fast Fourier Transform when processing the samples.

This isn’t the first time we’ve seen a character LCD used as a display for a frequency analyzer. This other ATmega8-based rendition supported several different screen layouts. These displays have enough RAM to store eight custom characters. Each character is 5×8 pixels, lending eight levels to each character for a total of 16 for each column seen above. We love the simplicity of the hardware in the project but we wouldn’t mind seeing an additional potentiometer to fine-tune how the data is displayed on the screen to take advantage of its full range. See the project in action in the clip after the break.

Continue reading “Spectrum Analyzer Users Custom Characters On An HD44780 Display”