Gameboy ROM Backups Using An Arduino

gameboy_cart_reader

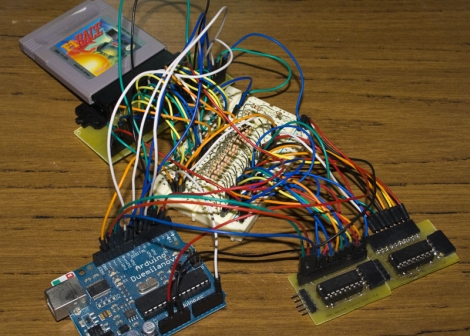
[Alex] collects retro gaming consoles. One day while playing a SNES title, his save games got wiped when he powered off the system. It turned out that the battery inside the game cartridge got disconnected somehow, and it got him thinking. He decided he wanted to find a way to back up his save games from the cartridges for safe keeping.

While cart readers exist, he says that they are hard to find nowadays, so he decided to construct his own using an Arduino. SNES cartridges are relatively complex, so he opted to focus on Gameboy cartridges for the time being. Before attempting to back up save games, he first chose to learn how to communicate with the cartridges in general, by reading the ROM.

He breaks the cartridges down in detail, discussing how they are constructed as well as how they can be addressed and read using the Arduino. He was ultimately successful, and offers up code as well as schematics on his site for any of you interested in doing the same. We imagine that save game reading (and perhaps editing) will likely happen in the near future.

Check out the video below to see his cart reader in action.

Continue reading “Gameboy ROM Backups Using An Arduino”

RFID-based HTPC Controller Gets A Wireless Refresh

RFiDJ_Refresh

[roteno] recently wrote in to let us know that he has completed work on the RFiDJ Refresh, a follow up to his 2009 project, the RFiDJ.

The concept is pretty simple – he has a set of RFID enabled tiles, which contain references to particular online streaming audio stations. He uses these tiles to tune into audio feeds on his HTPC by placing them on a block containing an RFID reader.

His previous implementation had the RFID reader tethered to his HTPC, which didn’t make it all that convenient to use. The newer version utilizes a 433 MHz transmitter/receiver pair in order to communicate with the PC, so it can be used anywhere through out his house. The reader and transmitter were placed in a shadow box picture frame, along with a rechargeable Li-poly battery that powers the whole setup. He also mentions that he has added a tactile interface that allows him to initiate mobile phone calls from the RFiDJ as well.

It’s a nice update to an already great project. We imagine it’s a bit more fun for [roteno] and his guests to tap a coaster on the transmitter box than fumble with a remote to change radio stations on the HTPC, but that’s just us.

Check out the videos below to see his new setup in action.

Continue reading “RFID-based HTPC Controller Gets A Wireless Refresh”

Smartphone Operated Garage Door Is Beginning Of Arduino Home Automation System

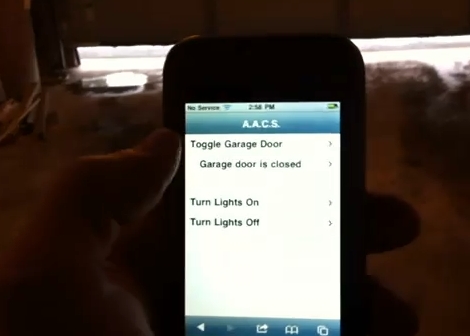
[Tim] is showing off the first step in his home automation projected with this smart-phone garage door interface. In the video after the break you can see him open and close the garage door with the touch of a button. There’s also an open or closed indicator that he can check when away from home.

An Arduino takes care of a portion of the control for this project. Like the post we saw yesterday, he’s using PHP code on a webpage to manipulate the Arduino via its USB connection in order to open and close the door using a relay. The door status is also monitored by the Arduino and sent to the PC over the serial connection. The computer uses a Python script to monitor the incoming data and update a text file which is merged into the web interface using a PHP include. Future plans for the system include adding control for heating and air conditioning systems.

If you’re looking to do something like this but wirelessly here’s some advice on ditching the Arduino and using an XBee module instead.

Continue reading “Smartphone Operated Garage Door Is Beginning Of Arduino Home Automation System”

EeePC Touchscreen Retrofit

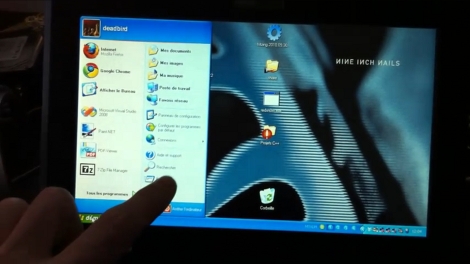
Adding touch screen capabilities to your computer is really not very expensive, but it’s a huge amount of work to get everything looking the way that it should. [Deadbird] wrote up a step-by-step guide that will help you install touch screen hardware and get your netbook put back together just like new.

The hardware comes in two parts. There’s the transparent film that covers the screen and the driver board that reads the inputs. The film itself has an adhesive layer on the back that sticks to the LCD panel. But to install it you first must remove the panel from the bezel. You’re also going to need a place to house the driver board. [Deadbird] somehow found enough room inside the case for the controller, but he had to remove the keyboard and motherboard to set it in place. This translates to a complete disassembly of your eeePC. But if you’re used to touch-sensitive devices, and have ever found yourself touching an LCD monitor and wondering why the computer is not following the link, this may be worth it to you. You can see the final product in a clip after the break.

Continue reading “EeePC Touchscreen Retrofit”

Test Your Etching Chops With PCB Map Making

pcb_map

[Martin] had been using standard perf board for most of his electronics projects, but as he was starting to utilize more surface mount ICs, he quickly realized that it was time to start making his own PCBs. Having never etched any PCBs using the toner transfer method, he figured it was as good a time as any to give it a try.

Rather than make a board for a particular project, he decided to try his hand at etching a very detailed map of the Paris Metro as a test pattern instead. He grabbed a large image of the subway map, then printed it out on the back of a supermarket flyer. He attached it to his PCB and ran it through a lamination machine to transfer the toner. He figured that the laminator would be easier than an iron to use, and was right for the most part. The only issue he had was that the laminator did not generate enough heat, so he supplemented the its heat output with a hair dryer.

When everything was said and done, he had a pretty good looking PCB on his hands. Most of the Metro tracks and text came out just fine, though he admits there is a bit of room for improvement. It looks nice when mounted in a frame, though we would love to see a functional circuit made out of a PCB map like that. Heck, we’d even settle for a double-sided PCB with a street-level map on one side an the Metro on the other!

Building A Home Automation Mesh Network

[Ian Harris] designed a bunch of home automation for his parents using X10 hardware. He was a bit disappointed by the failure rate of the modules and the overall performance of the system so he set out to replace it with his own hardware. Lucky for use he’s documented the journey in a four-part series about mesh networks.

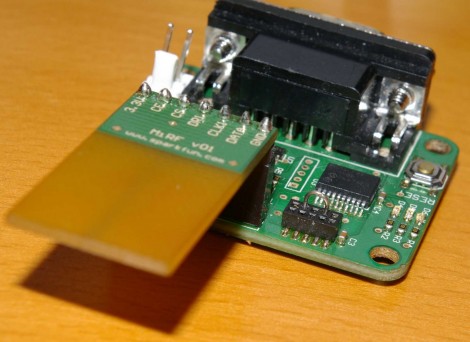
The hardware seen above is his test rig. He’s using a couple of Sparkfun breakout boards to develop for nrf2401a RF transceiver chips. These could be used as slave modules, with a central command device, but due to the home’s architecture wireless signals don’t propagate well from one end of the house to the other. The solution is to build a mesh network that will allow each module to act as a network node, receiving and passing on messages until they arrive at the target device. He’s trying to do this with cheap hardware, selecting the PIC 16F88 which boasts 7 KB or program memory and 368 bytes of ram. In the end it doesn’t take much code to get this running, it’s the concepts that take some time and research before you’ll be comfortable working with them.

[Thanks Oakkar7]

Hardware-based Security Keypad Keeps It Simple

hardware_keypad_lock

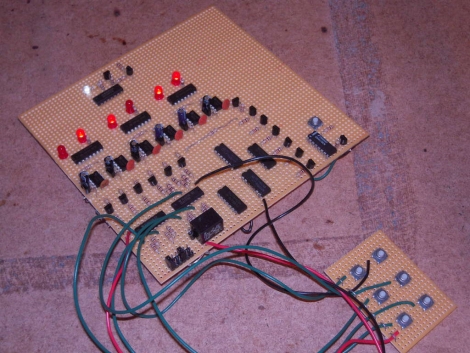
Instructables user [trumpkin] recently built an all-hardware based keypad lock for a contest he was entering, and we thought it was pretty neat. The lock uses mostly NAND gates and 555 timers to get the job done, which makes it a nice alternative to similar software-based projects we have seen in the past.

The lock has 6 keys on the keypad, which is connected to the main logic board. The keycode is set using a series of headers at the bottom of the board, and you get 10 chances to enter the proper code before the board locks up completely. If this occurs, a “manual” reset via a button built into the main board is required before any more attempts can be made.

As you can see in the video below, the lock works quite well, but suffers from one shortcoming. Any permutation of the key code can be used to deactivate the lock, which is something [trumpkin] says he would like to improve in the future.

If you are looking for some more security-related reading, be sure to check out these other hacks we have featured in the past.

Continue reading “Hardware-based Security Keypad Keeps It Simple”