Cyclone PCB Factory: 3d Printable Circuit Board Mill

printable-cyclone-pcb-factory

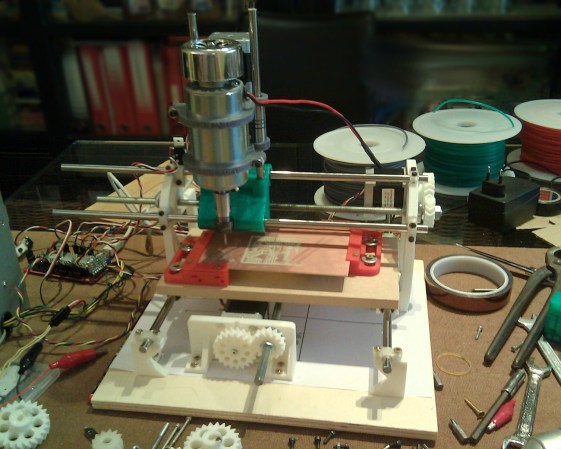
If you can 3D print most of the parts for another 3D printer, why not also for a PCB mill? That’s the question answered by the Cyclone PCB Factory. It will help you kiss those toner transfer or photo resist days goodbye.

Homemade circuit boards tend to be rather small, which really helps keep the cost and scope of this project down. Most of the mounting parts, as well as the gears, are 3D printed. Of course there’s the usual machine tool items which you pretty much have to purchase: the ball screws, precision rod, stepper motors, and a motor to spin the routing tool.

Check out the video below to see where the project is right now. One of the crucial aspects of PCB milling is to have a level build table. The cutter head tends to be ‘V’ shaped so cutting just a bit too deep can blow out the traces you’re trying to isolate. The demo shows that this can automatically calibrate the software to account for any variances in the height of the copper clad.

We remember seeing a snap-together PCB mill. But we’re pretty sure that that one used parts milled from HDPE rather than 3D printed components.

Continue reading “Cyclone PCB Factory: 3d Printable Circuit Board Mill”

Home Audio And Lighting Taken Over By The Raspberry Pi

687474703a2f2f7777772e6265616b61626c652e636f6d2f696d672f707265766965772d312e706e67

We’re beginning to see a lot of momentum building for using Raspberry Pi boards as the basis of your home automation. This latest offering from [Iain Hamilton] combines lighting and audio control through a single web interface. His frontend is run as a web page from the RPi board. It even includes separate layouts for mobile devices and computers in order to maximize use of the screen real estate.

Three buttons at the top of the interface allow him to configure the settings and switch between lighting and audio controls. This audio control screen issues commands to the Spotify client running on the Pi. The Mopidy package takes care of almost everything (as we’ve seen with other single-board computer Spotify servers). Future iterations will offer other streaming services like SoundCloud. [Iain’s] home lighting system uses X10 modules for control. He’s using a USB dongle to facilitate control of that system.

Continue reading “Home Audio And Lighting Taken Over By The Raspberry Pi”

Using 30 Year Old Microcontrollers

chips

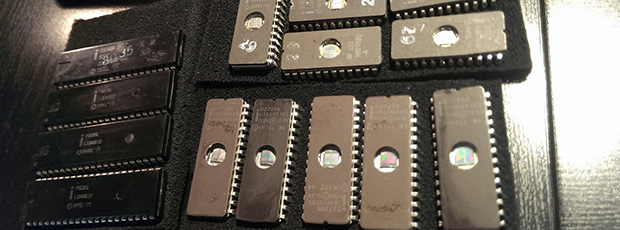
Like a lot of electronic tinkerers, [Andrew] has a lot of ancient components floating around his parts bin. His latest rediscovery in his cornucopia of components are a few Intel MCS-48 microcontrollers, dating back to 1977. Along with a few old EPROMs, [Andrew] decided it was worth getting these chips running again, if only for a historical curiosity.

[Andrew]’s had a few Intel 8035L microcontrollers on his hands, but this particular model of MCS-48 micros lacks any way to store code. This is where the EPROMs come in. With a modern EPROM programmer, [Andrew] was able to write some code to the extremely common for their vintage 27256 EPROMs. Erasing them, though, does require a UV lamp.

With the ROM programmed and the chips connected, [Andrew] was able to make a simple blinking LED circuit. Sure, it’s the simplest thing you can do with a microcontroller, but [Andrew]’s off to a great start in his explorations of older hardware.

Predator Suit For Monsterpalooza Includes Over-engineered Shoulder Cannon

off-the-hook-predator-suit

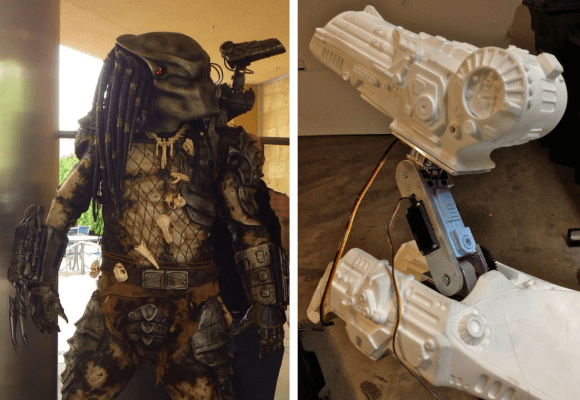
This Predator suit was premiered at this year’s Monsterpalooza conference. It’s nothing short of incredible. But the shoulder cannon is really what caught our attention. The thing is fully motorized and includes sound and light firing effects.

We saw a glimpse of what [Jerome Kelty] is capable of about two years ago. He was showing off an Arduino-based animatronics platform he put together for a Predator shoulder cannon that tracked based on where the predator’s helmet was pointing. But other than a video demonstration there wasn’t much info on the that actual build. This post makes up for that and then some.

A replica of this quality is rarely the work of just one person. A team of fans joined in to make it happen. After getting the molded parts for the backpack and canon from another team member [Jerome] set out to fit the support structure, motors, and control electronics into the space available. That meant a ton of milling, cutting, and shaping parts like the support arm seen above which integrates a servo motor into its rectangular outline. All of the controls fit in the backpack, with cables running to the helmet, as well as the cannon.

Continue reading “Predator Suit For Monsterpalooza Includes Over-engineered Shoulder Cannon”

A Keygen For The Rigol 2000-series Scopes

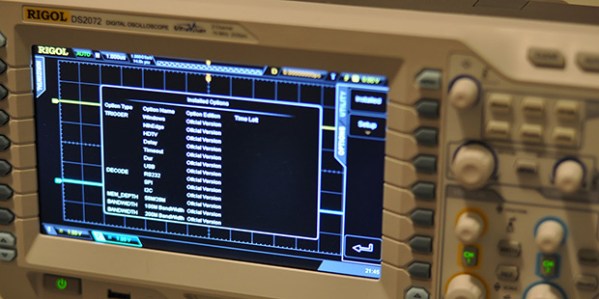
A few weeks ago it came to our attention that Rigol’s DS2000-series oscilloscopes were easily unlocked with a few USB commands. We had expected a small microcontroller device would be developed to send these bits to a scope automatically, and we never imagined the final version of this tool hack would be so elegant. Now it’s possible to unlock a DS2072 o’scope using just a serial number and a great encryption hack.

The engineers over a Rigol (bless their hearts) used the same hardware for the $800, 70MHz DS2072 and the $1600, 200MHz DS2202. The only difference between the two are a few bits in the scope’s memory that are easily unlocked if you have the right key. A few folks over on the EEV Blog forum figured out the private key for the scope’s encryption and the user [cybernet] wrote a keygen.

The upgrade process is extremely simple: get the serial number of your DS2072, put it in the keygen, and enter the resulting key into the scope. Reboot, and you have a $1600 scope you bought for half price.

Easy LCD Control For Arduino Mega

arduino-mega-easy-lcd-adapter

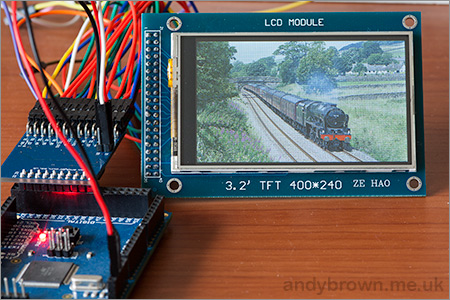
[Andy Brown] wrote in to show off the TFT LCD adapter he’s been working on for connecting inexpensive displays to an Arduino Mega.

These TFT LCD screens can be picked up on eBay for a few dollars. But they’re more suited for 16-bit microcontrollers which operate at 3.3V levels. His adapter board, which plugs directly into the Mega’s dual-row pin header, makes it easier to control these with an 8-bit chip that is running at 5V.

There’s a couple of things that make this happen. First off, he’s included level converter chips to managed the 3.3V/5V issues. Second, he uses latch chips to translate eight pins on the Arduino Mega to sixteen pins on the display. Those chips have a latch pin which holds the output values in memory while the input pins are changed. He manages to drive the latch on just one of the chips using the chip select (CS) line called for by the LCD protocol. This means you don’t lose any extra pins.

Another way to uses the displays with Arduino is to use a smart controller for TFT screens.

Continue reading “Easy LCD Control For Arduino Mega”