Cooling Fan Speed Controllers Do It By Generating Heat

cooling-fan-speed-controllers

We’ve never torn one apart ourselves, but it boggles the mind just a little bit to learn that these cooling fan controllers generate heat to do their job. We’d bet we’ll get shouted down in the comments, but doesn’t this seem counter-productive?

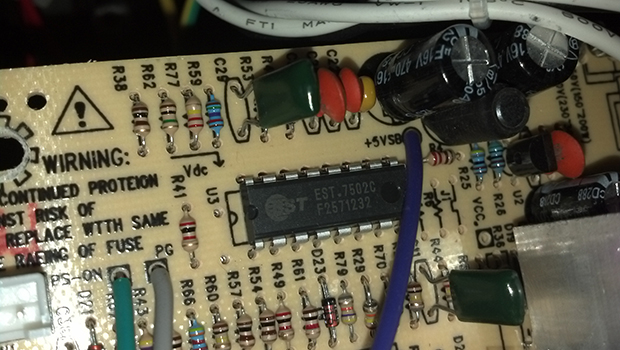
At any rate, we enjoyed reading two posts on this topic. [Göran’s] first adventure with the hardware started when he was trying to design his own speed controller. He saw a reference design in the LM7805 linear regulator datasheet which allows the adjustment of the output by changing the ground reference. When fed with 12V this ends up putting off some heat but it is a simple and reliable solution. He was a bit surprised to crack open a Zalman module and find the exact same circuit inside.

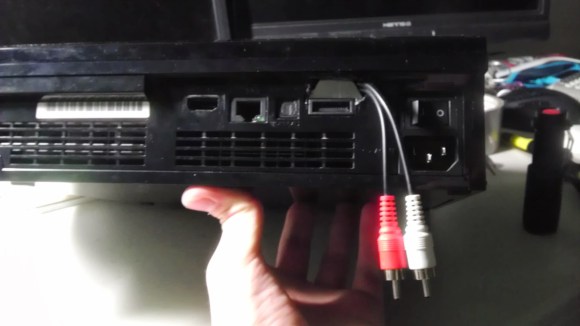
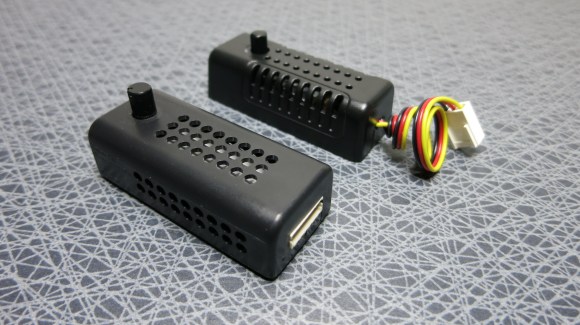
The controller in the background is an eBay purchase. He cracked that one open as well (that’s the link at the top) and found a circuit with a linear regulator in it, but this time it was a TL431 adjustable regulator. So here are our questions: Which one of these two is better and why. And can you do it relatively inexpensively without generating as much heat?

[Ken Shirriff] Completely Reverse Engineers The 1974 Sinclair Scientific Calculator

Wow. Seriously… Wow! The work [Ken Shirriff] put into reverse engineering the Sinclair Scientific is just amazing. He covers so much; the market forces that led [Clive Sinclair] to design the device with an under-powered chip, how the code actually fits in a minuscule amount of space, and an in-depth look at the silicon itself. Stop what you’re doing and read it right now!

This calculator shoe-horned itself into the market when the HP-35 was king at a sticker price of $395 (around $1800 in today’s money). The goal was to undercut them, a target that was reached with a $120 launch price. They managed this by using a Texas Instruments chip that had only three storage registers, paired with a ROM totaling 320 words. The calculator worked, but it was slow and inaccurate. Want to see how inaccurate? Included in the write-up is a browser-based simulator built from the reverse engineering work. Give it a try and let us know what you think.

Now [Ken] didn’t do all this work on his own. Scroll down to the bottom of his post to see the long list of contributors that helped bring this fantastic piece together. Thanks everyone!

[Thanks Ed]


PlayStation 3 Analog Audio Out Hack

ps3-analog-audio-out

Here’s the scenario: You’ve got the rage to play som CoD (we’re more GTA fans but whatever) but the monitor you’re going to play on has no speakers. You can get a crystal clear image using HDMI, but getting sound is a different matter. What’s the fix? Crack open your PS3 and solder on some audio connectors.

[Paul] knew there is a special cable that breaks out analog audio. Like original Xbox hacking of ages past, there is now plenty of information online about the internals of these machines. He grabbed a copy of the A/V pinout and found the analog audio pins. After soldering on this pair of RCA cables he cut savaged a hole in the case and put the console back together. The machine he’s working with is a salvaged unit with no Blu-ray drive — he links to his past posts on the repair process. You may be thinking what good is it without an optical drive? Remember, this is the beginning of the Internet age… everything is downloadable.


Disabling Under/over Voltage Protection On ATX Power Supplies

voltage

[C] just recently put together a RepRap. Not wanting to spend the money on a dedicated power supply, he looked around for a cheaper solution and found one in an off-the-shelf ATX computer power supply. These ATX supplies are actually a little finicky when not used in a computer, as [C] found, with voltage drops on the +12 line even when a load is connected to the supply. Undeterred, [C] eventually solved this problem by cutting some traces and grounding a few pins on the protection circuit.

The ATX supply [C] used could supply 25 amps on the 12 volt rail, more than enough for a simple RepRap. There was only one problem: the supply would randomly shut itself off, ruining the print. After a little googling, [C] found some people powering 12 volt amplifiers that were running into the same problem. Their solution was to ground a few pins on the protection circuit. Their supply wasn’t quite like [C]’s so he had to do a little experimentations.

It took a few iterations to get right, but [C] managed to figure out exactly which pins on the “power supply supervisor” IC must be grounded to disable the undervoltage protection. With these pins grounded, the protection circuit of the supply is completely disabled, giving him and uninterrupted 25 amps at 12 volts. If you’re looking for a cheap source of power, it would be hard to go wrong with [C]’s tutorial and his power supply of choice.

Bluetooth Low Energy Weather Lamp

bluetooth_low_energy_ble_weather_lamp

This is a well-executed proof of concept which [Aaron Jeromin] threw together in a couple of hours. This lamp hosts a Bluetooth Low Energy weather display. The project was a way for him to get used to using the BLE module. But to make the most out of that hardware this should really be refined into an actual low energy circuit. We do think the timing is perfect to feature this project since we just looked at a BLE primer yesterday.

He’s using a BLE Mini board from RedBearLab. It uses a Texas Instruments CC2540 SoC. We’d love to see a follow-up that does away with the Arduino in lieu of code running on the TI chip. But we would have done the same thing (use the uC we were most familiar with) when testing the BLE board out for the first time. It gets weather data from an iPhone. The forecast is projected as one of three icons using an LED bulb and a stencil which is positioned by a hobby servo.

Other inanimate objects that can tell you if it’s storming include this color-coded umbrella stand.

Continue reading “Bluetooth Low Energy Weather Lamp”

24-hour Hackathon Produces Respectable Accelerometer Labyrinth

hackathon-labyrinth

We’re not sure if this was some type of corporate team building, but if it was sign us up for the next one. [Filipp], [Saluka], and [Michael] participated in a recent 24-hour hackathon hosted by Microsoft. They whipped up this labyrinth game controlled by a Nexus 4 Android phone.

This thing looks so well crafted we’re shocked that it’s a 24-hour build. Just putting together the walls of a maze that size takes some time. They then mounted it in a gimbaled frame which tilts the using servos. Check out the demo video below to get a look at the underpinnings. There are several elastic bands connecting the base to the maze. These act as shock absorbers to help keep the movement smooth and to prevent any oscillations from the frame flexing. For us this is an important design element that we’ll keep in mind (just in case we need to win another competition by designing a labyrinth).

An Arduino controls the servos, using Bluetooth to communicate with the phone. The team mentions some filtering used to help make the user experience more natural but we didn’t see many details on this aspect of the hack.

Continue reading “24-hour Hackathon Produces Respectable Accelerometer Labyrinth”

Many Iterations Of A Plywood Stool That Requires No Glue

cnc-router-stool-design

At his local hackerspace [Vincent Sanders] noticed an interesting problem. The stools that they had were great in most cases, but there was one workbench which was very much the wrong height for them. So began his quest to design and fabricate plywood stools which use no glue for their joints.

The Cambridge Makespace (in the UK) turns out to be a perfect environment for this type of project. They already had a CNC router which can cut the plywood pieces, and there are other members who were willing to help train [Vincent] on the equipment. He found a design on Thingiverse which fit the bill, except for the actual measurements. He needed metric units to match the sheet stock available to him. Once converted he put together a stool that didn’t work at all. The thickness of the plywood just didn’t mesh with the tolerances of the joints. After wandering around to different suppliers in town, digital calipers in hand, he came up with a range of actual thicknesses and adjusted his joint design accordingly.

Of course this wasn’t the last revision. Even with the joints working the seat was still a little rickety. He moved to the next plywood thickness offered, redesigning the files to match. His final stool works like a charm, with five or six of them fitting on one standard sheet of plywood.