DEFCON: Blackphone

Despite being full of techies and people doing interesting things with portable devices, you don’t want to have an active radio on you within a quarter-mile of DEFCON. The apps on your phone leak personal data onto the Internet all the time, and the folks at DEFCON’s Wall Of Sheep were very successful in getting a few thousand usernames and passwords for email accounts.

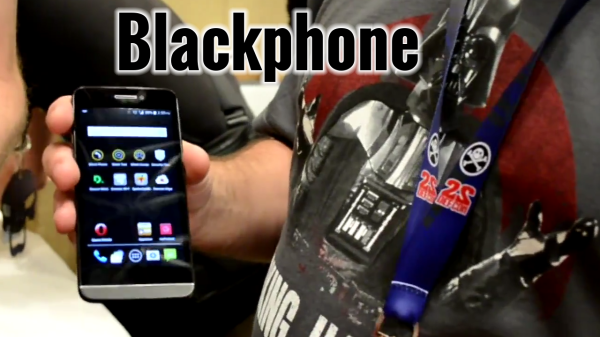
Blackphone is designed to be the solution to this problem, so when we ran into a few members of the Blackphone crew at DEFCON, we were pretty interested to take a quick peek at their device.

The core functionality for the Blackphone comes from its operating system called PrivatOS. It’s a fork of Android 4.4.2 that is supposed to seal up the backdoors found in other mobile phones. There’s also a bundle of apps from Silent Circle that give the Blackphone the ability to make encrypted phone calls, texts (with file sharing), and encrypted and password protected contact lists.

The hardware for the Blackphone is pretty impressive; a quad-core Nvidia Tegra provides all the power you need for your apps, video, and playing 2048, a 2000mAh battery should provide enough juice to get you through a day or two (especially since you can turn off cores), and the usual front/rear cameras, GPS, 802.11bgn and GSM and HSPA+/WCDA radios means this phone will be useable on most networks.

THP Semifinalst: Laser Solder Paste

laser

A relative latecomer to The Hackaday Prize, [AltMarcxs] has nevertheless come up with a very interesting tool for fabrication, the likes of which no one has ever seen before. It’s a rotating laser soldering paste applicator, meant to be an add-on to a CNC machine. What does it do? RIght now it looks extremely cool while being an immense time sink for [AltMarcxs], but the potential is there for being much more than that, ranging from a pick and place machine that also dispenses solder paste, to the closest thing you’ll ever get to a carbon fiber printer.

[AltMarcxs]’s build consists of two 3W laser diodes focused just beyond the tip of the syringe. The syringe dispenses solder paste, and rotating the diodes around, [Alt] is able to put a melted solder blob anywhere on a piece of perfboard. He put up a reasonably well focused video demonstrating this.

With a few homebrew pick and place machines making the semifinalist cut for The Hackaday Prize, it’s easy to see the utility of something like this: Putting a board in a machine, pressing a button, and waiting a bit for a completely populated and soldered board is a dream of the electronic hobbyist rivaled only by a cheap and easy way to make PCBs at home. [AltMarxcs]’s machine could be one step on the way to this, but there are a few other ideas he’d like to explore first.

The build also has wire feeders that allow a bit of copper wire to be soldered to the newly formed metal blob. There are plans to replace this with a composite fiber, replace the paste in the syringe with a UV resin, cut the fiber and cure the resin with the laser, and build something much better than other carbon fiber 3D printers we’ve seen before.


SpaceWrencherThe project featured in this post is a semifinalist in The Hackaday Prize. 

Casting a hand part 1

[Bil’s] Quest For A Lost Finger: Episode I

A little over a year ago I had a semi-gruesome accident; I stepped off of a ladder and I caught my wedding ring on a nail head. It literally stripped the finger off the bone. This was in spite of me being a safety-freak and having lived a whole second life doing emergency medicine and working in trauma centers and the like. I do have trauma center mentality which means, among other things, that I know you can’t wind the clock back.

hand9
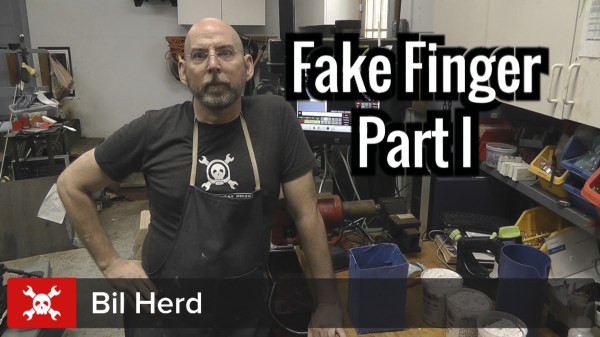
A few seconds make an incredible differences in people’s lives. Knowing that it couldn’t be undone, I stayed relaxed and in the end I have to say I had a good time that day as I worked my way through the system (I ended  up in a Philadelphia trauma center with a nearby hand specialist) as I was usually the funniest guy in the room. Truth be told they ask incredibly straight questions like”are you right handed?”  “Well I am NOW”.

So now I could really use a bit of a body hack, having seen the X-Finger on Hackaday long before I knew that I would one day work with them, I was hoping that we could get one to work for me. In speaking with a couple of the mechanical engineers on the Hackaday staff we decided to get [James Hobson] and [Rich Bremer] involved and that the best way to do it was to get a casting of my injured hand out to them.


Continue reading “[Bil’s] Quest For A Lost Finger: Episode I”

LED Water Wheel Display Is Dekatron-tastic!

led-ring-final

Sometimes, it’s the simple things that mesmerize. [JohnS_AZ] has created a simple dekatron style LED ring, but we can’t seem to stop watching his video. [John’s] LED ring began as a visual indicator for his Hackaday Prize entry, a water consumption display. Judging by his website, [John] is a bit of a display nut. Nixie tubes and huge clocks feature prominently.

We’ve seen plenty of LED projects using the trusty 74xx595 8-bit shift register. [John] personally isn’t a fan, as the entire chip is only rated to drive about 50mA. While hackers routinely push the chip several times past this limit, [John] found a chip designed for the task in the Texas Instruments TLC59282 16 channel constant current LED driver. (PDF link) While more expensive than the ‘595, the 59282 makes life much easier. Only one resistor is needed at the chip’s current sense pin, rather than a current-limiting resistor for each LED. The 59282 also provides a blank input, which is perfect for driving with PWM.

[John] designed a simple PCB with a the 59282 driving a ring of 16 LEDs. While he waited for the boards to come in, he wrote some test code for a Microchip PIC16F1509. [John’s] code is not optimized, but that makes it easy to see exactly which bit patterns he’s writing to the LEDs. It all makes for a great demo, and reminds us of those old Dekatron tubes.
It’s the demo video that makes this project. Click past the break and give it a watch. After several long days of judging entries, a really nice LED ring might be just what the doctor ordered.

Continue reading “LED Water Wheel Display Is Dekatron-tastic!”

Make Your Own UV Exposure Box For PCB Manufacture At Home

UV exposure box

[Shane] needed a UV exposure box to help speed up the process of making PCB’s at home. Not wanting to spend a few hundred on one, he decided to design and build his own, using a planter box!

Why a planter box? To be honest, it was simply the first opaque container [Shane] found, so he decided to base the design around it. Inside the planter box are two 15W fluorescent daytime bulbs which output a similar amount of UV to normal sunlight. A mirror is placed below them to help reflect all the useful light out of the box. A pane of glass was cut to fit on top of the planter box, giving you a nice surface to place curing PCB’s on.

All in all, it’s a pretty simple and inexpensive method to make your own UV exposure box. We’ve also seen it done before using UV LEDs and IKEA picture frames — just make sure you don’t start tanning your hands while you’re working!

Foosball Now Part Of The Internet Of Things

internet of things foosball

At a local LAN event, [Thomas] wanted a way to easily show off the capabilities from some of the Internet-of-Things devices everyone keeps talking about. His idea was to build an internet-connected foosball/table soccer/table football table to show off some hardware and software.

[Thomas]’s table automates almost everything that is part of the great sport of foosball. Once a user logs in using the barcode scanner, the game begins by deploying the tiny ball with parts salvaged from a Roomba. The table uses infrared sensors to detect the ball. Once a goal is scored, it is posted online where anyone can see the current score and a history of all of the games played on the table.

There are a few other unique touches on the foosball table, such as the LED lighting, touch screen displays, and an STM32-E407 ARM processor to tie the whole machine together.

For more information including the source code and demonstrations, check out [Thomas]’s project blog. And, if you get lonely, perhaps you can try the robot foosball player!

Gemma-Powered NeoPixel Sound Reactive Drums

adafruit_products_drum-slide-out

This tutorial from Adafruit shows how to create a custom interactive drum set that lights up with sound. It uses a mic amp sensor that is connected to a miniature Arduino Gemma board to detect when the instrument is being hit by the sticks. Neopixels then illuminate into a range of colors creating a beautifully synced up music presentation.

The container that houses the electronics is 3D printed. The entire circuit is integrated into the snare, mid-tom, hi-tom and a drum kick. All the code and step-by-step instructions can be found on Adafruit’s website. Now imagine something like this being packed up in a suitcase and carried from venue to venue as an up-and-coming band travels from state to state on tour; especially at Drum n’ Bass raves or electronic based music festivals. A video of the kit being used is below.

Continue reading “Gemma-Powered NeoPixel Sound Reactive Drums”