Retrotechtacular: Supersonic Transport Initiatives

In the early days of PBS member station WGBH-Boston, they in conjunction with MIT produced a program called Science Reporter. The program’s aim was explaining modern technological advances to a wide audience through the use of interviews and demonstrations. This week, we have a 1966 episode called “Ticket Through the Sound Barrier”, which outlines the then-current state of supersonic transport (SST) initiatives being undertaken by NASA.

MIT reporter and basso profondo [John Fitch] opens the program at NASA’s Ames research center. Here, he outlines the three major considerations of the SST initiative. First, the aluminium typically used in subsonic aircraft fuselage cannot withstand the extreme temperatures caused by air friction at supersonic speeds. Although the Aérospatiale-BAC Concorde was skinned in aluminium, it was limited to Mach 2.02 because of heating issues. In place of aluminium, a titanium alloy with a melting point of 3,000°F is being developed and tested.

Continue reading “Retrotechtacular: Supersonic Transport Initiatives”

Scope Noob: Microcontroller Quirks With DDS

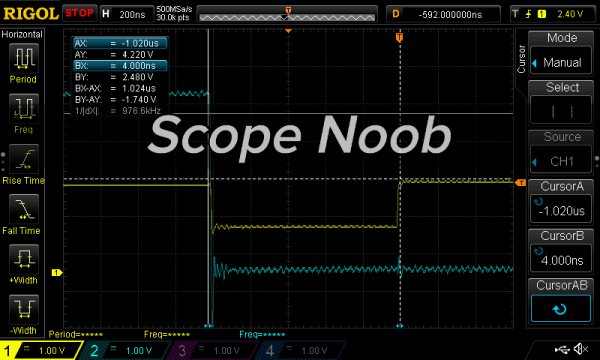
In this installment of Scope Noob I’m working with Direct Digital Synthesis using a microcontroller. I was pleasantly surprised by some of the quirks which I discovered during this process. Most notably, I had a chance to look at errant triggers solved by using holdoff and a few timing peculiarities introduced by my use of the microcontroller. Here’s a video synopsis but I’ll cover everything in-depth after the break.

Continue reading “Scope Noob: Microcontroller Quirks With DDS”

Clap On! A Breadboard

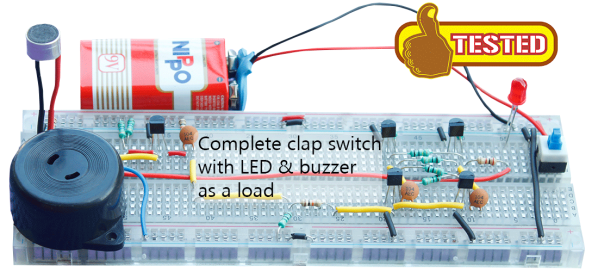
The Clapper™ is a miracle of the 1980s, turning lights and TVs on and off with the simple clap of the hands, and engraving itself into the collective human unconsciousness with a little jingle that implores – nay, commands – you to Clap On! and Clap Off! [Rutuvij] and [Ayush] bought a clap switch kit, but like so many kits, this one was impossible to understand; building the circuit was out of the question, let alone understanding the circuit. To help [Rutuvij] and [Ayush] out, [Rafale] made his own version of the circuit, and figured out a way to explain how the circuit works.

While not the most important component, the most obvious component inside a Clapper is a microphone. [Rafale] is using a small electret microphone connected to an amplifier block, in this case a single transistor.

The signal from the microphone is then sent to the part of the circuit that will turn a load on and off. For this, a bistable multivibrator was used, or as it’s called in the world of digital logic and Minecraft circuits, an S-R flip-flop. This flip-flop needs two inputs; one to store the value and another to erase the stored value. For that, it’s two more transistors. The first time the circuit senses a clap, it stores the value in the flip-flop. The next time a clap is sensed, the circuit is reset.

Output is as simple as a LED and a buzzer, but once you have that, connecting a relay is a piece of cake. That’s the complete circuit of a clapper using five transistors, something that just can’t be done with other builds centered around a 555 timer chip.

Overhauling A 3-Zone Reflow Oven

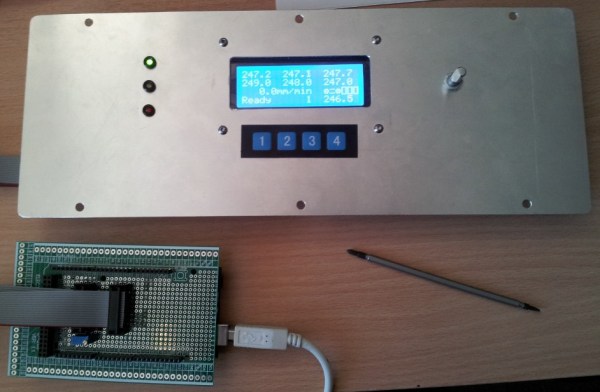
[Ed] owns a 3-zone reflow oven (which he coincidently uses to manufacture reflow oven controllers), but its performance has gotten worse and worse over time. The speed of the conveyer belt became so inconsistent that most boards run through the oven weren’t completely reflowed. [Ed] decided to rip out the guts of the oven and replace it with an Arduino, solving the belt problem and replacing the oven’s user-unfriendly interface

When [Ed] was looking into his belt speed problem, he discovered that the belt motor was controlled by an adjustable linear regulator with no feedback. Although this seems a bit sketchy by itself, the motor also had some mechanical issues and [Ed] ended up replacing it entirely. After realizing that closed-loop speed control would really help make the oven more consistent, [Ed] decided to overhaul all of the electronics in the oven.

[Ed] wanted to make as little custom hardware as possible, so he started out with an Arduino Mega and some MAX31855’s that measure multiple thermocouples in the oven. The Arduino controls the belt speed and runs PID loops which control heating elements in each of the oven’s 3 zones. The Arduino can be programmed with different profiles (stored in EEPROM) which are made up of 3 zone temperatures and a conveyor speed. Don’t have a 3-zone oven of your own to hack? Check out some DIY reflow oven builds we’ve featured before.

Ephemeral Photographs Staged With Artful Inventions

[Gordon Kirkwood’s] focus as a photographer is in capturing ephemeral phenomena, that is, things that are exhilarating to see but also fleeting. In the pursuit of documenting such blips of beauty found in the natural word, he has taken on engineering the circumstance through which they occur by means of technology.

One of the amazing mechanical creations he’s constructed to aid in his photography is a large computer controlled, bubble blower. A few stepper motors work to dilate three segments of soap-soaked rope engaged at 120 degree angles to create a triangular aperture. When the aperture closes, the segments overlap slightly, covering themselves with a consistent coating of suds. When the segments stretch apart, a fan blows a current of air towards the center, pushing the sheath of fluid into ginormous glimmering orbs which he uses as the focal point in some of his photographs.

bubbleAparatus

More currently, [Gordon] has been developing a body of work that involves zapping botanical subject matter with a quarter-million volts from a portable arc producing device he’s created and capturing the reaction with an ultra low-tech camera (the kind with the bellow and sheet you hide under while exposing the film). Using a method all his own, the shots recorded on large format film are claimed to turn out with even more clarity than any current digital camera in use today. [Gordon] has launched a crowd funding campaign to support a pilgrimage to the majestic island of Hawaii, where he’ll use his lightning producing apparatus on ten different specimens of tropical plant life so that he can record the outcome with his tried and proven technique. (see below an artsy shot of his lightning summoner)

lighteningAparatus

Sometimes Kickstarter isn’t so much about commercialism as it is starting a dialogue with the world and beginning a personal adventure. May the journey lead to new inventions and larger, more ambitious projects! Oh yeah- the bubble blowing machine is a must-see in action. Wicked cool:

Continue reading “Ephemeral Photographs Staged With Artful Inventions”

An MSP430-based Automatic Fish Feeder

[Dmitri] wanted to buy an automatic feeding setup for his aquarium, but he found that most off-the-shelf feeders are really inaccurate with portion control. [Dmitri]’s fish is sensitive to overfeeding, so an off-the-shelf feeder wouldn’t get the job done. Since [Dmitri] knows a thing or two about electronics, he set out to build his own microcontroller-based automatic feeding machine.

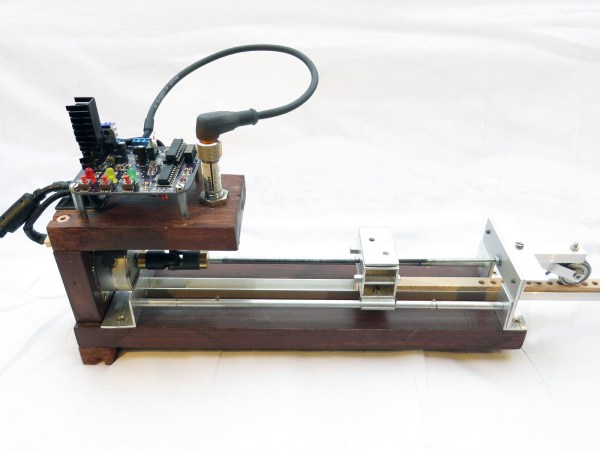
[Dmitri]’s machine is based around a MSP430 that starts feeding at scheduled times and controls how much food is dispensed. The MSP lives on a custom PCB that [Dmitri] designed, which includes a stepper motor driver and input for an endstop sensor. The board is wired to a stepper motor that advances a small wooden board with a series of holes in it. Each hole is filled with a single serving of food. The board slides along a piece of U-channel, and food drops out of each hole into the aquarium when the hole reaches the end of the channel.

The whole build is very well documented, and [Dmitri] explains each block of his schematic in detail. His firmware is also open-source, so you can build your own fish feeder based off of his design. Check out the video after the break to see the feeder in action.

Continue reading “An MSP430-based Automatic Fish Feeder”

Making T-Glase Crystal Clear

There are 3D printing filaments out there with a lot of interesting properties. Whether it’s the sanded-down MDF feel you get from Laywood, the stretchy and squishy but somehow indestructible feel of Ninjaflex, or just regular ‘ol PLA, there’s a filament out there for just about any use. Even optically clear printed objects. Yes, you can now do some post-processing on printed parts to make T-glase crystal clear.

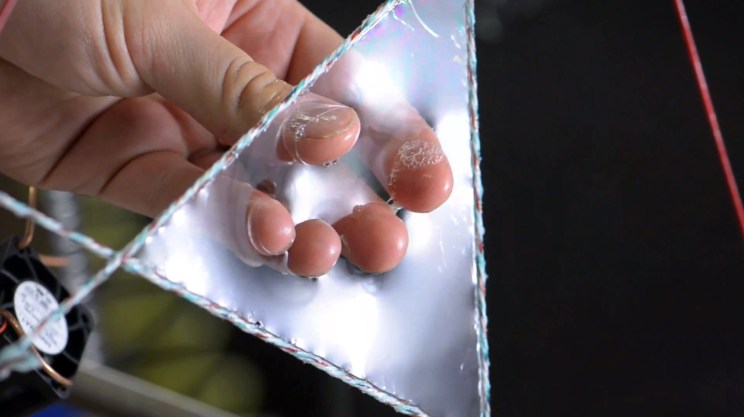
The big advance allowing translucent parts to be made clear is a new product from Smooth-On that’s meant to be a protective and smoothing coating for 3D printed objects. With PLA, ABS, and powder printed parts, this coating turns objects shiny and smooth. Strangely – and I don’t think anyone planned this – it also has the same index of refraction as T-glase. This means coating an object printed with T-glase will render the layers invisible, smooth out the tiny bumps in the print, and turn a single-walled object clear.

There is a special technique to making clear objects with T-glase. The walls of the print must be a single layer. You’ll also want a perfect layer height on your print – you’re looking for cylindrical layers, not a nozzle that squirts out to the side.

The coating for the pictures above was applied on a makeshift lathe built out of an electric drill and a sanding pad. This gave the coating a nice, even layer until it dried. After a few tests, it was determined lenses could be printed with this technique. It might not be good enough for 3D printed eyeglasses, but it’s more than sufficient for creating windows for a model, portholes for an underwater ROV, or anything else where you want nothing but light inside an enclosure.