Hacker Creates Thermal Probes By Welding With A PC Power Supply

[Illya Tsemenko] decided to build his own thermocouples from bare wire. [Illya] is interested in measuring the temperature of Liquid Nitrogen and for this he needed T-type probes. While you can buy these for about 20 bucks, he felt this was too expensive for what is essentially two pieces of wire and decided to build his own.

Thermocouples use the Seebeck effect, when a piece of metal is hot at one end, and cold at the other the electrons in the hot end will be more energetic and migrate towards the cold end, creating a voltage. While this migration occurs in single metal, it can’t easily be measured (as the voltage will be the same as the measurement point). For that reason thermocouples use two metals in which the migration occurs at different rates. This difference creates an overall migration in one direction, and a voltage can be measured which correlates to the temperature where the metals meet. Thermocouples are extremely common and have many applications.

In order to make his thermocouples [Illya] needed to weld the two metals together, and knocked together a quick welding rig using a PC power supply and graphite electrode from a powertool. The graphite electrode is important as it prevents oxidization during the welding process.

The process worked well, and [Illya] was able to make both K and T-type thermocouples and successfully measure temperatures down to -190 degrees C. Awesome work [Illya]!

Learning From Transparent Microchips

Microchips and integrated circuits are usually treated as black boxes; a signal goes in, and a signal goes out, and everything between those two events can be predicted and accurately modeled from a datasheet. Of course, the reality is much more complex, as any picture of a decapped IC will tell you.

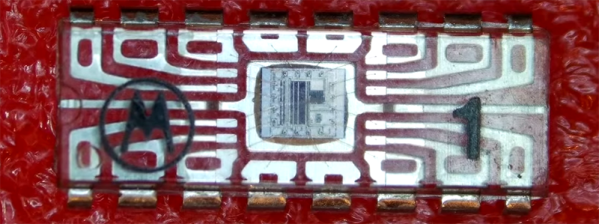
[Jim Conner] got his hands on a set of four ‘teaching’ microchips made by Motorola in 1992 that elucidates the complexities of integrated circuitry perfectly: instead of being clad in opaque epoxy, these chips are encased in transparent plastic.

The four transparent chips are beautiful works of engineering art, with the chip carriers, the bond wires, and the tiny square of silicon all visible to the naked eye. The educational set covers everything from resistors, n-channel and p-channel MOSFETS, diodes, and a ring oscillator circuit.

[Jim] has the chips and the datasheets, but doesn’t have the teaching materials and lab books that also came as a kit. In lieu of proper pedagogical technique, [Jim] ended up doing what any of us would: looking at it with a microscope and poking it with a multimeter and oscilloscope.

While the video below only goes over the first chip packed full of resistors, there are some interesting tidbits. One of the last experiments for this chip includes a hall effect sensor, in this case just a large, square resistor with multiple contacts around the perimeter. When a magnetic field is applied, some of the electrons are deflected, and with a careful experimental setup this magnetic field can be detected on an oscilloscope.

[Jim]’s video is a wonderful introduction to the black box of integrated circuits, but the existence of clear ICs leaves us wondering why these aren’t being made now. It’s too much to ask for Motorola to do a new run of these extremely educational chips, but why these chips are relegated to a closet in an engineering lab or the rare eBay auction is anyone’s guess.

Hackaday Prize Entry: Emoticon Keyboard

The Internet is raising an entire generation that can speak entirely in emoticons. This reverses the six thousand year old evolution of written language and makes us (╯°□°)╯︵ ┻━┻. It is, however, fun. There is a problem with these newfangled emoticons: no one actually types them; they’re all copied and pasted. This is inefficient, and once again technology is here to save us once again.

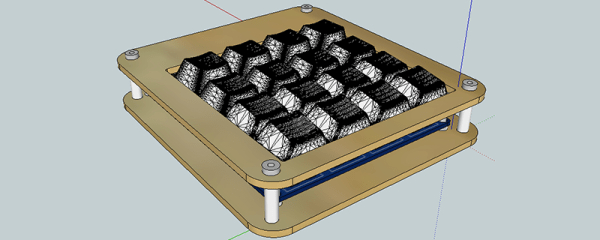
For his Hackaday Prize entry, [Duncan] is working on an EmojiPad. It’s a (mechanical!) keyboard for typing emoticons, but it can also be used for gaming, CAD design, or as a USB MIDI device.

The keyboard uses 16 Cherry MX switches in a standard diode matrix configuration. This is a USB keyboard, and for the controller, [Duncan] is using an ATMega328 with the V-USB library This is all well-worn territory for the mechanical keyboard crowd, so to spice things up, [Duncan] is going to add individually addressable LEDs underneath each keycap. The ATMega328 doesn’t have enough pins to do this the normal way, so all the LEDs will be Charlieplexed.

A keyboard for emoticons demands custom keycaps, but [Duncan] is having a hard time finding a good solution. Right now he’s planning on using blank keycaps with vinyl decals, a somewhat expensive option at $1 USD a keycap. A better, even more expensive option exists, but for something as ephemeral as an emoticon keyboard a sticker will do just fine.

The 2015 Hackaday Prize is sponsored by:

DIY Punch Card System Despite Hanging Chads

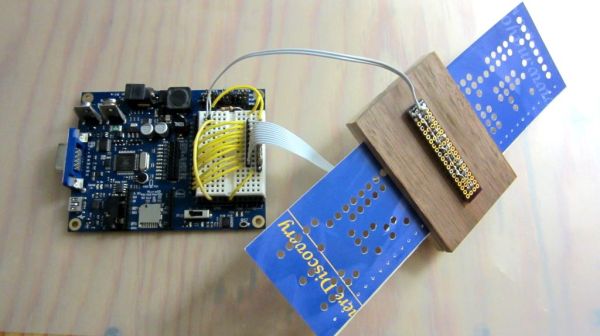
Sometimes you just have parts lying around and want to make something out of them. [Tymkrs] had a robot paper cutter, so naturally they made punch cards. But then, of course, they needed a punch card reader, so they made one of those too. All with stuff lying around the shop.

The Silhouette Portrait paper cutter is meant for scrapbooking, but what evokes memories of the past more than punchcards? To cut out their data, rather than cute kittens or flowers, they wrote some custom code to turn ASCII characters into rows of dots. And the cards are done — you just have to clean up the holes that didn’t completely cut. These are infamously known as hanging chads.

The reader is made up of a block of wood, with a gap for the cards and perpendicular holes drilled for LEDs and photoresistors. This is cabled to a Propeller dev board with some simple firmware. We would have used photodiodes or phototransistors, because that’s what’s in our junk box (and because they have faster reaction time), but when you’ve got lemons, make lemonade.

OK, now that you’ve got a punch card reader and writer, what do you do with it? Password storage comes to mind.

Continue reading “DIY Punch Card System Despite Hanging Chads”

Open Hybrid Gives You The Knobs And Buttons To Your Digital Kingdom

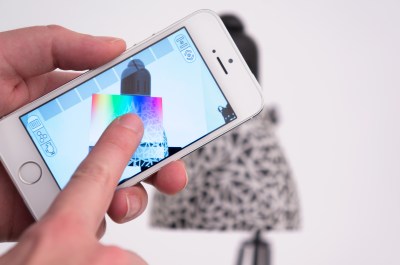
With a sweeping wave of complexity that comes with using your new appliance tech, it’s easy to start grumbling over having to pull your phone out every time you want to turn the kitchen lights on. [Valentin] realized that our new interfaces aren’t making our lives much simpler, and both he and the folks at MIT Media Labs have developed a solution.

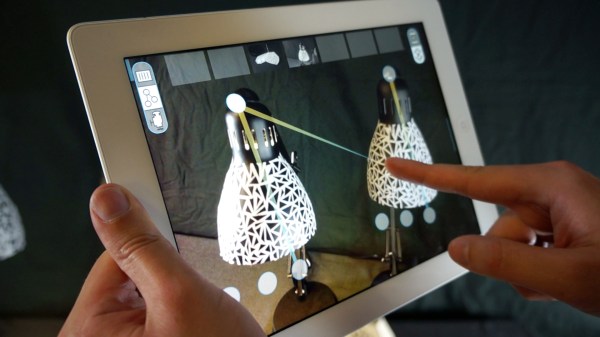
open-hybrid-light-color-pickerOpen Hybrid takes the interface out of the phone app and superimposes it directly onto the items we want to operate in real life. The Open Hybrid Interface is viewed through the lense of a tablet or smart mobile device. With a real time video stream, an interactive set of knobs and buttons superimpose themselves on the objects they control. In one example, holding a tablet up to a light brings up a color palette for color control. In another, sliders superimposed on a Mindstorms tank-drive toy become the control panel for driving the vehicle around the floor. Object behaviors can even be tied together so that applying an action to one object, such as turning off one light, will apply to other objects, in this case, putting all other lights out.

Beneath the surface, Open Hybrid is developed on OpenFrameworks with a hardware interface handled by the Arduino Yún running custom firmware. Creating a new application, though, has been simplified to be achievable with web-friendly languages (HTML, Javascript, and CSS). The net result is that their toolchain cuts out a heavy need for extensive graphics knowledge to develop a new control panel.

If you can spare a few minutes, check out [Valentin’s] SolidCon talk on the drive to design new digital interfaces that echo those we’ve already been using for hundreds of years.

Last but not least, Open Hybrid may have been born in the Labs, but its evolution is up to the community as the entire project is both platform independent and open source.

Sure, it’s not mustaches, but it’s definitely more user-friendly.

Continue reading “Open Hybrid Gives You The Knobs And Buttons To Your Digital Kingdom”

Maglev, Submersibles, And More At Maker Faire Detroit

This past weekend the Maker Faire returned to the motor city. While it seemed a bit smaller than previous years, the event still brought in a ton of awesome makers from the metro Detroit area and beyond.

img_8517

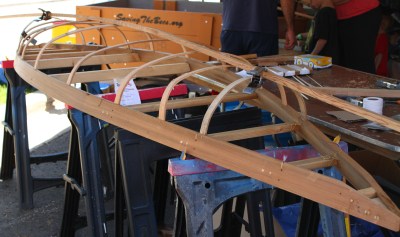
Although we don’t feature too many woodworking projects, there were quite a few woodworkers at the Faire with projects ranging from custom longboards pressed with a home built iron mold to DIY kayaks with elaborate wooden skeletons built by a local group of Michigan kayak builders. The kayaks were quite impressive: hand sewn nylon panels are wrapped around custom frames made from steamed white oak. It’s great to speak with the makers about the specialized skills needed for kayak building.

Continue reading “Maglev, Submersibles, And More At Maker Faire Detroit”

We Should 3D Scan People

In a perfect futuristic world you have pre-emptive 3D scans of your specific anatomy. They’d be useful to compare changes in your body over time, and to have a pristine blueprint to aid in the event of a catastrophe. As with all futuristic worlds there are some problems with actually getting there. The risks may outweigh the rewards, and cost is an issue, but having 3D imaging of a sick body’s anatomy does have some real benefits. Take a journey with me down the rabbit hole of 3D technology and Gray’s Anatomy.

Continue reading “We Should 3D Scan People”