Hackaday Prize Semifinalist: Artificial Muscles And Supercapacitors

For [Lloyd T Cannon III]’s entry to the Hackaday Prize, he’s doing nothing less than changing the way everything moves. For the last 100 years, internal combustion engines have powered planes, trains, and automobiles, and only recently have people started looking at batteries and electric motors. With his supercapacitors and artificial muscles, [Lloyd] is a few decades ahead of everyone else.

There are two parts to [Lloyd]’s project, the first being the energy storage device. He’s building a Lithium Sulfur Silicon hybrid battery. Li-S-Si batteries have the promise to deliver up to 2000 Watt hours per kilogram of battery. For comparison, even advanced Lithium batteries top out around 2-300 Wh/kg. That’s nearly an order of magnitude difference, and while it’s a far way off from fossil fuels, it would vastly increase the range of electric vehicles and make many more technologies possible.

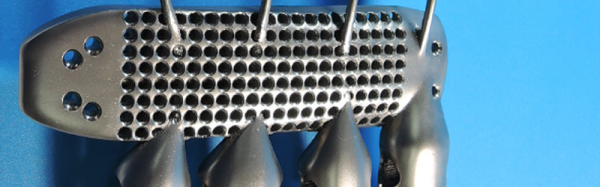
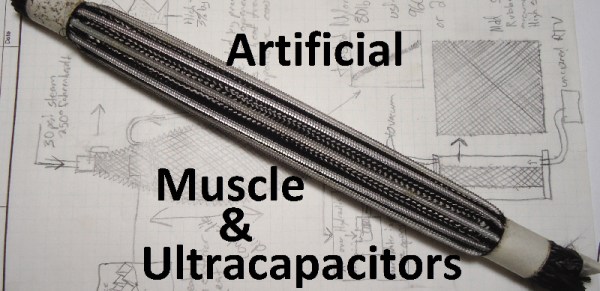
The other part of [Lloyd]’s project is artificial muscles. Engines aren’t terribly efficient, and electric motors are only good if you want to spin things. For robotics, muscles are needed, and [Lloyd] is building them out of fishing line. These muscles contract because of the resistive heating of a carbon fiber filament embedded in the muscle. It’s been done before, but this is the first project we’ve seen that replicates the technique in a garage lab.

Both parts of [Lloyd]’s project are worthy of a Hackaday Prize entry alone, but putting them together as one project more than meets the goal: to build something that matters.

The 2015 Hackaday Prize is sponsored by:

AvE Builds DRINKO (not Affiliated With PLINKO)

[SuperUnknown] aka [AvE], one of our favorite Canadian hackers is back at it with DRINKO, an adult beverage themed take on the classic PLINKO game from The Price Is Right. He’s built the game as a mancave warming gift for a friend. This isn’t a particularly complex build, but it’s always great to see all the little steps that go into a project, leading up to the finished job. [SuperUnknown] said that wood would be a great material for this project, but he is opposed to the senseless killing of peaceful trees, so he built the base from 1/8″ plate steel. The glasses were plain shot glasses masked and etched to spell out DRINKO.

The most tedious part of a fabricating a game like this is cutting and installing the tines. [SuperUnknown] used old welding rods, cut with a slitting saw on his Bridgeport. The rods were TIG welded into the metal plate forming the back panel of the game.  To spice things up, [SuperUnknown] added an Arduino and some through hole WS2812 LEDs. While he didn’t have the flat surface mount WS2812’s on hand, that didn’t stop him. A quick trip through the bridgeport trimmed those frosted LED lenses down to size. The Arduino drives the LEDs through several patterns – much like the attract mode on a video game, or a Las Vegas sign. If you build your own DRINKO, we’d suggest adding some microswitches below each slot, so the drink to be consumed lights up.

Continue reading “AvE Builds DRINKO (not Affiliated With PLINKO)”

Automated Bubble Gun Just Because

After a recent trip to Disney Land, [Thomas] came home with an electric bubble gun. [Thomas] is a full-grown man. But since when did that stop us having fun blowing bubbles?? Obviously, a project was to be had using this fun little toy. So he decided to automate it.

So after taking some measurements with his trusty calipers, [Thomas] got on the computer and started designing an enclosure for the bubble gun using SolidWorks. It’s pretty simple. He designed it to hold the bubble gun in place, and allow him to attach a small RC servo motor in order to trigger the switch. Hooking that up to an Arduino Micro and he was now able to trigger it remotely.

Continue reading “Automated Bubble Gun Just Because”

Why You Should Build A Clock For Social Good This Week

We’ve seen a wide range of emotional responses regarding [Ahmed Mohamed]’s arrest this week for bringing a clock he built to school. No matter where you fall on the political scale, we can all agree that mistaking a hobby engineering project for a bomb is a problem for education. People just don’t understand that mere mortals can, and do, build electronics. We can change that, but we need your help.

Our friends at NYC Resistor came up with a great idea. Why don’t we all build a clock? I want you to take it one step further: find a non-hacker to partner with on the project. Grab a friend, relative, or acquaintance and ask them to join you in building a clock from stuff you have on hand in order to promote STEM education.

Clocks have long been one of my favorite projects, and like the one shown above, most of my builds didn’t look anything like traditional clocks. Once you start getting into how clocks are built, you’ll be amazed at how accurate dirt-cheap clocks are and how difficult it can be to replicate that accuracy. Pass this knowledge on to your teammates. Teach them how to solder, or how to draw a schematic, or just how to open the case on some electronics without fear.

Post your project on hackaday.io and we’ll add it to the Clocks for Social Good list (message me with the link). If you decide to document it elsewhere just leave a link in the comments below. We’ll post a roundup of all these builds next week. I plan to repurpose the soldering workshop board I populated last week as the display for my clock. I’ll be helping a friend of mine learn to solder as part of the build!

Happy hacking, and thanks for helping to dispel fear and teach others about awesome engineering.

Need some inspiration to get going? You can always chat with others about it in the Hacker Channel. If you have an Arduino and some LED strips you can do something like this. Here’s a binary clock built with just a few LEDs. Or if you have a laser cutter at your disposal you can make a unique display with just a pair of motors.

Learn And Build A High Side Switch

As electronics engineer I have a mental collection of circuits that I’ve gathered over the years, much like a mechanic collects specialized tools as they work. All engineers do this and the tools in their tool boxes usually represent their project history and breadth.

A useful circuit to have in designer’s toolbox is the “high side switch”. Like it sounds, this is a circuit that switches the “high side” or positive voltage to a load.

We usually tend to switch things to ground as seen by outputs such as an Open Collector output, the reason being that ground usually is a known entity and is usually low impedance and is at a known voltage. But there are advantages to using a high-side switch in your circuits.

Continue reading “Learn And Build A High Side Switch”

Hack Your Rib Cage With Titanium 3D Printing

A Spanish hospital recently replaced a significant amount of a man’s rib cage and sternum with a titanium replacement. Putting titanium inside people’s chests is nothing new, but what made this different was the implant was 3D printed to match his existing bone structure.

An Australian company, Anatomics, created the 3D print from high-resolution CT scans of the patient. They used a printer provided by an Australian Government corporate entity, CSIRO, that helps bring technology to Australian companies.

Biomedical printing has been in the news quite a bit lately and we’ve covered CT scan to 3D model conversions more than once. Is this the dawn of the age of the cyborg? Maybe it’s really mid morning. Many people walk around with pacemakers, Vagus nerve stimulators, and plenty of more conventional titanium hardware in them now.

While the ethics of replacing a cancer patient’s rib cage is pretty clear, the real issue will be when people want enhancements just for the sake of it (think of the controversy surrounding runners with prosthetic legs, for example). It might seem far-fetched, but as replacements become better than originals, some people will want to opt for replacements for perfectly good body parts.

Continue reading “Hack Your Rib Cage With Titanium 3D Printing”

Don’t Understand The Periodic Table? It’s Just A Quantum Truth Table

In the wee hours of the late 17th century, Isaac Newton could be found locked up in his laboratory prodding the secrets of nature. Giant plumes of green smoke poured from cauldrons of all shapes and sizes, while others hissed  and spat new and mysterious chemical concoctions, like miniature volcanoes erupting with knowledge from the unknown. Under the eerie glow of twinkling candle light, Newton would go on to write over a million words on the subject of alchemy. He had to do so in secret because the practice was frowned upon at that time.  In fact, it is now known that alchemy was the ‘science’ in which he was chiefly interested in. His fascination with turning lead into gold via the elusive philosopher’s stone is now evident. He had even turned down a professorship at Cambridge and instead opted for England’s Director of Mint, where he oversaw his nation’s gold repository.

Not much was known about the fundamental structure of matter in Newton’s time. The first version of the periodic table would not come along for more than a hundred and forty years after his death. With the modern atomic structure not surfacing for another 30 years after that. Today, we know that we can’t turn lead into gold without setting the world on fire. Alchemy is recognized as a pseudoscience, and we opt for modern chemistry to describe the interactions between the elements. Everyone walking out of high school knows what atoms and the periodic table are. They know what the sub-atomic particles and their associated electric charges are. In this article, we’re going to push beyond the basics. We’re going to look at atomic structure from a quantum mechanical view, which will give you a new understanding of why the periodic table looks the way it does. In fact, you can construct the entire periodic table using nothing but the quantum numbers.

Continue reading “Don’t Understand The Periodic Table? It’s Just A Quantum Truth Table”