Hands-On Othermill Review Grinds Out Sparkling Results

We’ve been on the lookout for alternatives to chemically etching circuit boards for years. The problem has been that we don’t particularly want to devote months of or lives learning how to build precision CNC mills. Off in the distance there may be an answer for that quandary if you don’t mind parting with twenty-two Benjamins. Sure, it’s a heck of a lot more expensive than toner transfer and cupric chloride, but the Othermill can be purchased right now (in your hands a few months later) and after reading this in-depth review we are a bit less hesitant about opening our wallets for it.

othermill-review-thumb
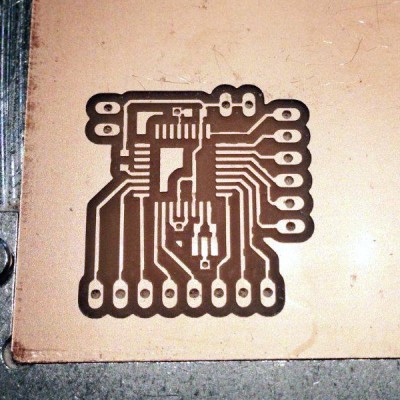
It’s a tome of a review, but that means there’s something for everybody. We especially enjoyed seeing the 10 mil board shown here which took about 1-hour to mill. Considering it has also been through-hole drilled we’d put that on part with the time it takes to etch a board. There are obvious places where the traces are not perfectly smooth (not sure if that’s burring or over-milling) but they are not broken and the board’s ready to be populated.

Alignment is something of an issue, but the Othermill isn’t limited to PCBs so we’d recommend designing and milling your own alignment bracket system as an early project.

Who isn’t envious of custom-builds that can get down to 10-mils, like this beauty from 2013. Our hopes had been sparked when Carbide 3D came onto the scene. We’re still optimistic that they will make a big splash when they start shipping preorders in a few months.

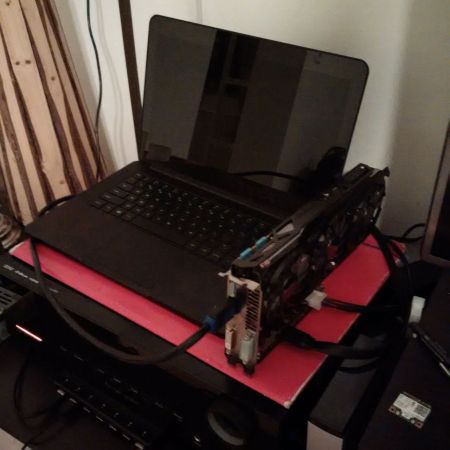
As this review proves, Othermill is already out in the wild with a 6-8 week wait before shipping. We saw it in action milling multiple materials at the Hackaday Omnibus Lauch Party and were duly impressed. Price or waiting-period aside we’re going to hold off until the software options expand beyond Mac-only (UPDATE: Othermill software support for Windows was added in early 2016); either Othermill will add support or someone will come up with a hack to use traditional CNC software. But if you count yourself as a subscriber to the cult of Apple the software, called Otherplan, does get a favorable prognosis along with the hardware.

Already have an Othermill sitting on your bench? Let us know your what you think about it in the comments below.

Bonus content: [Mike Estee], CTO of Othermill just gave a talk last night about how he got into making mills and the challenges of building something with super-high-precision. Sound isn’t good but the talk is solid. Hackaday’s [Joshua Vasquez] also gives a talk on the video about building an SPI core for FPGA. These talks are one of the Hardware Developer’s Didactic Galactic series which you really should check out if you’re ever in the San Francisco area.

Continue reading “Hands-On Othermill Review Grinds Out Sparkling Results”

The Pi 2 Means Faster GPIO

The Raspberry Pi is a great machine to learn the ins and outs of blinking pins, but for doing anything that requires blinking pins fast, you’re better off going with a BeagleBone. This has been the conventional wisdom for years now, and now that the updated Raspberry Pi 2 is out, there’s the expectation that you’ll be able to blink a pin faster. The data are here, and yes, you can.

The method of testing was connecting a PicoScope 5444B to a pin on the GPIO pin and toggling between zero and one as fast as possible. The original test wasn’t very encouraging; Python maxed out at around 70 kHz, Ruby was terrible, and only C with the native library was useful for interesting stuff – 22MHz.

Using the same experimental setup, the Raspberry Pi 2 is about 2 to three times faster. The fastest is still the C native library, topping out at just under 42 MHz. Other languages and libraries are much slower, but the RPi.GPIO Python library stukk sees a 2.5x increase.

Mediated Matter At The MIT Media Lab

Few things have managed to capture the imagination of hackers and engineers around the world the way Synthetic Biology did over the last couple of years. The promise of “applying engineering principles to designing new biological devices and systems” just seemed way too sci-fi to missed out on, and everyone jumped on the bandwagon. All of a sudden, the field which used to be restricted to traditional research organizations and startups found itself crowded with all sorts of enthusiasts, biohackers, and weirdos alike. Competitions such as the International Genetically Engineered Machine (iGEM) paved the way, and the emergence of community spaces like GenSpace and BioCurious finally made DNA experimentation accessible to anyone who dares to try. As it often happens, the Sci-Fi itself did not go untouched, and a whole new genre called “Biopunk” emerged, further fueling people’s imagination and extrapolating worlds to come.

Continue reading “Mediated Matter At The MIT Media Lab”

Using I2C Addresses As Chip Selects

I2C has a seven-bit address space, and you’re thinking “when do I ever need more than 127 devices on a pair of wires?” So you order up some parts only to find that they have one, two, or three user-configurable address pins for any given device type. And you need a bunch more than four or eight capacitive sensor buttons on your project. What do you do?

If you’re reader [Marv G], you think outside the box and realize that you can change the addresses on the fly by toggling address pins high and low with your microcontroller. That is, you can use a single I2C address pin for each device as a chip select signal just like you would have with SPI.

That’s it, really. [Marv G] goes through all of the other possible options in his writeup, and they’re all unsavory: multiple I2C busses, a multiplexer, buying different sensors, or changing micros. None of these are as straightforward as just running some more wires and toggling these with your micro.

We’d even go so far as to suggest that you could fan these chip select lines out with a shift register or one of those 1-of-N decoder chips, depending on how many I2C devices you need to chip-selectify. (We’re thinking 74HC595 or 74HC154.)

Along the way, we found this nice list of the number of address pins for a bunch of common peripherals provided by [LadyAda], in case you don’t believe us about how ubiquitous this problem is. How many devices on that list have one (1!!) address pin?

At the end of his post, [Marv G] asks if anyone else has thought of this chip select trick before. We hadn’t. Here’s your chance to play the smart-ass in the comments.

Exploded View of a Kindle

Re-purposing Old Electronics To Inspire New Designs

We love seeing how things work. Exploded views are like mechanical eye-candy to most engineers, so when [Chris’] Kindle Touch died, he decided to give it new life… on his wall.

Inspired by others, he decided to mount all the components of his Kindle onto a piece of plastic that he could hang up on his wall. As an electronics design engineer, he’s always looking for new ideas and ways to design and build circuits — what better way to inspire creativity than to see a real product blown apart? Does anyone remember reading [Stephen Biesty’s] Incredible Cross Sections or Incredible Explosions as a child?

The construction is quite simple, relying on mounting holes where possible to screw parts directly to the board, or by using heavy duty double-sided tape. After finishing the Kindle, [Chris] found an old iPod of his and decided to give it the same ritual.

For some more in-depth exploded physical models, take a look Bolt.io’s office art we covered last year!

Training Fish To Feed Themselves

We’ve featured quite a few aquarium and fish feeder hacks on our blog. [RoboPandaPDX] thought of taking it up a notch and make an interactive fish feeder. He built a Fish feeder that train’s them to feed themselves.

A copper bar hangs from the middle of a metal cylinder – much like a bell. The end of the bar has a fish lure. When a fish pushes the lure, the copper bar touches the metal cylinder and  closes the circuit. This signal goes to an Arduino. To catch the attention of the fishes and to “teach” them, an RGB LED is used. The fish need to figure out that the feeder will dispense food only when the LED is ON and the Lure is pushed. If the fish figure that out, and push the lure when the LED is on, a servo is activated which pushes the feeder to deliver 1 unit of fish food. While at it, he added a couple of bells and whistles. A buzzer to indicate when the Lure switch is closed and a 2 line LCD shows how many times the switch has been activated and how long the program has been running.

A Sparkfun  open logger stores the hit count and the minutes and seconds of the hit for data analysis later on. The good news is that it seems to be working. The current code activates the feeder for 30 to 60 minutes every day, which is indicated by the LED. At the end of 9 days,  [RoboPandaPDX] found that the goldfish would hit the Lure when the LED turned on, and then turn around to face where the feeder would dispense food in to the tank. His next plan is to put up some obstacles along the path to see if the fish learn some new tricks. His schematic looks a little iffy (the Lure switch is connected to the RST pin of the Arduino), and it seems he cannot remember why he ever did that. He’s happy that it works though, but we’re sure that’s not the right way to wire it up.

[RoboPandaPDX] is looking for suggestions on improving his interactive feeder, so if you have any, do add them in the comments below.

If you need some more fish feeder ideas, check out this and this that we blogged about earlier.

laptop with external gpu

A Laptop With An External Graphics Card?

It used to be that desktop computers reigned king in the world of powerful computing, and to some extent, they still do. But laptops are pretty powerful these days, and in our experience, a lot of engineering companies have actually swapped over to them for resource hungry 3D CAD applications — But what if you still need a bit more power?

Well, [Kamueone] wasn’t satisfied with the performance of his Razer Blade GTX870m laptop, so he decided to hack it and give it its own external graphics card.

Now unfortunately this really isn’t quite a simple as running some PCIE extender cables — nope. You’ll have to modify the BIOS first, which according to [Kamueone], isn’t that bad. But after that’s done you’ll also need a way to mount your graphics card outside of the laptop. He’s using an EXP GDC Beast V6 which uses a mini PCIE cable that can be connected directly to the laptop motherboard. You’re also going to need an external power supply.

[Kamueone] ran some benchmarks and upgrading from the stock onboard GTX870m to an external GTX 780ti resulted in over three times the frame rate capability — 40fps stock, 130fps upgraded!