Bot Wars: A Collateral Gift Of The Automation Revolution

I received an email Wednesday morning from a company launching new features for a bot called Trim which will negotiate a lower cable bill for you. Give it your Comcast login info and it will launch a support-chat window and go to work negotiating rates on your behalf. This could be a lower monthly rate, or one-time credits for slow or intermittent service.

This chatbot is a glimpse into our cat-and-mouse future. If rate-reducing automation is widely adopted by customers, Comcast will have an incentive to spot these chatbots and act accordingly, and they’ll probably want to automate that. This leads quickly to a war of bots.

How many times has Hackaday predicted the future? The coming bot wars were hinted at in an article I wrote back in 2009 on the re-emergence of Tradewars 2002. This is a turn-based BBS game that I loved as a child. The second version added an automation layer — the game had become a challenge to write a better script than your opponent to play the game with maximum efficiency. Of course, it’s only a prediction if you realize it at the time. But this gamification of automation from seven years ago is about to jump into the mainstream.

You win if your automation outperforms your competitors; this is the founding idea of the automation age. There’s no event horizon to mark our slide into the new realm. But we know the financial markets have been playing this game for a long time now (think flash crash and algorithmic trading). Continuing the customer service call example, call centers have been using scripts for years. Automation stems from this, just cutting out the human; you may already be talking to a chatbot and not knowing it — a human takes over when the bot has already verified your account info and gets stumped. The real question is will you take up arms by building your own bots or using those available from startups like Trim? Maybe you already have? We’d love to hear about it in the comments below.

[Image Source: the main and thumbnail images are of course from the United Artists film War Games.]

Characterizing A Cheap 500MHz Counter Module

An exciting development over the last few years has been the arrival of extremely cheap instrumentation modules easily bought online and usually shipped from China. Some of them have extremely impressive paper specifications for their price, and it was one of these that caught the eye of [Carol Milazzo, KP4MD]. A frequency counter for under $14 on your favourite online retailer, and with a claimed range of 500 MHz. That could be a useful instrument in its own right, and with a range that significantly exceeds the capabilities of much more expensive bench test equipment from not so long ago.

Just how good is it though, does it live up to the promise? [Carol] presents the measurements she took from the device, so you can see for yourselves. She took look at sensitivity, VSWR, and input impedance over a wide range, after first checking its calibration against a GPS-disciplined standard and making a fine adjustment with its on-board trimmer.

In sensitivity terms it’s a bit deaf, requiring 0.11 Vrms for a lock at 10 MHz. Meanwhile its input impedance decreases from 600 ohms at the bottom of its range to 80 ohms at 200 MHz, with a corresponding shift in VSWR. So it’s never going to match a high-end bench instrument from which you’d expect much more sensitivity and a more stable impedance, but for the price we’re sure that’s something you can all work around. Meanwhile it’s worth noting from the pictures she’s posted that the board has unpopulated space for an SPI interface header, which leaves the potential for it to be used as a logging instrument.

We think it’s worth having as much information as possible about components like this one, both in terms of knowing about new entrants to the market and in knowing their true performance. So if you were curious about those cheap frequency counter modules, now thanks to [Carol] you have some idea of what they can do.

While it’s convenient to buy a counter module like this one, of course there is nothing to stop you building your own. We’ve featured many over the years, this 100MHz one using a 74-series prescaler or this ATtiny offering for example, or how about this very accomplished one with an Android UI?

Taig Mill Anointed With Ball Screws (at Last!)

Yup, we can hear a crowd full of “not-a-hack” loading their cannons as we speak, but this machine has a special place in the community. For years, the Taig milling machine has remained the go-to micro mill for the light-duty home machine shop. These machines tend to be adorned and hacked to higher standards, possibly because the community that owns these tools tends to enjoy machining for machining’s sake–or possibly because every single component of the mill is available as a replacement part online. For many, this machine has been a starting point to making chips at home. (In fact, Other Machine Co’s CTO, Mike Estee, began his adventure into machining with a Taig.)

For years, Taig has sold their machines with a leadscrew and a brass nut that could be tensioned to cut down the backlash. Backlash still remains an issue for the pickiest machinists, though; so, at long last, Taig has released a backlash-free ball-screw variant in two incarnations: an all-in-one machine pre-fitted with ballscrews and an upgrade kit for customers that already decorated their garage with the lead-screw model.

In the clip below [John] takes us on a tour of the challenges involved in cramming 3, 12-mm ballscrews into the original topology. As we’d expect, a few glorious chunks of metal have been carved away to make space for the slightly-larger ballnut. Despite the cuts, the build is tidy enough to fool us all into thinking that ballscrews landed in the original design from the start.

Confused why ballscrews are such a giant leap from leadscrews? Lend your eyes and ears a few moment to take in [Al]’s overview on the subject.

Continue reading “Taig Mill Anointed With Ball Screws (at Last!)”

Spinning 3D POV Display: A High School Term Project

If you are a fan of sci-fi shows you’ll be used to volumetric 3D displays as something that’s going to be really awesome at some distant point in the future. It’s been about forty years since a virtual 3D [Princess Leia] was projected to Star Wars fans from [R2D2]’s not-quite-a-belly-button, while in the real world it’s still a technology with some way to go. We’ve seen LED cubes, spinning arrays, and lasers projected onto spinning disks, but nothing yet to give us that Wow! signaling that the technology has truly arrived.

We are starting to see these displays move from the high-end research lab into the realm of hackers and makers though, and the project we have for you here is a fantastic example. [Balduin Dettling] has created a spinning LED display using multiple sticks of addressable LEDs mounted on a rotor, and driven by a Teensy 3.1. What makes this all the more remarkable is that he’s a secondary school student at a Gymnasium school in Germany (think British grammar school or American prep school).

volumetric-pov-display-built-by-high-schooler-led-boardsThere are 480 LEDs in his display, and he addresses them through TLC5927 shift registers. Synchronisation is provided by a Hall-effect sensor and magnet to detect the start of each rotation, and the Teensy adjusts its pixel rate based on that timing. He’s provided extremely comprehensive documentation with code and construction details in the GitHub repository, including a whitepaper in English worth digging into. He also posted the two videos we’ve given you below the break.

What were you building in High School? Did it involve circuit design, mechanical fabrication, firmware, and documentation? This is an impressive set of skills for such a young hacker, and the type of education we like to see available to those interested in a career in engineering.

Continue reading “Spinning 3D POV Display: A High School Term Project”

Solving Hackaday’s Crypto Challenge

Although I’ve been to several DEF CONs over the past few years, I’ve never found time to devote to solving the badge. The legendary status of all the puzzles within are somewhat daunting to me. Likewise, I haven’t yet given DefCon DarkNet a try either — a real shame as the solder-your-own-badge nature of that challenge is right up my alley.

But at the Hackaday SuperCon I finally got my feet wet with the crypto challenge created by [Marko Antonic]. The challenge was built into a secondary firmware which anyone could easily flash to their conference badge (it enumerates as a USB thumb drive so just copy it over). This turned it into a five-puzzle challenge meant to take two days to solve, and it worked perfectly.

If you were at the con and didn’t try it out, now’s the time (you won’t be the only one late to the game). But even if you weren’t there’s still fun to be had.

Thar’ be spoilers below. I won’t explicitly spill the answers, but I will be discussing how each puzzle is presented and the different methods people were using to finish the quest. Choose now if you want to continue or wait until you’ve solved the challenge on your own.

Continue reading “Solving Hackaday’s Crypto Challenge”

PoisonTap Makes Raspberry Pi Zero Exploit Locked Computers

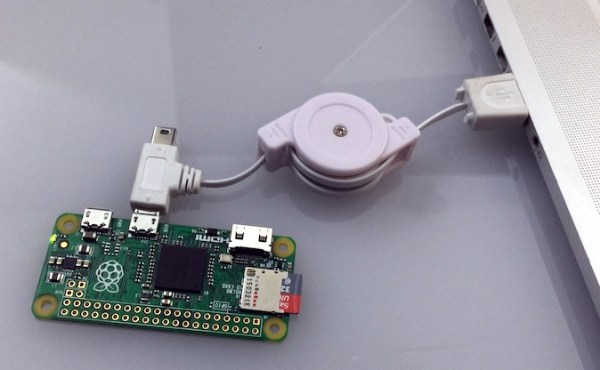
[Samy Kamkar], leet haxor extraordinaire, has taken a treasure trove of exploits and backdoors and turned it into a simple hardware device that hijacks all network traffic, enables remote access, and does it all while a machine is locked. It’s PoisonTap, and it’s based on the Raspberry Pi Zero for all that awesome tech blog cred we crave so much.

PoisonTap takes a Raspberry Pi Zero and configures it as a USB Gadget, emulating a network device. When this Pi-come-USB-to-Ethernet adapter is plugged into a computer (even a locked one), the computer sends out a DHCP request, and PoisonTap responds by telling the machine the entire IPv4 space is part of the Pi’s local network. All Internet traffic on the locked computer is then sent over PoisonTap, and if a browser is running on the locked computer, all requests are sent to this tiny exploit device.

With all network access going through PoisonTap, cookies are siphoned off, and the browser cache is poisoned with an exploit providing a WebSocket to the outside world. Even after PoisonTap is unplugged, an attacker can remotely send commands to the target computer and force the browser to execute JavaScript. From there, it’s all pretty much over.

Of course, any device designed to plug into a USB port and run a few exploits has a few limitations. PoisonTap only works if a browser is running. PoisonTap does not work on HTTPS cookies with the Secure cookie flag set. PoisonTap does not work if you have filled your USB ports with epoxy. There are a thousand limitations to PoisonTap, all of which probably don’t apply if you take PoisonTap into any office, plug it into a computer, and walk away. That is, after all, the point of this exploit.

As with all ub3r-1337 pen testing tools, we expect to see a version of PoisonTap for sale next August in the vendor area of DEF CON. Don’t buy it. A Raspberry Pi Zero costs $5, a USB OTG cable less than that, and all the code is available on Github. If you buy a device like PoisonTap, you are too technically illiterate to use it.

[Samy] has a demonstration of PoisonTap in the video below.

Continue reading “PoisonTap Makes Raspberry Pi Zero Exploit Locked Computers”

How To Control Your Instruments From A Computer: It’s Easier Than You Think

There was a time when instruments sporting a GPIB connector (General Purpose Interface Bus) for computer control on their back panels were expensive and exotic devices, unlikely to be found on the bench of a hardware hacker. Your employer or university would have had them, but you’d have been more likely to own an all-analogue bench that would have been familiar to your parents’ generation.

A GPIB/IEEE488 plug. Alkamid [CC BY-SA 3.], via Wikimedia Commons
A GPIB/IEEE488 plug. Alkamid [CC BY-SA 3.], via Wikimedia Commons.
The affordable instruments in front of you today may not have a physical GPIB port, but the chances are they will have a USB port or even Ethernet over which you can exert the same control. The manufacturer will provide some software to allow you to use it, but if it doesn’t cost anything you’ll be lucky if it is either any good, or available for a platform other than Microsoft Windows.

So there you are, with an instrument that speaks a fully documented protocol through a physical interface you have plenty of spare sockets for, but if you’re a Linux user and especially if you don’t have an x86 processor, you’re a bit out of luck on the software front. Surely there must be a way to make your computer talk to it!

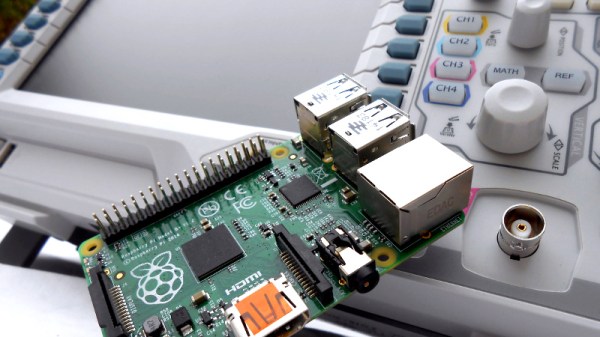
Let’s give it a try — I’ll be using a Linux machine and a popular brand of oscilloscope but the technique is widely applicable.

Continue reading “How To Control Your Instruments From A Computer: It’s Easier Than You Think”