Is Your Wireless Charger Working?

It’s that time of year at which the Christmas lights are coming out of storage, isn’t it. Some modern seasonal rituals: untangling half a mile of fairy lights, and replacing a pile of CR2032 cells in LED candles.

[RobBest] had a solution to the latter, owning a set of nifty rechargeable LED candles that came with their own wireless charger. Sadly the charger wasn’t working quite as intended, as the indicator light to show when it had finished its cycle was always on. How could he indicate that the induction system was in operation?

His answer was to take a non-functioning candle and strip it down to expose its induction pick-up coil. He could have simply hooked it up to an LED for a quick result, but since the device in question was a candle it made sense to give it a candle effect. A PIC microcontroller was therefore pressed into service to drive the LED with its PWM output, giving a pleasing flickering effect.

You don’t have to own a set of electronic candles to have a go at wireless charging. Instead you could try a trip to IKEA.

Continuity Tester Uses The ATtiny85’s Comparator

There’s an inside joke among cyclists – the number of bikes you need is “n+1”, where “n” is your current number of bikes. The same probably also applies to the number of tools and equipment a hacker needs on their workbench. Enough is never enough. Although [David Johnson-Davies] has a couple of multimeters lying around, he still felt the urge to build a stand-alone continuity tester and has posted details for a super-simple ATtiny85 based Continuity Tester on his blog. For a device this simple, he set himself some tall design goals. Using the ATtiny85 and a few SMD discretes, he built a handy tester that met all of his requirements and then some.

The ATtiny85’s Analog Comparator function is perfectly suited for such a tester. One input of the comparator is biased such that there is a 51 ohm resistor between the input and ground. The output of the comparator toggles when the resistance between the other input and ground is either higher or lower than 51 ohms. Enabling internal pullup resistors in the ATtiny85 not only takes care of proper biasing of the comparator pins, but also helps reduce current consumption when the ATtiny85 is put to sleep. The test current is limited to 100 μA, making the tester suitable for use in sensitive electronics. And enabling the sleep function after 60 seconds of inactivity reduces standby current to just about 1 μA, so there is no need for a power switch. [David] reckons the CR927 button cell ought to last pretty long.

For those interested in building this handy tester, [David] has shared the Eagle CAD files as well as the ATtiny85 code on his Github repository or you could just order out some boards from OSHpark.

Stepper Driver Module With Swappable Heatsinks

At first glance, [Dean Gouramanis]’s stepper driver module for 3D printers looks like just another RAMPS-compatible stepper board. Except, what could that gold-plated copper peg sticking out of the PCB possibly be? That would be [Dean]’s PowerPeg Thermal Management System that he built and entered in the Hackaday Prize competition for 2015, where it rocked its way into the Finals. It’s a thermal connector peg that attaches to a variety of heatsinks so you can swap in whatever sink fits the bill.

In the case of this project, [Dean] created a custom PCB that accommodates the PowerPeg connector, onto which the heat sink screws. Needless to say, he machined his own heatsinks to go with the pegs, though it looks like you could use any sink with enough surface contact that can be secured by the same #0-80 screw.

You shouldn’t be surprised that hackers obsess over heatsinks. This heatsink tester project we published helps determine which sink  to use. Another post gives all the ins and outs of ordering a custom heatsink.

AsciiCam: Make ASCII Art With Your Phone

We admit it, we have a nostalgic soft spot for ASCII Art. Pictures made form characters, printed on an old-fashioned line printer. They’ve been a hacker standby since the 1960’s. Times have moved on though. These days we’re all carrying supercomputers in our pockets.  Why not use them to create more great ASCII art? That’s exactly what [Brian Nenninger] did with AsciiCam. AsciiCam lets you use your Android phone’s camera to create ASCII images.

Using the software is simple. Just launch it and you’re greeted with an ASCII preview of the camera image. Users can select from a 16 color palette and full 24 bit color. Monochrome modes are also available. You can also choose from black text on a white background or white text on black.

The great thing about AsciiCam is the fact that it is open source. You can download the full source code from Github. If you just want to run the software, it’s available through the Google Play Store. This is a labor of love. The first Github commits were six years ago, and [Bran] is still working — the most recent commits were made only a few days back. AsciiCam is also a good example for neophyte Android programmers.

Want to know more about ASCII art? Check out Al’s history of ASCII art, or this talk about both ASCII and ANSI creations.

A Callout: Parts For An Iron Lung

Polio was a disease that devastated the United States in the 1950s, but with concerted efforts towards vaccination, is now on the verge of eradication. With the disease a distant memory for most, it’s easy to miss the fact that there are still those suffering the effects of the disease decades after its initial strike.

The iron lung was an invention that helped keep thousands of sufferers alive, by breathing for those who had lost the ability through the degenerative effects of the disease. A small handful of people are still relying on those machines today, and there’s a problem – who is around to keep these machines running?

The story is a powerful one, made up of interviews with those who still rely on their machines on a daily basis to stay alive. Particularly poignant is Lillard’s account of the repairman who came to fix her machine, and tried to leave before putting it back together. As someone who needs the machine operational to survive, this obviously wasn’t going to cut it.

Overall, these are people who have relied on help from friends, neighbours, and local tinkerers to help keep their machines running long after the companies responsible have long stopped supporting the hardware. This has led to an unenviable situation for Lillard herself – she’s no longer able to purchase replacement collars that seal her neck to the machine, as the subsidiary of Phillips responsible only has ten left in the country and will no longer sell to her. Naomi Wu and others are organising on Twitter to find a way to remanufacture these parts. If you’re in the know, or otherwise have the expertise, get involved or throw your ideas down in the comments.

It’s not the first time we’ve heard dark stories of medical equipment from years past – the story of the Therac-25 is particularly chilling.

[via Gizmodo]

Low-End Parts Make Tesla Coil With A High-End Look

We all know the saying: cheap, fast, or good — pick any two. That rule seems to apply across the spectrum of hackerdom, from software projects to hardware builds. But this DIY Tesla coil build might just manage to deliver on all three.

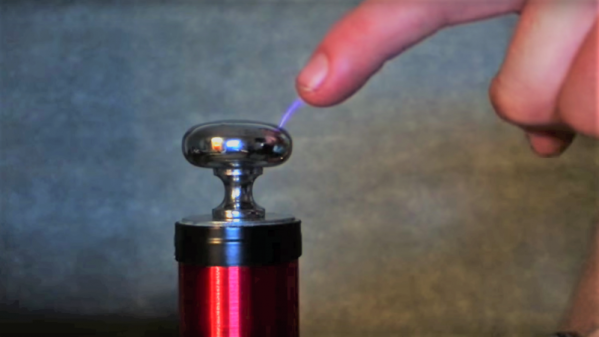
Cheap? [Jay Bowles]’ Tesla coil is based on a handheld bug zapper that you can find for a couple of bucks, or borrow from the top of the fridge in the relatively bug-free winter months. The spark gap is just a couple of screws set into scraps of nylon cutting board — nothing fancy there. Fast? Almost everything needed to build this is stuff lying around the house, and depending on the state of your junk bin you may not even have to order the polypropylene caps [Jay] recommends. Good? That’s a relative term, of course, and if you define it as a coil capable of putting out pumpkin-slaying lightning bolts or playing “Yakkity Sax”, you’ll likely be disappointed. But there’s no denying that this Tesla coil looks good, from its Lexan base to the door-pull top load. And running off a couple of AA batteries, it’s safe to use too.

[Jay] put a lot of care into winding and dressing the secondary coil neatly, and the whole thing would look great as a desktop toy. Not into the winding part? You can always etch a PCB Tesla coil instead.

Continue reading “Low-End Parts Make Tesla Coil With A High-End Look”

Fixing Linux Audio One Chipset At A Time

Linux audio may be confusing for the uninitiated. As a system that has evolved and spawned at least two independent branches over time it tends to produce results that surprise or irritate the user. On the other hand it is open source software and thus can be fixed if you know what you do.

Over at reddit [rener2] was annoyed by the fact that listening to music on his laptop was a significantly worse experience under Linux than under Windows. Running Windows the output of  the headphone jack covered the whole spectrum while his Linux set up cut off the low end resulting in a tinny sound. The culprit in this is the sound card: it has two different output paths for the internal speakers and the headphone jack. The signal for the internal speakers is routed through a high pass filter to spare them the embarrassment of failure to reproduce low frequencies.

When headphones are plugged in, the sound card driver is supposed to make the sound card bypass the filter and deliver the full spectrum. The authors of the Windows driver knew this and had it taken care of. In his video [rener2] runs us through the process of patching the ALSA driver while referencing the documentation of a sound card that he deems ‘similar enough’ to his Realtek ALC288.

Continue reading “Fixing Linux Audio One Chipset At A Time”