Mine Bitcoin With An ESP8266

With all the hype surrounding cryptocurrencies and the current high not quite so high but still pretty eye-watering price of Bitcoin, there are some things which might once have been pure folly that could now be deemed worthy of pursuit. There is an excavation mission being considered to unearth a hard drive containing an early Bitcoin wallet in a Welsh landfill, for instance. But a more approachable task for you may be the possibility of mining using minimal hardware.

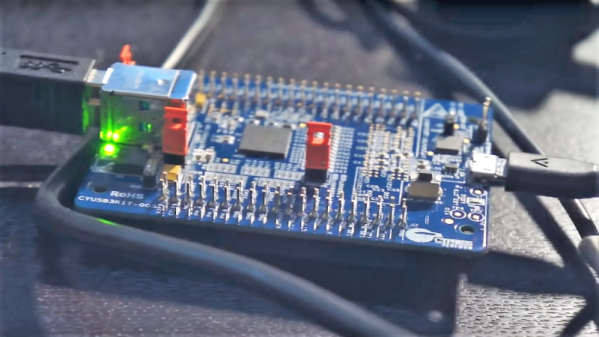
Take [Merlot Machina]’s project for example, implementing a Bitcoin miner on an ESP8266. Part of this is the timeless pursuit of answering the joke question: “Will it mine Bitcoin”, and the other part is looking at this like a lottery ticket. Is it a worthwhile punt at a prize for a minimal investment?

He gives us a rundown of some of the statistics involved, and comes away with the conclusion that it is something like a not-very-good lottery ticket. The ESP performs 1200 hashes per second while the entire Bitcoin community manages about 1.2 exahashes per second. This he calculates gives him a 1 in 1016 chance of mining a block every ten minutes, which for the tiny cost of an ESP and its relatively frugal power budget is a chance he sees as worth taking.

So far he has implemented the hashing algorithm and verified it against a known hash on an already-mined block. At this point though he’s hit a roadblock in the need to run Bitcoin core on a server to keep the ESP supplied with new block headers, so the ESP miner remains a proof of concept. The write-up is still an interesting read though, and given that many readers will have a few spare ESP boards it’s possible that one of you may take it to the next level and Win It Big. If that’s you, you’ll be able to sit on your private island sipping a cool drink, and laugh at the commenters who said it would never happen. Meanwhile here at Hackaday we’ll stick to tried-and-trusted revenue generation strategies, such as bringing you the latest hardware hacks.

This might seem a peculiarly slow miner, but it’s not the slowest we’ve seen by any means. The ever-prolific [Ken Shirriff] has tried it on an IBM 1401 mainframe and a Xerox Alto, and you can of course do it the old-fashioned way.

Upgrading A 3D Printer With OctoPrint

If you’ve been hanging around 3D printing communities, or reading the various 3D printing posts that have popped up here on Hackaday, you’ve almost certainly heard of OctoPrint. Created and maintained by Gina Häußge, OctoPrint allows you to turn an old computer (or more commonly a small ARM board like the Raspberry Pi or BeagleBone) into a network-accessible control panel for your 3D printer. Thanks to a thriving collection of community developed plugins, it can even control other hardware such as lights, enclosure heaters, smart plugs, or anything else you can think to hook onto the GPIO pins of your chosen ARM board. The project has become so popular that the new Prusa i3 MK3 has a header on the control board specifically for connecting a Pi Zero W running OctoPrint.

Even still, I never personally “got” OctoPrint. I was happy enough with my single printer connected to my computer and controlled directly from my slicer over USB. The majority of the things I print are of my own design, so when setting up the printer it only seemed logical that I would have it connected to the machine I’d be doing my designing on. If I’m sitting at my computer, I just need to rotate my chair to the right and I’m at my printer. What do I need to control the thing over WiFi for?

But things got tricky when I wanted to set up a second printer to help with speeding up larger projects. I couldn’t control them both from the same machine, and while I could print from SD on the second printer if I really had to, the idea seemed painfully antiquated. It would be like when Scotty tried talking into the computer’s mouse in “Voyage Home”. Whether I “got it” or not, I was about to dive headfirst into the world of OctoPrint.

Continue reading “Upgrading A 3D Printer With OctoPrint”

Spite, Thrift, And The Virtues Of An Affordable Logic Analyzer

[Larry Wall], the father of Perl, lists the three great virtues of all programmers: Laziness, Impatience, and Hubris. After seeing that Saleae jacked up the prices on their popular logic analyzers to ludicrous levels, [CNLohr] added a fourth virtue: Spite. And since his tests with a Cypress FX3 over the last few days may lead to a dirt-cheap DIY logic analyzer, we may soon be able to add another virtue: Thrift.

The story begins a year or two ago when [CNLohr] got a Cypress FX3 development board for $45. The board sat unused for want of a Windows machine, but after seeing our recent article on a minimalist logic analyzer based on an FX2, he started playing with the board to see if it could fan the flames of his Saleae hatred. The FX3 is a neat little chip that has a 100-MHz General Programmable Interface (GPIF) bus that basically lets it act like an easy to use FPGA.

Prepared to spend months on the project, he was surprised to make significant progress on his mission of spiteful thrift within a few days, reading 16 bits off the GPIF at over 200 megabytes per second and dumping it over the USB 3.0 port. [Charles]’ libraries for the FX3 lay the foundation for a lot of cool stuff, from logic analyzers to SDRs and beyond — now someone just has to build them.

The search for a cheap but capable logic analyzer is nothing new, of course. Last year, both [Jenny List] and [Bil Herd] looked at the $22 iCEstick as a potential Saleae beater.

Continue reading “Spite, Thrift, And The Virtues Of An Affordable Logic Analyzer”

Why Sony’s Trinitron Tubes Were The Best

If you’re old enough to remember Cathode Ray Tube (CRT) Televisions, you probably remember that Sony sold the top products. Their Trinitron tubes always made the best TVs and Computer Monitors. [Alec Watson] dives into the history of the Sony Trinitron tube.

Sony Color TVs didn’t start with Trinitron — for several years, Sony sold Chromatron tubes. Chromatron tubes used individually charged wires placed just behind the phosphor screen. The tubes worked, but they were expensive and didn’t offer any advantage over common shadow mask tubes. It was clear the company had to innovate, and thanks to some creative engineering, the Trinitron was born.

Closeup of a Trinitron tube shows unbroken vertical stripes which led to a brighter picture.

All color TV’s shoot three electron guns at a phosphor screen. Typical color TVs use a shadow mask — a metal sheet with tiny holes cut out. The holes ensure that the electron guns hit only the red, green and blue dots of phosphor. Trinitrons use vertical bars of single phosphor color and a picket fence like aperture grille. The aperture grill blocks less of the electron beam than a shadow mask, which results in a much brighter image. Trinitrons also use a single electron gun, with three separate cathodes.

[Alec] is doing some amazing work describing early TV systems and retro consumer electronics over on his YouTube channel, Technology Connections. We’ve added him to our Must watch subscription list.

Interested in retro CRTs? Check out Dan’s article on cleaning up the fogged plastic safety screen on the front of many CRTs.

Continue reading “Why Sony’s Trinitron Tubes Were The Best”