We don’t think [bleepbit] will take offense when we say the “poor man’s theremin” looks cheesy — after all, it was built in a cheese container. Actually, it isn’t a bad case for a simple device, as you can see in the picture and the video below. Unlike a traditional theremin, the device uses ultrasonics to detect how far away your hand is and modifies the sound based on that.
There are also two buttons — one to turn the sound off and another to cycle through some effects. We liked how it looked like a retro cassette, though. The device uses a cheap Arduino clone, but even with a real Arduino, the price wouldn’t be too bad. However, the price tag quoted doesn’t include a few connectors or the speaker that appears in the schematic. There’s a note that the model built uses a jack instead of a speaker, but it would be nice to include both and use the kind of jack that disconnects the speaker when you plug speakers or headphones in.
When using an Arduino, at least once you’ve made it past blinking LEDs, you might start making use of the serial connection to send and receive information from the microcontroller. Communicating with the board while it’s interacting with its environment is a crucial way to get information in real-time. Usually, that’s as far as it goes, but [Pieter] wanted to take it a step farther than that with his command line interpreter (CLI) for the Arduino.
The CLI allows the user to run Unix-like commands directly on the Arduino. This means control of GPIO and the rest of the features of the microcontroller via command line. The CLI communicates between the microcontroller and the ANSI/VT100 terminal emulator of your choosing on your computer, enabling a wealth of new methods of interacting with an Arduino.
The CLI requires a hex file to be loaded onto the Arduino that you can find at a separate site, also maintained by [Pieter]. Once that’s running, you can get all of that sweet command line goodness out of your Arduino. [Pieter] also has some examples on his project page, as well as the complete how-to to get this all set up and running. There’s a lot going on in the command line world, in Linux as well as windows. So there’s plenty to explore there as well.
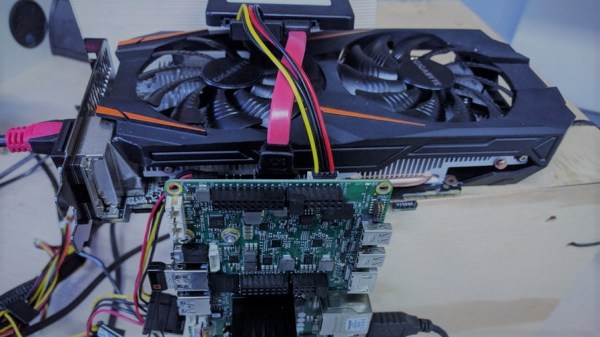
It’s about convenience when it comes to single board computers. The trade-off of raw compute power for size means the bulk of them end up being ARM based, but there are a few exceptions like the x86 based Udoo Ultra. The embedded Intel 405 GPU on the Udoo Ultra is better than most in the category, but that won’t begin to play much of anything outside of a browser window. Not satisfied with “standard” [Matteo] put together his build combining an Udoo x86 Ultra with a NVIDIA 1060 GPU. It seems ridiculous to have an expansion card almost three times longer than the entire computer its attached to, but since when did being ridiculous stop anyone in the pursuit of a few more polygons?
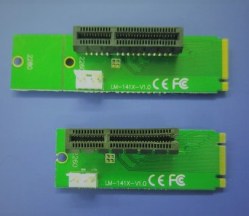
M.2 to PCIe adapter board (Top) Trimmed adapter board (Bottom)
Since the Udoo Ultra doesn’t feature a PCIe slot [Matteo] slotted in a M.2 to PCIe adapter board. There are two PCIe lines accessible by the Udoo Ultra’s M.2 port although trimming the adapter board was required in order to fit. The PCIe female slot was cut open to allow the 1060 GPU to slide in. All of the throughput of the 1060 GPU wouldn’t be utilized given the Udoo Ultra’s limitations anyway.
Windows 10 was the OS chosen for the machine so that all those NVIDIA drivers could be installed, and there’s also the added benefit of being able to sneak in a little Trackmania Turbo too. So to accompany the build, [Matteo] created a graphics comparison video to show the remarkable improvement over the embedded graphics chip. You can see the Time Spy benchmark results in the video below.
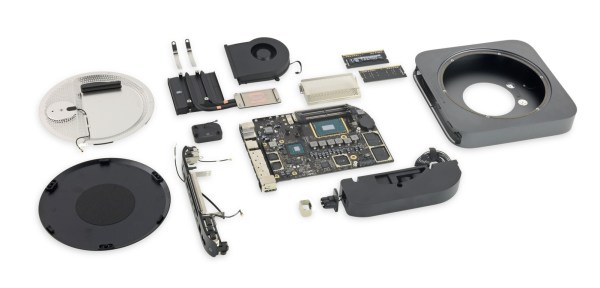
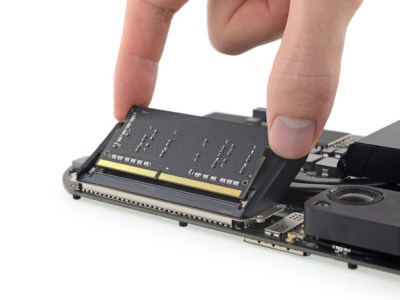
It’s been four long years since Apple has refreshed their entry-level desktop line. Those that have been waiting for a redesign of the Mac Mini can now collectively exhale as the Late 2018 edition has officially been released. Thanks to [iFixit] we have a clearer view of what’s changed in the new model as they posted a complete teardown of the Mac Mini over on their website.
One of the most welcomed changes is that the DDR4 RAM is actually user upgradeable this time around. Previously RAM was soldered directly to the motherboard, and there were no SO-DIMM slots to speak of. The 2018 Mac Mini’s RAM has also been doubled to 8GB compared to the 4GB in the 2014 model. Storage capacity may have taken a hit in the redesign, but the inclusion of a 128GB PCIe SSD in the base model fairs better than the 500GB HDD of old. The number of ports were flip-flopped between the two model generations with the 2018 Mini featuring four Thunderbolt ports along with two USB 3.0 ports. Though the biggest upgrade lies with the CPU. The base 2018 Mac Mini comes with a 3.6GHz quad-core Intel Core i3 as compared to the 2014’s 1.4GHz dual-core Intel Core i5.
Although Apple lacked “the courage” to drop the 3.5mm headphone jack this time around, they did retain the same footprint for Mac Mini redesign. It still provides HDMI as the default display out port, although the additional Thunderbolt ports provide additional options via an adapter. A quick overview of the spec differences between the 2018 and 2014 base Mac Mini models have been summarized below.
In 1961, FCC Commissioner [Newt Minow] famously described TV as a “vast wasteland.” But TV can do great things; educational programming, news coverage, and great performances do appear, just not all that often. You can draw the same parallels to the Internet. Sure, it’s mostly cat pictures, snarky comments, and posts of what your friends had for dinner. But it can also be a powerful tool, especially for education. Recently, top-name schools and other institutions have posted courses online for everything from Python to Quantum Mechanics to Dutch. The problems are finding these classes and figuring out which ones are gems and which are duds. A site called Class-Central aims to solve these problems.
The site aggregates class descriptions from a variety of sources like edX, Coursea, and more. Users can rate the classes. Many of these courses are free to take. The recent trend is to offer the content for free, but charge for people who want an assessment, such as a certificate of completion or even a full-blown degree. Even then, the cost is typically far less than traditional college costs.
There’s also news about courses. For example, a recent post highlighted that edX now offers nine online master’s degrees in conjunction with major schools. A computer science masters from the University of Texas, for example, runs about $10,000. A Georgia Tech cybersecurity masters degree costs even less. There are another seven not ready yet, including one for electrical engineering.
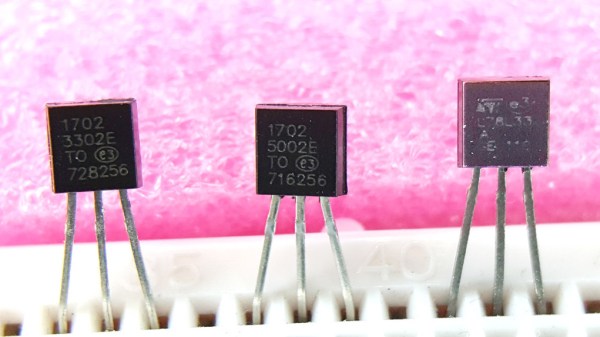
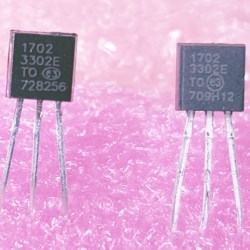
[Charles Ouweland] purchased some parts off Aliexpress and noticed that the Texas Instruments logo on some of his parts wasn’t the Texas Instruments logo at all, it was just some kind of abstract shape that vaguely resembled the logo. Suspicious and a little curious, he decided to take a closer look at the MCP1702 3.3v LDO regulators he ordered as well. Testing revealed that they were counterfeits with poor performance.
Looking at the packages, there were some superficial differences in the markings of the counterfeit MCP1702 versus genuine parts from Microchip, but nothing obviously out of place. To conclusively test the devices, [Charles] referred to Microchip’s datasheet. It stated that the dropout voltage of the part should be measured by having the regulator supply the maximum rated 250 mA in short pulses to avoid any complications from the part heating up. After setting up an appropriate test circuit with a 555 timer to generate the pulses for low duty cycle activation, [Charles] discovered that the counterfeit parts did not meet Microchip specifications. While the suspect unit did output 3.3 V, the output oscillated badly after activation and the dropout voltage was 1.2 V, considerably higher than the typical dropout voltage of 525 mV for the part, and higher even than the maximum of 725 mV. His conclusion? The parts would be usable in the right conditions, but they were clearly fakes.
The usual recourse when one has received counterfeit parts is to dump them into the parts bin (or the trash) and perhaps strive to be less unlucky in the future, but [Charles] decided to submit a refund request and to his mild surprise, Aliexpress swiftly approved a refund for the substandard parts.
While a refund is appropriate, [Charles] seems to interpret the swift refund as a sort of admission of guilt on the part of the reseller. Is getting a refund for counterfeit parts a best-case outcome, evidence of wrongdoing, or simply an indication that low value refund requests get more easily approved? You be the judge of that, but if nothing else, [Charles] reminds us that fake parts may be useful for something perhaps unexpected: a refund.
Producing colored smoke requires a slightly different tack than making a simpler white smoke device. Colored smokes use dyes that are temperature sensitive, and thus the reaction temperature must be controlled carefully. This is achieved by choosing a potassium chlorate oxidiser, and combining it with magnesium carbonate and sodium bicarbonate, which help stop the reaction getting too hot. Sugar is used as the primary fuel, with both lactose and sucrose being fit for purpose. Color is then added with solvent-based dyes, readily sourced online. These are stable at higher temperatures than typical water-based food grade dyes, and thus are the best choice for creating thick, vibrant colored smoke.
[Tech Ingredients] does a great job of explaining both the theory behind the work, as well as the practical considerations necessary to be successful. The video is the result of much experimentation and work off-camera, which shows in the final presentation. If you’ve been working on your own pyrotechnic creations, be sure to hit up the tips line. Video after the break.