Motorized Magic Over HDMI

There is a certain warmth that seems to emanate from stereo receivers of the 70s, 80s, and 90s. Despite their large footprint and considerable heft, the soft glow of the indicator lights and solid kerthunk of switches provide a sense of coziness. When [Tom] recently swapped his receiver for a 1970s Pioneer SX-950, he found himself getting up from the couch to adjust the volume when watching TV far too often for his liking. Resolving to do something about it, he added some magic in the form of a motorized volume knob. One of the coolest tricks for stereos was to have a small motor attached to the volume knob so that it could turn the volume up or down via a remote.

The first obstacle came when [Tom] had to forgo the center tap on the potentiometer to get a motorized one. This meant the volume compensation feature would be disabled, which is but a small price to pay for convenience. After scouring the internet, he finally had the part in hand only to discover some troublesome capacitors in the way. The new pot had a rather large motor hanging off the back that the previous one didn’t have. Fortunately, there was a good bit of space between the PCB and the bottom of the chassis, so Tom was able to just flip the capacitors to the underside of the board and bend them on their sides.

The next problem to solve was how to change the volume remotely. IR was considered as well as optical cable control signals. What [Tom] did instead was to implement HDMI CEC (consumer electronics control). CEC was well documented and seemed simple to implement on an ATTINY4313 with the help of a half-H driver. The CEC protocol implemented by [Tom’s] TV seemed to be very sensitive to timing, so an external crystal was used to get more precise timing and additional handshaking was implemented to get the TV to accept the microcontroller as valid. A few fail-safes were added to make sure the motor didn’t burn out if something went wrong with the CEC protocol and a nice enclosure wrapped up the build quite nicely.

We’ve seen CEC implemented before on a PIC 18F87J50, but as a sender of CEC commands not a receiver. [Tom’s] code is available on GitHub and might prove useful if you’re looking to implement CEC on an AVR.

Thanks [Tom] for sending this one in!

TTGO ESP32 Module With Multiple Personalities

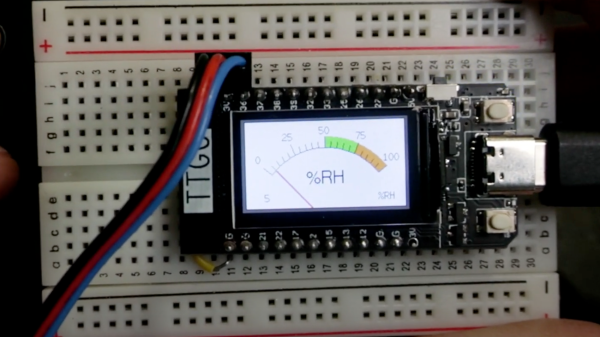
Volos Projects educator [Danko Bertović] had a TTGO ESP32 board looking for a project, so he implemented a surprisingly functional weather station for such a small screen. Presumably that was too boring for him, so he decided to write a version of the classic Atari game Breakout instead. [Danko] prefers using the Arduino IDE for ESP32 projects, and has made the Breakout software available as an Arduino sketch. We hope the weather station sketch will be released soon, too. The TTGO is a small ESP32 board with an ST7789V 1.14 in (29 mm) TFT color display, available from your favorite Shenzhen market supplier. This platform is perfect for all kinds of niche applications. We’d love to hear how you are using, or plan to use, these modules in your projects.

We wrote about one such project last summer, where a similar TTGO module was used to display 50-year broadcast delayed transcripts of the Apollo 11 mission. [Danko] is no stranger to Hackaday — he has made several Arduino-based calculator projects.  Perhaps the most remarkable being the circuit sculpture binary number calculator from last year, another project that morphed into a computer game (Pong).

Continue reading “TTGO ESP32 Module With Multiple Personalities”

Ethernet At 40: From A Napkin Sketch To Multi-Gigabit Links

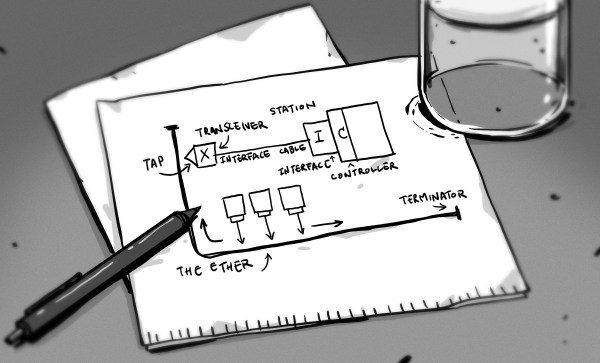
September 30th, 1980 is the day when Ethernet was first commercially introduced, making it exactly forty years ago this year. It was first defined in a patent filed by Xerox as a 10 Mb/s networking protocol in 1975, introduced to the market in 1980 and subsequently standardized in 1983 by the IEEE as IEEE 802.3. Over the next thirty-seven years, this standard would see numerous updates and revisions.

Included in the present Ethernet standard are not just the different speed grades from the original 10 Mbit/s to today’s maximum 400 Gb/s speeds, but also the countless changes to the core protocol to enable these ever higher data rates, not to mention new applications of Ethernet such as power delivery and backplane routing. The reliability and cost-effectiveness of Ethernet would result in the 1990 10BASE-T Ethernet standard (802.3i-1990) that gradually found itself implemented on desktop PCs.

With Ethernet these days being as present as the presumed luminiferous aether that it was named after, this seems like a good point to look at what made Ethernet so different from other solutions, and what changes it had to undergo to keep up with the demands of an ever-more interconnected world. Continue reading “Ethernet At 40: From A Napkin Sketch To Multi-Gigabit Links”

Bench Supplies Get Smaller Thanks To USB-C

Bench power supplies are an indispensable tool when prototyping electronics. Being able to set custom voltages and having some sort of current limiting feature are key to making sure that the smoke stays inside all of the parts. Buying a modern bench supply might be a little too expensive though, and converting an ATX power supply can be janky and unreliable. Thanks to the miracle of USB-C, though, you can build your own fully-featured benchtop power supply like [Brian] did without taking up hardly any space, and for only around $12.

USB-C can be used to deliver up to 100W but is limited to a few set voltage levels. For voltages that USB-C doesn’t support, [Brian] turns to an inexpensive ZK-4KX buck-boost DC-DC converter that allows for millivolt-level precision for his supply’s output. Another key aspect of using USB-C is making sure that your power supply can correctly negotiate for the amount of power that it needs. There’s an electronic handshake that goes on over the USB connection, and without it there’s not a useful amount of power that can be delivered. This build includes a small chip for performing this negotiation as well.

With all the electronics taken care of, [Brian] houses all of this in a 3D-printed enclosure complete with a set of banana plugs. While it may not be able to provide the wattage of a modern production unit, for most smaller use cases this would work perfectly. If you already have an ATX supply around, though, you can modify [Brian]’s build using that as the supply and case too.

Continue reading “Bench Supplies Get Smaller Thanks To USB-C”

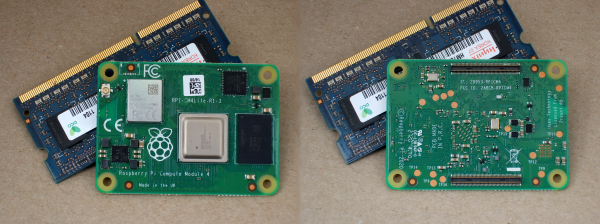
New Raspberry Pi 4 Compute Module: So Long SO-DIMM, Hello PCIe!

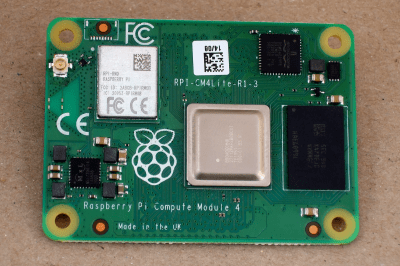
The brand new Raspberry Pi Compute Module 4 (CM4) was just released! Surprised? Nope, and we’re not either — the Raspberry Pi Foundation had hinted that it was going to release a compute module for the 4-series for a long while.

The form factor got a total overhaul, but there’s bigger changes in this little beastie than are visible at first glance, and we’re going to walk you through most of them. The foremost bonuses are the easy implementation of PCIe and NVMe, making it possible to get data in and out of SSDs ridiculously fast. Combined with optional WiFi/Bluetooth and easily designed Gigabit Ethernet, the CM4 is a connectivity monster.

One of the classic want-to-build-it-with-a-Pi projects is the ultra-fast home NAS. The CM4 makes this finally possible.

If you don’t know the compute modules, they are stripped-down versions of what you probably think of as a Raspberry Pi, which is officially known as the “Model B” form-factor. Aimed at commercial applications, the compute modules lack many of the creature comforts of their bigger siblings, but they trade those for flexibility in design and allow for some extra functionality.

The compute modules aren’t exactly beginner friendly, but we’re positively impressed by how far Team Raspberry has been able to make this module accessible to the intermediate hacker. Most of this is down to the open design of the IO Breakout board that also got released today. With completely open KiCAD design files, if you can edit and order a PCB, and then reflow-solder what arrives in the mail, you can design for the CM4. The benefit is a lighter, cheaper, and yet significantly more customizable platform that packs the power of the Raspberry Pi 4 into a low-profile 40 mm x 55 mm package.

So let’s see what’s new, and then look a little bit into what is necessary to incorporate a compute module into your own design.

Continue reading “New Raspberry Pi 4 Compute Module: So Long SO-DIMM, Hello PCIe!”