A Tiny Tuner For The Low Power Ham

Something that all radio amateurs encounter sooner or later is the subject of impedance matching. If you’d like to make sure all that power is transferred from your transmitter into the antenna and not reflected back into your power amplifier, there’s a need for the impedance of the one to match that of the other. Most antennas aren’t quite the desired 50 ohms impedance, so part of the standard equipment becomes an antenna tuner — an impedance matching network. For high-power hams these are big boxes full of chunky variable capacitors and big air cored inductors, but that doesn’t exclude the low-power ham from the impedance matching party. [Barbaros Aşuroğlu WB2CBA] has designed the perfect device for them: the credit card ATU.

The circuit of an antenna tuner is simple enough, two capacitors and an inductor in a so-called Pi-network because of its superficial resemblance to the Greek letter Pi. The idea is to vary the capacitances and inductance to find the best match, and on this tiny model it’s done through a set of miniature rotary switches. There are a set of slide switches to vary the configuration or switch in a load, and there’s even a simple matching indicator circuit.

We like this project, in that it elegantly provides an extremely useful piece of equipment, all integrated into a tiny footprint. It’s certainly not the first ATU we’ve brought you.

Thanks [ftg] for the tip!

M1 Development Board From Scraps

Apple is fairly notorious for building devices that are difficult to repair, but with the right tools it’s often not completely impossible to circumvent some of their barriers. As they say, every lock has a key. [dosdude1] has wanted a specific M1 development board for a while now and has been slowly piecing together everything he needs to cobble one together, and finally got this unit running despite many roadblocks put in his way by Apple.

The development kit is a Developer Transition Kit  or “DTK” meant for developers during Apple’s transition from Intel chips to their own in-house ARM-based M1 platform. This particular version is in a Mac Mini form factor but it has a few hurdles to clear before it powers on. First, the board was cut in a critical location that shorted out many of the PCB layers, so this had to be carefully filed down to remove the shorts. It was also missing a few tiny surface mount components and a NAND chip, but these were scavenged from other scrapped parts and assembled into a fully working machine.

There are a number of other non-physical problems to solve here as well, too. Apple coded their NAND chips to work with specific WiFi modules so if these aren’t programmed to work together the computer will get stuck in a boot loop. But with that and a few other details out of the way [dosdude1] finally has his DTK up and running in a 2018 Mac Mini chassis, right down to the working power LEDs. We’ve seen all kinds of PCB damage before (although not often quite this intricate) and even PCBs repaired that were snapped in half.

Thanks to [CodeAsm] for the tip!

Continue reading “M1 Development Board From Scraps”

Hack Your Own Adventure Story With Yarn Spinner

We are big fans of programmed texts for education. You know, the kind where you answer a question and go to a new page based on your answer. But they can also be entertaining “choose your own adventure” stories. You might say, “You are standing in front of an oak door, two meters high, with an iron handle. Do you a) open it? b) knock on it? c) ignore it?” Then, based on your answer, you go to a different part of the story. These are tough to write, but you can get some help using Yarn Spinner and the Yarn scripting language.

The original purpose of Yarn is to produce conversations for games. There’s a tutorial for that. The difference is to produce a book, you get a choose your own adventure PDF at the end. For the tutorial, you can try to read the text on the left-hand side of the editor or just press Test (at the top) and let it “read” the tutorial to you, which is a little more fluid.

Continue reading “Hack Your Own Adventure Story With Yarn Spinner”

How Italians Got Their Power

We take for granted that electrical power standards are generally unified across countries and territories. Europe for instance has a standard at 230 volts AC, with a wide enough voltage acceptance band to accommodate places still running at 220 or 240 volts. Even the sockets maintain a level of compatibility across territories, with a few notable exceptions.

It was not always this way though, and to illustrate this we have [Sam], who’s provided us with a potted history of mains power in Italy. The complex twists and turns of power delivery in that country reflect the diversity of the power industry in the late 19th and early 20th century as the technology spread across the continent.

Starting with a table showing the impressive range of voltages found across the country from differing power countries, it delves into the taxation of power in Italy which led to two entirely different plug standards, and their 110/220 volt system. Nationalization may have ironed out some of the kinks and unified 220 volts across the country, but the two plugs remain.

Altogether it’s a fascinating read, and one which brings to mind that where this is being written you could still find a few years ago some houses with three sizes of the archaic British round-pin socket. Interested in the diversity of plugs? We have a link for that.

Students’ Leaf Blower Suppressor To Hit Retail

Electric leaf blowers are already far quieter than their gas-powered peers, but they still aren’t the kind of thing you’d like to hear first-thing on a Saturday morning. Looking to improve on the situation, a group of students from Johns Hopkins University have successfully designed a 3D printed add-on that manages to significantly reduce the noise generated by a modern electric leaf blower without compromising the amount of air it’s able to move. The device has proven to be so successful in tests that Stanley Black & Decker is looking to put a commercial version of the device on store shelves within the next two years.

The team says the first part of the problem was identifying where the noise was actually coming from. After taking an example leaf blower apart and studying all of its moving components, they determined that most of the noise produced wasn’t mechanical at all — what you’re actually hearing is the complex cacophony of high-speed air rushing out of the nozzle. With this knowledge in hand, they isolated the frequencies which were the harshest to the human ear and focused on canceling them out.

Continue reading “Students’ Leaf Blower Suppressor To Hit Retail”

About Right

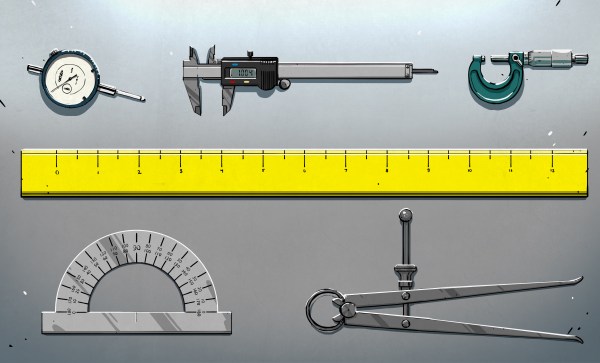
I really enjoyed reading Anne Ogborn’s piece on making simple DIY measurement devices for physical quantities like force, power, and torque. It is full of food for thought, if you’re building something small with motors and need to figure out how to spec them out.

A Push Stick

Aside from a few good examples, what I really took home from this piece is how easy it can be to take approximate measurements. Take the push stick, which is a spring-loaded plunger in a transparent barrel. You use it to measure force by, well, squeezing the spring and reading off how far it deflects. That’s obvious, but the real trick is in calibration by pushing it into a weighing scale and marking divisions on the barrel. That quickly and easily turns “it’s pressing this hard” into an actual numerical force measurement.

The accuracy and precision of the push stick are limited by the quality of your scale and the fineness of the pen tip that you use to mark the barrel. But when you’re just looking to choose among two servo motors, this kind of seat-of-the-pants measure is more than enough to buy the right part. Almost any actual measurement is better than a wild-ass guess, so don’t hold yourself to outrageous standards or think that improvised quantitative measurement devices aren’t going to get the job done.

Al Williams quoted a teacher of his as saying that the soul of metrology is “taking something you know and using it to find something you don’t know”, and that sums up this piece nicely. But it’s also almost a hacker manifesto: “take something you can do and use it to do something that you can’t (yet)”.

Got any good measurement hacks you’d like to share?

Flexures Keep This Printed Displacement Sensor In Line

When the job at hand is measuring something with micron-range precision, thoughts generally turn to a tool with a Mitutoyo or Starrett nameplate. But with a clever design and a little electronics know-how, it turns out you can 3D print a displacement sensor for measuring in the micron range for only about $10.

While the tool that [BubsBuilds] came up with isn’t as compact as a dial indicator and probably won’t win any industrial design awards, that doesn’t detract from its usefulness. And unlike a dial indicator — at least the analog type — this sensor outputs an easily digitized signal. That comes courtesy of a simple opto-interrupter sensor, which measures the position of a fine blade within its field of view. The blade is attached to a flexure that constrains its movement to a single plane; the other end of the flexure has a steel ball acting as a stylus. In use, any displacement of the stylus results in more or less light being received by the phototransistor in the opto-interrupter; the greater the deflection, the less light and the lower the current through the transistor. In addition to the sensor itself, [Bub] printed a calibration jig that allows precision gauge blocks or simple feeler gauges to be inserted in front of the stylus. The voltage across the emitter resistor for these known displacements is then used to create a calibration curve.

[Bub] says he’s getting 5-micron repeatability with careful calibration and multiple measurements of each gauge block, which seems pretty impressive to us. If you don’t need the digital output, this compliant mechanism dial indicator might be helpful too. Continue reading “Flexures Keep This Printed Displacement Sensor In Line”