Vintage Hacks For Dot Matrix Printers In China

In an excerpt from his book The Chinese Computer: A Global History of the Information Age, [Thomas Mullaney] explains how 1980s computer tech — at least the stuff that was developed in the West — was stubbornly rooted in the Latin alphabet. After all, ASCII was king, and with 60,000 symbols, Chinese was decidedly difficult to shoehorn into 8 bits. Unicode was years in the future so, of course, ingenious hackers did what they do best: hack!

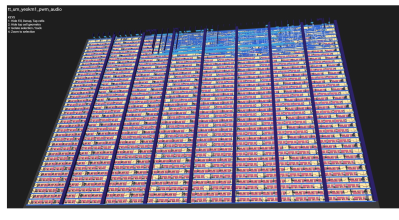
The subject of the post is the dot matrix printer. Early printers had nine pins, which was sufficient to make Latin characters in one pass. To print Chinese, each character required at least two passes of the print head. This was slow, of course, but it was also subject to confusing variations due to ink inconsistency and registration problems. It also made the Chinese characters twice as big as English text.

Initial attempts were made to use finer pins to pack twice as many dots in the same space. But this made the pins too thin and subject to bending and breaking. Instead, some engineers would retain the two passes but move the print head just slightly lower so the second pass left dots in the gaps between the first pass dots. Obviously, the first pass would print even-numbered dots (0, 2, 4,…), and the second pass would catch the odd-numbered dots. This wasn’t faster, of course, but it did produce better-looking characters.

While international languages still sometimes pose challenges, we’ve come a long way, as you can tell from this story. Of course, Chinese isn’t the only non-Latin language computers have to worry about.

Tired With Your Robot? Why Not Eat It?

Have you ever tired of playing with your latest robot invention and wished you could just eat it? Well, that’s exactly what a team of researchers is investigating. There is a fully funded research initiative (not an April Fools’ joke, as far as we know) delving into the possibilities of edible electronics and mechanical systems used in robotics. The team, led by EPFL in Switzerland, combines food process engineering, printed and molecular electronics, and soft robotics to create fully functional and practical robots that can be consumed at the end of 
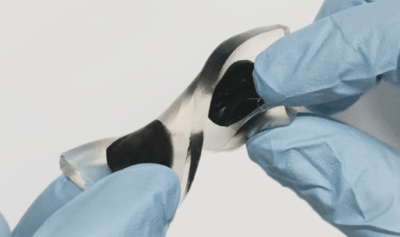
their lifespan. While the concept of food-based robots may seem unusual, the potential applications in medicine and reducing waste during food delivery are significant driving factors behind this idea.

The Robofood project (some articles are paywalled!) has clearly made some inroads into the many components needed. Take, for example, batteries. Normally, ingesting a battery would result in a trip to the emergency room, but an edible battery can be made from an anode of riboflavin (found in almonds and egg whites) and a cathode of quercetin, as we covered a while ago. The team proposed another battery using activated charcoal (AC) electrodes on a gelatin substrate. Water is split into its constituent oxygen and hydrogen by applying a voltage to the structure. These gasses adsorb into the AC surface and later recombine back into the water, providing a usable one-volt output for ten minutes with a similar charge time. This simple structure is reusable and, once expired, dissolves harmlessly in (simulated) gastric fluid in twenty minutes. Such a device could potentially power a GI-tract exploratory robot or other sensor devices.

But what use is power without control? (as some car tyre advert once said) Microfluidic control circuits can be created using a stack of edible materials, primarily oleogels, like ethyl cellulose, mixed with an organic oil such as olive oil. A microfluidic NOT gate combines a pressure-controlled switch with a fluid resistor as the ‘pull-up’. The switch has a horizontal flow channel with a blockage that is cleared when a control pressure is applied. As every electronic engineer knows, once you have a controlled switch and a resistor, you can build NOT gates and all the other logic functions, flip-flops, and memories. Although they are very slow, the control components are importantly edible.

Edible electronics don’t feature here often, but we did dig up this simple edible chocolate bunny that screams when you bite it. Who wouldn’t want one of those?

Build Your Own Tape Recorder/Player

If you want to read something from magnetic tape, you need a tape head, right? Or you could do like [Igor Brichkov] and make your own. It looks surprisingly simple. He used a washer with a small slot cut in it and a coil of wire.

The first experiment, in the first video below, is using a commercial tape head connected to a preamp. Music playing “through” the homemade head is readable by the commercial tape reader. This is a prelude to creating an entire tape deck using the head, which you can see in the second video below.

Continue reading “Build Your Own Tape Recorder/Player”

Tiny Tapeout 4: A PWM Clone Of Covox Speech Thing

Tiny Tapout is an interesting project, leveraging the power of cloud computing and collaborative purchasing to make the mysterious art of IC design more accessible for hardware hackers. [Yeo Kheng Meng] is one such hacker, and they have produced their very first custom IC for use with their retrocomputing efforts. As they lament, they left it a little late for the shuttle run submission deadline, so they came up with a very simple project with the equivalent behaviour of the Covox Speech Thing, which is just a basic R-2R ladder DAC hanging from a PC parallel port.

The computed gate-level routing of the ASIC layout

The plan was to capture an 8-bit input bus and compare it against a free-running counter. If the input value is larger than the counter, the output goes high; otherwise, it goes low. This produces a PWM waveform representing the input value. Following the digital output with an RC low-pass filter will generate an analogue representation. It’s all very simple stuff. A few details to contend with are specific to Tiny Tapout, such as taking note of the enable and global resets. These are passed down from the chip-level wrapper to indicate when your design has control of the physical IOs and is selected for operation. [Yeo] noticed that the GitHub post-synthesis simulation failed due to not taking note of the reset condition and initialising those pesky flip-flops.

After throwing the design down onto a Mimas A7 Artix 7 FPGA board for a quick test, data sent from a parallel port-connected PC popped out as a PWM waveform as expected, and some test audio could be played. Whilst it may be true that you don’t have to prototype on an FPGA, and some would argue that it’s a lot of extra effort for many cases, without a good quality graphical simulation and robust testbench, you’re practically working blind. And that’s not how working chips get made.

If you want to read into Tiny Tapeout some more, then we’ve a quick guide for that. Or, perhaps hear it direct from the team instead?

Continue reading “Tiny Tapeout 4: A PWM Clone Of Covox Speech Thing”

2024 Business Card Challenge: Integrated Game Card

[Dan Schnur] has a simple strategy to ensure their business card stays on the client’s desk and doesn’t just get lobbed in a drawer: make it into a simple gaming platform. This entry into the 2024 Business Card Challenge is based around the tinyjoypad project, integrating an SSD1306 OLED display, joypad, and push button.

Powered by the superstar ATTiny85, the electronics are really not all that much, just a sprinkling of passives to support the display and the six switch inputs from the joystick and push button. Or at least, that’s how much we can glean from the PCB images, as the PCB design files are not provided in the project GitHub.

Leaving the heavy lifting of the software to the tinyjoypad project, the designer can concentrate on the actual job at hand and the reason the business card exists to stay at the forefront of the client’s mind. In the meantime, the card can be a useful distraction for those idle moments. A few such distractions include a tiny version of Missile Command (as shown above), tiny tris, and a very cut-down Q-bert.  Sadly, that last game isn’t quite the same without that distinctive sound.

Hackaday Podcast Episode 276: A Mac On A Pico, Ropes On The Test Stand, A Battleship Up On Blocks

The week gone by was rich with fun hacks, and Elliot and Dan teamed up this time around to run them down for everyone. The focus this week seemed to trend to old hardware, from the recently revived Voyager 1 to a 1940s car radio, a homebrew instrument from 1979, a paper tape reader, and a 128k Mac emulator built from an RP2040.

Newer hacks include a 3D-printed bottle labeler, a very hackable smart ring, and lessons learned about programming robots. We also took a look at turning old cell phones into Linux machines, making sure climbing ropes don’t let you down, and snooping on orbital junk with a cool new satellite.

We wrapped things up with a discussion of just how weird our solar system is, and Dan getting really jealous about Tom Nardi’s recent trip to see the battleship New Jersey from an up close and personal perspective.


Worried about attracting the Black Helicopters? Download the DRM-free MP3 and listen offline, just in case.

Continue reading “Hackaday Podcast Episode 276: A Mac On A Pico, Ropes On The Test Stand, A Battleship Up On Blocks”

A treadmill with a doorbell alert in one of the cup holders.

See Them Knocking With A Doorbell Alert

Picture it: you’re on the treadmill, running through a forest, sweating like a pig, and the doorbell rings because a package is being delivered. Would you even hear it? Chances are, if you’re rocking out to music on headphones and your treadmill is as noisy as [Antonio]’s, you wouldn’t, and you’d once again face the dreaded ‘we’ll try later’ slip.

The guts of the doorbell alert in a pink 3D-printed enclosure.What you need is something that thing listens for the doorbell and flashes a giant 20 mm red LED to alert you. Could this be done with a 555? Yes, in fact, [Antonio] used a pair of them in the form of the 556 on the alert side.

The first 555 is wired up in astable mode to control the tempo of the flashing light, and the second timer is in monostable mode to control the length of time the light flashes. Power comes from the doorbell’s 9V, which is wired up through an existing Ethernet jack.

Now whenever the doorbell rings, [Antonio] has 60 seconds of flashing light in order to react, stop the treadmill, and jump off to answer the door. To conserve power when [Antonio] is relaxing, there’s an on/off switch.