Recreating The Intercom From Ferris Bueller’s Day Off

Ferris Bueller’s Day Off is a pop culture classic, and remains one of the standout teen films of the era. Notably, titular character Ferris was somewhat of a hacker himself, with the movie showcasing several contraptions the teenager used to get out of a day of school. Among them was the intercom, which [Aaron] faithfully recreated with modern technology.

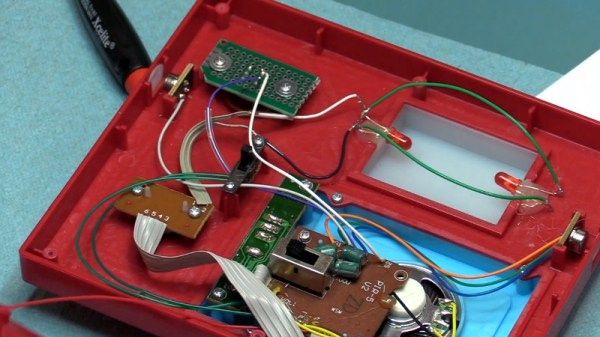
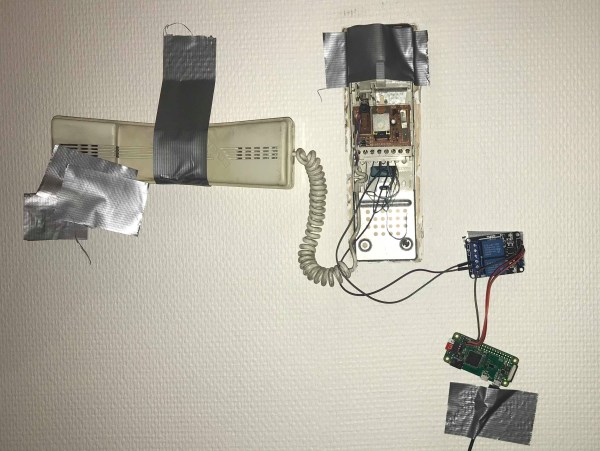
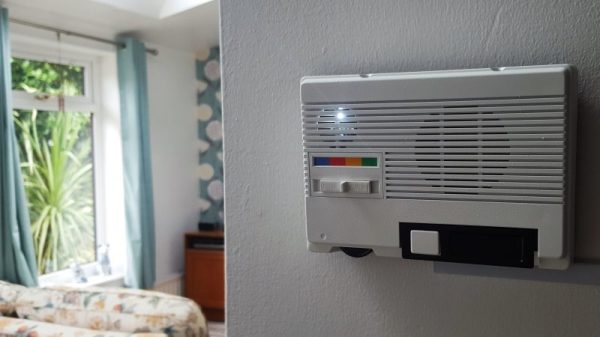
For those who haven’t seen the film, the intercom was hooked up to a cassette player to feign a believable response to anyone that visited the house while Ferris was away. Rather than do things the old fashioned way, [Aaron] built his replica using an ESP32 fitted with a sound chip instead. When visitors ring the intercom, it plays back sound clips from the movie, while also signalling another ESP microcontroller inside [Aaron]’s house to let him know he has visitors.

The build is a charming tribute to the classic film, and all the more fun for [Aaron’s] efforts to make it look the part as well, choosing to build it inside a period-correct intercom housing. To avoid confusion for those who haven’t seen the film, however, he’s been careful to place a sign up to clarify the intercom is not as it seems.

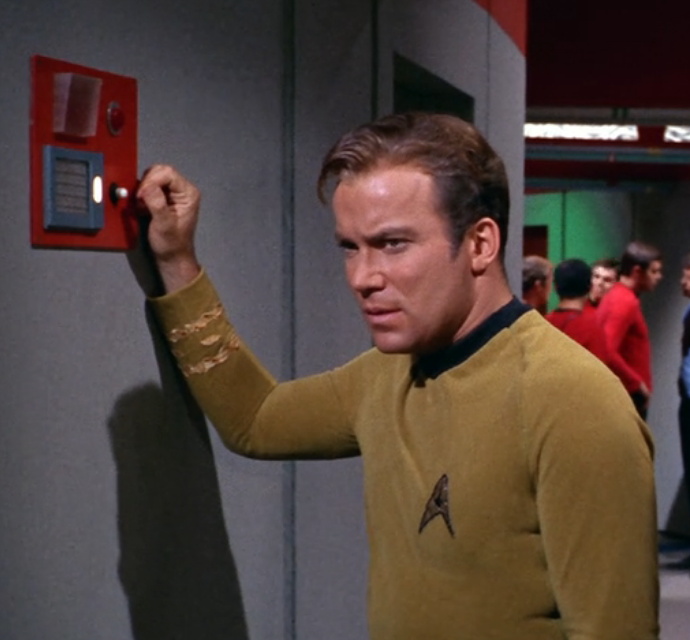
We’ve seen other movie replicas in the same vein before – like this great Star Trek build. Video after the break.

Continue reading “Recreating The Intercom From Ferris Bueller’s Day Off”

A Raspberry Pi Video Intercom System

When it comes to hacks, we’re always amazed by the aesthetic of the design as much as we are by the intricacies of the circuit or the cleverness of the software. We think it’s always fun to assemble projects that were just sort of rigged up in our shop really quickly and made to just work, without worrying about much else. But, when you really invest time in the aesthetics and marry form with function, the results are always one to marvel at.

That’s what the engineers over at [Hacker Shack] did with their Raspberry Pi-based video intercom system over on Hackster. Now we’ve seen RPi doorbell projects here on Hackaday before, but it’s the implementation of a full-duplex video intercom system that makes [Hacker Shack’s] project really stand out. (Unless you want to be a bit more secretive). They used a Raspberry Pi 3 Model B with an off-brand Pi camera, but the R Pi branded camera will also work just fine. Couple the camera with a very crisp LCD display, microphone, and speaker and you’re good to go! Continue reading “A Raspberry Pi Video Intercom System”

Tuning Up The ThinkGeek Star Trek Intercom Panel

On Star Trek, all Kirk and friends had to do was snap the button on the always conveniently located intercom panel, start talking, and the intended recipient would immediately respond no matter where they were in the ship. How did it work? Who knows. In spite of, or perhaps even because of, the lightly-explained nature of the technology, the cherry-red wall intercoms still hold a certain charm for fans of the groundbreaking show.

A viewer sent [Fran Blanche] a scaled down replica of the intercom from ThinkGeek, and while it certainly looks fairly close to the original prop, it has a couple of annoying design elements. When triggered by the side-mounted motion sensors, the panel will play either the iconic swoosh of the automatic doors or the “Red Alert” sound effect. It’s a cute idea for a kid’s bedroom maybe, but not exactly ideal for somebody who regularly records YouTube videos.

Peak 23rd century technology

So the first order of business was to cut the motion sensors out of the circuit and replace them with a push button. [Fran] draws up a quick diagram to explain how these sensors work, and shows that they can easily be bypassed with a momentary switch since they normally bring the line high when triggered. She then converted the indicator light on the right side of the panel into a button to enable the alert sound effect, which is more accurate to how it worked in the show anyway.

The other issue, and perhaps the most egregious to Star Trek fans, is that the “Red Alert” indicator on the top of the panel didn’t actually flash like it did in the show. To design and build this panel and not put a few LEDs behind that piece of frosted plastic seems a bit like producing a Matchbox car and forgetting to make the wheels spin. With a couple of red LEDs and a bit of new wiring, the oversight was quickly rectified.

While it might not be perfect, at least ThinkGeek actually produced a functional product this time. It could have ended up like one of their April Fool’s “products” that never get put into production, forcing a desperate Trekkie to begrudgingly build his own version.

Continue reading “Tuning Up The ThinkGeek Star Trek Intercom Panel”

Quick And Dirty: Operate An Intercom Via Telegram

Never underestimate the quick and dirty hack. It’s very satisfying to rapidly solve a real problem with whatever you have on hand, and helps to keep your hacking skills sharp for those big beautifully engineered projects. [Guillaume M] needed a way to remotely open his apartment building door for deliveries, so he hacked the ancient intercom to be operated via Telegram, to allow packages to be deposited safely inside his mailbox inside the building’s front too.

[Guillaume] needed to complete the hack in a way that would allow him to return the intercom to its original state when he moves out. Opening the 30-year-old unit, he probed a row of screw terminals and identified a 13V supply, ground, and the connection to the buildings’ door lock. He connected the lock terminals to a relay, which is controlled by a Raspberry Pi Zero W that waits for the “open” command to be sent to a custom Telegram Bot.

To power the Pi, [Guillaume] connected it to the 13V supply on the intercom via a voltage divider circuit. Voltage dividers usually make lousy power supplies, since the output voltage will fluctuate as the load changes, but it looks as though it worked well enough for [Guillaume]. The intercom had a lot of empty space inside, so after testing everything was packed inside the housing.

If you want to achieve the same with an ESP8266, there’s a library for that. Just keep in mind that being dependent on web servers to open critical doors might get you locked out.

Reverse Engineering A Two-Wire Intercom

There was a time when an intercom was simply a pair of boxes with speakers joined by a couple of wires, with an audio amplifier somewhere in the mix. But intercoms have like everything else joined the digital age, so those two wires now carry a load of other functionality as digital signalling. [Aaron Christophel] installs these devices for a living, and has posted a fascinating reverse engineering video that we’ve also placed below the break.

Power for the system is present as a constant 24V DC, and the audio is still an old-fashioned analogue signal that we’ll all be familiar with. On that 24V DC though are imposed a series of pulse trains to trigger the different alarms and other functions, and he describes extracting these with an oscilloscope before showing us the circuitry he’s used to send and receive pulses with an Arduino. The bulk of the video is then devoted to the software on the Arduino, which you can also find in a GitHub repository.

The result is an interesting primer for anyone who fancies a bit of serial detective work, even if they don’t have a intercom to hand.

Continue reading “Reverse Engineering A Two-Wire Intercom”

Old Intercom Gets Googled With Raspberry Pi And AIY Hat

Old Radio Shack intercom; brand new Google Voice interface for a Raspberry Pi. One of these things is not like the other, but they ended up together in this retro-look Google Voice interface, and the results are pretty slick.

The recipient of the Google hive-mind transplant was one of three wireless FM intercoms [MisterM] scored for a measly £4. Looking much as they did when they were the must-have office tool or home accessory for your modern mid-80s lifestyle, the intercom case was the perfect host for the Pi and the Google AIY hat. Only the case was used — not even the original speaker made it into the finished product. The case got a good scrubbing, a fresh coat of paint to perk up the gone-green plastic, and an accent strip of Google’s logo colors over the now-deprecated station selector switch. [MisterM] provided a white LED behind the speaker grille for subtle feedback. A tap of the original talk bar gets Google’s attention for answers to quick questions, and integration into the family’s existing home automation platform turns the lights on and off. See it in action after the break.

[MisterM] was lucky enough to score an AIY hat for free, and as far as we know they’re still hard to come by. If you’re itching to try out the board, fear not — turns out you can roll your own.

Continue reading “Old Intercom Gets Googled With Raspberry Pi And AIY Hat”

Retrofitting A Vintage Intercom To Run Amazon Alexa

The Amazon Echo is a pretty cool piece of tech: it lets you ask questions, queue up music, find out the weather, and more, without having to do anything but talk. But, the device itself is a bit pricey, and looks a little boring. What if you could have all the features of the Echo, but in a cool retro case and at a cheaper price?

Well, you can, and that’s exactly what [nick.r.brewer] did, using a ’50s intercom and a Raspberry Pi. He picked the vintage intercom up at an antique store for $20, and the Raspberry Pi Zero is less than $10. So, for about $30 (and some parts most of us have lying around) he was able to build a cool looking device with all of the capabilities of the Amazon Echo.

The hardware portion of the build was pretty straightforward, with the Raspberry Pi, a sound card, WiFi dongle, USB hub, and microphone all fitting nicely inside the case of the intercom. The software side of things is a little more tricky, but with a device like this it runs well with Amazon’s Alexa SDK. Of course, if you want to add more hardware features, that’s possible too.

Continue reading “Retrofitting A Vintage Intercom To Run Amazon Alexa”