Oracle CSO To Customers: Leave The Vulnerabilities To Us

[Mary Ann Davidson], chief security officer of Oracle, is having a bad Tuesday. The internet has been alight these past few hours over a blog post published and quickly taken down from oracle’s servers. (archive) We’re not 100% sure the whole thing isn’t a hack of some sort. Based on [Mary’s] previous writing though, it seems to be legit.

The TL;DR version of Mary’s post is that she’s sick and tired of customers reverse engineering Oracle’s code in an attempt to find security vulnerabilities. Doing so is a clear violation of Oracle’s license agreement. Beyond the message, the tone of the blog says a lot. This is the same sort of policy we’re seeing on the hardware side from companies like John Deere and Sony. Folks like [Cory Doctorow] and the EFF are doing all they can to fight it. We have to say that we do agree with [Mary] on one point: Operators should make sure their systems are locked down with the latest software versions, updates, and patches before doing anything else.

[Mary] states that “Bug bounties are the new boy band”, that they simply don’t make sense from a business standpoint. Only 3% of Oracles vulnerabilities came from security researchers. The rest come from internal company testing. The fact that Oracle doesn’t have a bug bounty program might have something to do with that. [Mary] need not worry. Bug Bounty or not, she’s placed her company squarely in the cross-hairs of plenty of hackers out there – white hat and black alike.

Building A Dead-On-Accurate Model Ford Pickup From Scratch

In a world filled with 3D printed this and CNC machined that, it’s always nice to see someone who still does things the old-fashioned way. [Headquake137] built a radio controlled truck body (YouTube link) from wood and polystyrene using just a saw, a Dremel, a hobby knife, and a lot of patience. This is one of those builds that blurs the lines between scale model and sculpture. There aren’t too many pickup trucks one might call “iconic” but if we were to compile a list, the 6th generation Ford F-series would be on it. [Headquake137’s] model is based on a 1977 F100.

ford-thumb2The build starts with the slab sides of the truck. The basic outline is cut into a piece of lumber which is then split with a handsaw to create a left and a right side. From there, [Headquake137’s] uses a Dremel to carve away anything that doesn’t look like a 1977 F100. He adds pieces of wood for the roof, hood, tailgate, and the rest of the major body panels. Small details like the grille and instrument panel are created with white polystyrene sheet, an easy to cut material often used by train and car modelers.

When the paint starts going on, the model really comes to life. [Headquake137] weathers the model to look like it’s seen a long life on the farm. The final part of the video covers the test drive of the truck, now mounted to a custom chassis. The chassis is designed for trails and rock crawling, so it’s no speed demon, but it sure does look the part riding trails out in the woods!

[Headquake137] managed to condense what must have been a 60 or 70 hour build down to a 14 minute video found below.

Continue reading “Building A Dead-On-Accurate Model Ford Pickup From Scratch”

Hacklet 69 – Morse Code Projects

With over 160 years of history under its belt, Morse code is by far the oldest digital signaling system known to man. Originally developed for telegraph systems, [Samuel Morse’s] code has been sent over wires, via radio, and even with flashes of light. Hackers, makers and engineers have been working with Morse code throughout history. For many years, simple code keys and practice oscillators were the “hello world” of hobby electronics. In fact, a company which started out selling a Morse key has gone on to become one of the largest electronic component distributors in the world. The company still bears the name of that project: Digi-Key. This week’s Hacklet is all about some of the best Morse code projects on Hackaday.io!

key1We start with [voxnulla] and Morse key HID + ugly hack. [voxnulla] found an old key at his favorite thrift store. It was dusty, greasy, and for some reason had been painted hospital green. Once the paint and grime were removed, and the original wooden plate restored, the key actually looked pretty good. [Voxnulla] then decided to turn it into a USB Human Interface Device (HID), emulating the keyboard of his computer. An Arduino converts Morse code characters tapped at the key into keystrokes over USB. As [voxnulla] knows, when butterflies aren’t available, real programmers drive vim with a Morse key!

code2Next up is [Voja Antonic] with Daddy, I don’t have the key. If you didn’t read [Voja’s] article about Hacking the Digital and Social System, check it out! Many apartments have an intercom system where you have to “buzz” someone in, activating a solenoid lock in the door. [Voja] inserted a Microchip PIC12 series microcontroller between the speaker and the unlock button. All a user has to do is tap out the right Morse code password on the call button in the lobby. If the code is accepted, the PIC unlocks the door, and you’re in!


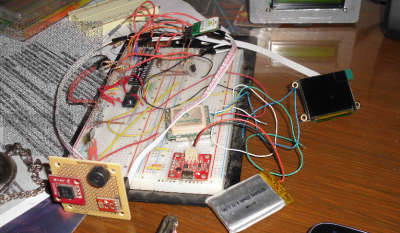
morseterminal[kodera2t] took things into the digital age with Stand-alone Tiny Morse code encoder/decoder. This project grew out of his general purpose Portable tiny IoT device project. [kodera2t] rolled his own Arduino-compatible board for this project. The tiny ATmega1284 powered computer allows him to encode and decode Morse code. A smartphone-sized keyboard and a lilliputian OLED display serve as the user interface, while rotary encoder allows for variable code speed. You can even “tap” Morse out on one of the tactile buttons!


morselightFinally, we have [Yannick (Gigawipf)] with Portable (morsing) 100W led flashlight. 100 watt LEDs have gotten quite cheap these days, and they’re perfect when you absolutely, positively have to blind everyone around you. These LEDs can also be switched on and off quickly, which makes them perfect for Morse code. In years past, mechanical shutters had to be used to perform the same feat. [Yannick] used a 5000mAh 5S Zippy Li-Po to supply electrons to this hungry beast, while a 600 Watt constant current boost converter keeps that power under control. An Arduino running Morse code converter software controls the boost convert and LED.  [Yannick] uses his computer to send a message over the Arduino’s serial link, and the light does the rest, flashing out the message for all to see.

If you want more Morse goodness, check out our brand new Morse code project list! My Morse is a bit rusty, so if I wasn’t able to copy your transmission and missed your project, don’t hesitate to drop me a message on Hackaday.io. That’s it for this week’s Hacklet. As always, see you next week. Same hack time, same hack channel, bringing you the best of Hackaday.io!

Caption CERN Contest – All Good Things…

Week 25 of the Caption CERN Contest is complete. Thanks to all the entrants who tried to figure out exactly what is going on with this scientist and his strange box. We’re still just as confused (and amused) as you are. He definitely is focused on the box and whatever is in there.

So, without further adieu, here are the winners of this week’s contest:

The Funnies:

  • “On the slim chance my invention does not go down in history. I hope no one makes a Schrodinger’s cat joke about it.” – [masterdurr]
  • “Step one, you cut a hole in the box” – [FuzzyNegguts]
  • “here is a rare shot of CERNs artificial heart prototype. Due to its size, it was only installed in whales. And badgers. I don’t know how, but somehow badgers.” – [jakewisher125]

This week’s winner is [Jack Laidlaw] with  “At Cern you have to be careful when having fun with the new guy, John was sent for a bucket of steam and only reappeared 6 months later with this contraption.” Jack is a web designer based in Scotland. He’s an avid fan of electronics, and is going to be getting a hands on course with his new Teensy 3.1 from The Hackaday Store!

A bit of a break

After 25 great weeks of the Caption CERN Contest, it’s time to take a bit of a break. The Hackaday Prize competition is really heating up, along with plenty of other work here at Hackaday HQ. I’ve said it each week, but I have to give one more big thank you to all the folks who have entered and made this a great contest. It’s been a pleasure to read the captions every week and to award the prizes to all the top captions. The science and fun don’t end here though – There are plenty of images in CERN’s archives waiting to be discovered. Take some time and browse through. You won’t regret it!

Finally, I’d just like to say don’t forget to document your own work, and take notes on what each image contains. Be it on Hackaday.io, on Github, or even on your own drive. Otherwise you might see your own hacks in the next incarnation of the Caption CERN Contest!

Hacklet 68 – Rocket Projects

There’s just something amazing about counting down and watching a rocket lift off the pad, soaring high into the sky. The excitement is multiplied when the rocket is one you built yourself. Amateur rocketry has been inspiring hackers and engineers for centuries. In the USA, modern amateur rocketry gained popularity after Sputnik-1, continuing on through the space race. Much of this history captured in the book Rocket Boys by Homer Hickam, which is well worth a read. This week’s Hacklet is dedicated to some of the best rocketry projects on Hackaday.io!

rocket1We start with [Sagar] and Guided Rocket. [Sagar] is building a rocket with a self stabilization system. Many projects use articulated fins for this, and [Sagar] plans to add fins in the future, but he’s starting with an articulated rocket motor. The motor sits inside a gimbal, which allows it to tilt about 10 degrees in any direction. An Arduino is the brain of the system. The Arduino gathers data from a MPU6050 IMU sensor, then determines how to steer the rocket motor. Steering is accomplished with a couple of micro servos connected to the gimbal.


rocket2Next up is [Howie], with Homemade rocket engine. [Howie] is cooking some seriously hot stuff on his stove. Rocket candy to be precise, similar to the fuel [Homer Hickam] wrote about in Rocket Boys. This solid fuel is so named because one of the main ingredients is sugar. The other main ingredient is stump remover, or potassium nitrate. Everything is mixed and heated together on a skillet for about 30 minutes, then pushed into rocket engine tubes. It goes without saying that you shouldn’t try this one at home unless you’re really sure of what you’re doing!


rocket3Everyone wants to know how high their rocket went. [Vcazan] created AltiRocket to record acceleration and altitude data. AltiRocket also transmits the data to the ground via a radio link. An Arduino Nano keeps things light. A BMP108 barometric sensor captures pressure data, which is easily converted into altitude. Launch forces are captured by a 3 Axis accelerometer. A tiny LiPo battery provides power. The entire system is only 23 grams! [Vcazan] has already flown AltiRocket, collecting data from several flights earlier this summer.


rocket4Finally we have [J. M. Hopkins] who is working on a huge project to do just about everything! High Power Experimental Rocket Platform includes designing and building everything from the rocket fuel, to the rocket itself, to a GPS guided parachute recovery system. [J. M. Hopkins] has already accomplished two of his goals, making his own fuel and testing nozzle designs. The electronics package to be included on the rocket is impressive, including a GPS, IMU, barometric, and temperature sensors. Data will be sent back to the ground by a 70cm transceiver. The ground station will use a high gain human-guided yagi tracking antenna with a low noise amplifier to pick up the signal.

If you want more rocketry goodness, check out our brand new rocket project list! Rocket projects move fast, if I missed yours as it streaked by, don’t hesitate to drop me a message on Hackaday.io. That’s it for this week’s Hacklet, As always, see you next week. Same hack time, same hack channel, bringing you the best of Hackaday.io!

Hacklet 57 – CNC Hacks

Everyone’s first microcontroller project is making an LED blink. It’s become the de-facto “Hello World” of hardware hacking.  There’s something about seeing wires you connected and the code you wrote come together to make something happen in the real world. More than just pixels on a screen, the LED is tangible. It’s only a short jump from blinking LEDs to making things move. Making things move is like a those gateway drug – it leads to bigger things like robots, electric cars, and CNC machines. Computer Numerical Control (CNC) is the art of using a computer to control movement. The term is usually applied to machine tools, which cut, engrave, or perform other operations on wood, plastic, metal and other materials. In short, tools to make more things. It’s no surprise that hackers love CNCs. This week’s Hacklet is all about some of the best CNC projects on Hackaday.io!

charliexWe start with [Charliex] and Grizzly G0704 CNC Conversion. [Charliex] wanted a stout machine capable of milling metal. He started with a Grizzly  G0704, which is small compared to a standard knee mill, but still plenty capable of milling steel. [Charliex] added a Flashcut CNC conversion kit to his mill. While they call them “conversion kits” there is still quite a bit of DIY ingenuity required to get a system like this going. [Charliex] found his spindle runout was way out of spec, even for a Chinese mill. New bearings and a belt conversion kit made things much smoother and quieter as well. The modded G0704 is now spending its days cutting parts in [Charliex’s] garage.


makesmithNext up is [brashtim] with Makesmith CNC. Makesmith was [brashtim’s] entry in the 2014 Hackaday prize. While it didn’t win the prize, Makesmith did go on to have a very successful Kickstarter, with all the machines shipping in December of 2014. The machine itself is unorthodox. It uses closed loop control like large CNC machines, rather than open loop stepper motors often found in desktop units. The drive motors are hobby type servos.  We’re not talking standard servos either – [brashtim] picked microservos. By using servos, common hardware store parts, and laser cut acrylic, [brashtim] kept costs down. The machine performs quite well though, easily milling through wood, plastic, foam, and printed circuit boards.


reactronNext we have [Kenji Larsen] with Reactron material processor: Wireless CNC mill. [Kenji] started with a  Shapeoko 2, and gave it the Reactron treatment. The stock controller was replaced with a Protoneer shield, which is connected to the Reactron network via a HopeRF radio module. The knockoff rotary tool included with the kit was replaced with a DeWalt DW660 for heavy-duty jobs, or a quieter Black and Decker RTX-6. A tool mounted endoscope keeps an eye on the work. [Kenji] mounted the entire mill in a custom enclosure of foam and Roxul insulation. The enclosure deadens the sound, but it also keeps heat in. [Kenji] plans to add a heat exchanger to keep things cool while maintaining relative quiet in his shop.

cnc2Finally we have a [hebel23] with DIY Multiplex Plywood CNC Router. [hebel23] wanted to build a big machine within a budget – specifically a working area of  400 x 600 x 100 mm and a budget of 800 Euro. As the name implies, [hebel23] used birch plywood as the frame of his machine. He chose high quality plywood rather than the cheap stuff found in the big box stores. This gives the machine a stable frame. The moving components of the machine are also nice – ball screws, linear bearings, and good stepper controllers. The stepper motors themselves are NEMA-23 units, which should give the CNC plenty of power to cut through wood, plastic, and even light cuts on metal. [hebel23] spent a lot of time on the little details of his CNC, like adding an emergency stop switch, and a wire-chain to keep his gantry control wires from ending up tangled up in the work piece. The end result is a CNC which would look great in anyone’s workshop.

If you want more CNC goodness, check out our brand new CNC project list! Did I miss your project? Don’t be shy, just drop me a message on Hackaday.io. That’s it for this week’s Hacklet, As always, see you next week. Same hack time, same hack channel, bringing you the best of Hackaday.io!

Caption CERN Contest – What’s In The Box?

Week 24 of the Caption CERN Contest was one for the books. There were so many good captions that we had a hard time picking a winner! Thank you to everyone who wrote up a caption and entered the contest. We still don’t know quite what this device was. Our best guess is a coil from a beam line. Some creative positioning and camera focus sure turned it into a conversation piece though!

The Funnies:

  • “I am the Face of Boe. Has anyone seen the Doctor?.” – [jonsmirl]
  • “CERN’s brief attempt into the consumer “Pro” audio market. They lost out to the competitions because they didn’t use unidirectional oxygen free copper wires that are blessed by the Tibetan monks. They might be the expert with super conductor magnets, but one hard lesson they have learnt is that you can’t spell consumer without the “con” part.” – [K.C. Lee]
  • “Go ahead pick up the operating tool!! For your first task remove the patient’s tooth for 10 points. But beware!!! there’s the 10,000K volt charge if you touch the sides!! Enjoy!!!” – [EngineerAfterLunchTime]

This week’s winner is [surubarescu] with “Prototype of the sextuple face electric razor was a complete technical success, but it never went into full production due to some raised (then lost) eyebrows.” Enjoy your new Teensy 3.1 from The Hackaday Store, [surubarescu]!

Week 25

cern-25-smWe’re not kidding when we say CERN scientists and engineers really get into their work. Check out this CERN scientist looking down at his… uh, experiment. We’re not sure exactly what this device is. There is a sealed chamber, but is it a vacuum, or some sort of specialized atmosphere for the research this scientist is working on? Either way, he seems very interested in whatever is happening inside this box!

So what’s happening here? High energy physics, or some new coffee maker? You tell us!

This week’s prize is once again a Teensy 3.1 from The Hackaday Store. Add your humorous caption as a comment to this project log. Make sure you’re commenting on the contest log, not on the contest itself.

As always, if you actually have information about the image or the people in it, let CERN know on the original image discussion page.