540 LEDs On A Geodesic Sphere

[burgerga] loves attending Music Festivals. He’s also a MechE who loves his LED’s. He figured he needed to put it all together and do something insane, so he build a huge, 15″ geodesic sphere containing 540 WS2812B addressable LED’s. He calls it the SOL CRUSHER. It sips 150W when all LED’s are at full intensity, making it very, very, bright.

As with most WS2812B based projects, this one too is fairly straightforward, electrically. It’s controlled by four Teensy 3.2 boards mounted on Octo WS2811 adapter boards. Four 10,000 mAh 22.2V LiPo batteries provide power, which is routed through a 5V, 30Amp heatsinked DC-DC converter. To protect his LiPo batteries from over discharge, he built four voltage monitoring modules. Each had a TC54 voltage detector and an N-channel MOSFET which switches off the LiPo before its voltage dips below 3V. He bundled in a fuse and an indicator, and put each one in a neat 3D printed enclosure.

The mechanical design is pretty polished. Each of the 180 basic modules is a triangular PCB with three WS2812B’s, filter capacitors, and heavy copper pours for power connections. The PCB’s are assembled in panels of six and five units each, which are then put together in two hemispheres to form the whole sphere. His first round of six prototypes set him back as he made a mistake in the LED footprint. But it still let him check out the assembly and power connections. For mechanical support, he designed an internal skeleton that could be 3D printed. There’s a mounting frame for each of the PCB panels and a two piece central sphere. Fibreglass rods connect the central sphere to each of the PCB panels. This lets the whole assembly be split in to two halves easily.

It took him over six months and lots of cash to complete the project. But the assembly is all done now and electrically tested. Next up, he’s working on software to add animations. He’s received suggestions to add sensors such as microphones and accelerometers via comments on Reddit. If you’d like to help him by contributing animation suggestions, he’s setup a Readme document on Dropbox, and a Submission form. Checkout the SolCrusher website for more information.

Thanks [Vinny Cordeiro], for letting us know about this build.

Continue reading “540 LEDs On A Geodesic Sphere”

Plastic Cutter Made Of 3.5” Floppy Disk

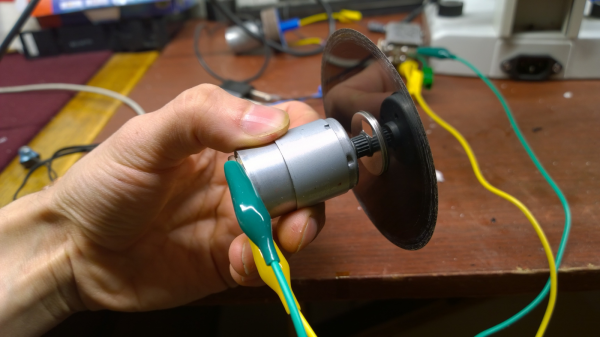
This is so cool; an unexpected use for an antiquated digital storage medium. [DeepSOIC] built a cutter that shaves off plastics but cannot cut through metal. It’s made out of the media part of a 3.5” floppy disk. For the new kids, here’s what a Floppy Disk is.

The disk is attached to any high speed DC motor connected to a plain ol’ power supply – variable if you want to adjust speed. As you can see from the video after the break, it cuts through plastic quite well, but is unable to damage any metal that it encounters. This property makes it extremely handy for many applications. Want to strip through an old 3.5mm phono jack without damaging the wires? Want to wind a coil over a plastic former and then strip away the plastic? Want to trim some 3D printed parts? All game for this handy tool. According to [DeepSOIC], if you don’t have floppy disks, you can use other kinds of plastic films too – such as overhead transparencies or plastic printer films. If you are in a pinch, he claims even paper works, although it doesn’t last too long. Don’t throw away all of those business cards yet.

This isn’t the only trick up his sleeve. He’s documenting a whole series on his project page at Hacks and Tricks. And if you like these, then also checkout [RoGeorge]’s bag of tricks over at The Devil is in the Details.

Continue reading “Plastic Cutter Made Of 3.5” Floppy Disk”

Fixing A Broken CCFL Backlight

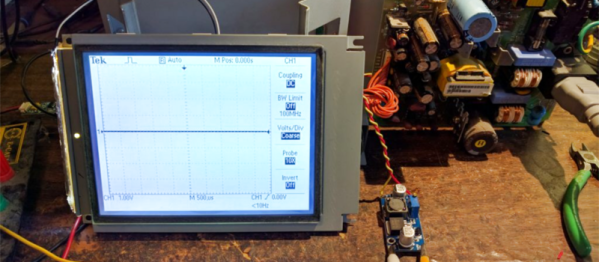
When you work at Tektronix and they make a difficult to refuse offer for their ‘scopes, you obviously grab it. Even if the only one you can afford is the not-so-awesome TDS1012. [Jason Milldrum] got his unit before cheaper, and better ‘scopes appeared on the market. It served him well for quite a long time. But keeping it switched on all the time took a toll, and eventually the CCFL backlight failed. Here’s how he replaced the CCFL back light with a strip of LED’s and revived the instrument.

Searching for an original replacement CCFL backlight didn’t turn up anything – it had been obsoleted long back. Even his back-channel contacts in Tektronix couldn’t help him nor could he find anything on eBay. That’s when he came across a video by [Shahriar] who hosts the popular The Signal Path blog. It showed how the CCFL can be replaced by a thin strip of SMD LEDs powered by a DC-DC converter. [Jason] ordered out the parts needed, and having worked at Tektronix, knew exactly how to tear down the ‘scope. Maybe he was a bit rusty, as he ended up breaking some (non-critical) plastic tabs while removing the old CCFL. Nothing which could not be fixed with some silicone sealant.

The original DC-DC converter supplied along with his LED strip needed a 12V input, which was not available on the TDS1012. Instead of trying to hack that converter to work off 6V, he opted to order out another suitable converter instead. [Jason]’s blog details all the steps needed, peppered with lots of pictures, on how to make the swap. The one important caveat to be aware of is the effect of the LED DC-DC converter on the oscilloscope. Noise from the converter is likely to cause some performance issues, but that could be fixed by using a more expensive module with RF and EMI filtering.

This is not an original hack for sure. Here’s a “Laptop backlight converted from CCFL to LED” from a few years back, and this one for “LCD: Replacing CCFL with LEDs” from even further back in time. Hopefully if you have an instrument with a similar issue, these ought to guide you on how to fix things.

Reviving A Dead Zanzithophone

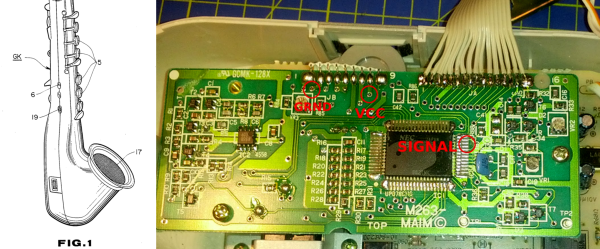
It’s great to hear from people who say they’re inspired to fix stuff by reading about hacks here on Hackaday. [Michael Lüftenegger] from Salzburg is one of them. About a year back, he snagged a digital horn from eBay that turned out to be dead-er than advertised and he wrote a post about how he fixed it and gave it a second life.

The Casio DH-100 is an electronic MIDI digital wind controller/synthesizer musical instrument. Your breath flows through the instrument, making it feel pretty similar to acoustic wind instruments. [Michael]’s unit had already seen some attempted, but unsuccessful repairs. Nothing that could not be fixed, except that the main pressure sensor was missing. Without the sensor, the instrument was practically useless. The eBay seller wasn’t lying when he described the unit as working with breath mode turned off!
Continue reading “Reviving A Dead Zanzithophone”

Hackaday Prize Entry: The Green Machine

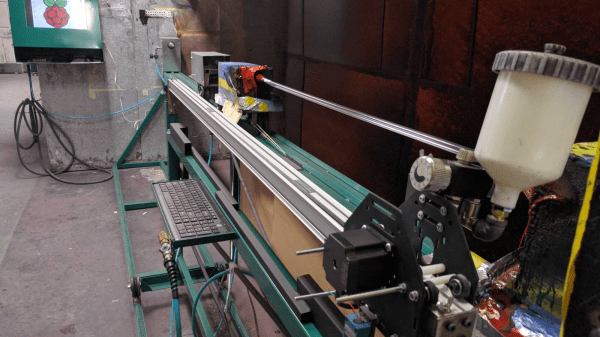
For Hackers, rapid prototyping is made easier using basic building blocks such as the Raspberry Pi, Arduino and the huge variety of add on shields for home brew projects. But we don’t see too many real world Industrial applications or machines built using these off-the-shelf electronics. [SlyScience] built The Green Machine – an industrial grade, automated spray painting device to help coat polycarbonate tubes consistently.

The Green Machine is essentially a linear drive that can move a spray gun across a spinning clear tube and coat it evenly with the desired color. These tubes are used as color filters – they slide over standard T5, T8 or T12 fluorescent lamps – and are used in advertising, special effects, films and similar applications. For almost 10 years prior to this machine, the task was done manually. The HPLV (high pressure, low volume) spray gun used for this process needed skilled hands to get consistent results. It was easy to ruin a tube and cleaning them was not possible. [SlyScience] figured things out on the go – teaching himself and figuring out all of the software and hardware pieces of the puzzle. The welded steel frame is about the only “custom” part in this build. Everything else is COTS. Check out the video of The Green Machine in action below, and if you have any tips to help improve the build, chime in with your comments.

Continue reading “Hackaday Prize Entry: The Green Machine”

Autonomous Plant Watering Thingamajig

[Eitan] is one of those guys whose plants keep tottering between life and death. Can’t blame the plants, because he just keeps forgetting when to water them. But keeping them hydrated requires him to get off his butt and actually water them. Surely, there had to be an easier solution which needed him to do nothing and yet prevent his plants from dying. Being lazy has its benefits, so he built his own super simple Autonomous Plant Watering Thingamajig.

He needed a water pump, but all he had was an air pump. So he hooked it up to force air in to a sealed container and push the water out. To make the setup autonomous, he connected the pump to a WiFi-enabled wall socket and then programmed it to dispense water at regular intervals. It may take him some time to fine tune the right interval and duration for his setup over the next few weeks, but right now, it’s pumping water for a short duration once every week.

The important thing for a system like this to work is to ensure it is well sealed. Any air leakage will require an increasing amount of air to be pumped in to the container as the water level keeps reducing. Without knowing the actual level of water in the container, it isn’t easy to compensate for this via programming. And that’s the other problem. [Eitan] will still have to periodically check his mason jar for water, and top it up manually. Maybe his next hack will take care of that. We’re thinking a Rube Goldberg watering system would be awesome. It’s nice when people put on their thinking caps and say “Okay, here’s a problem, how do I solve it?” instead of going out and buying an off-the-shelf device.

Thanks, [Clay], for sending in this tip.

The Foghorn Requiem

Foghorns have been a part of maritime history since the 19th century, providing much needed safety during inclement weather to mariners out at sea. Over time, their relevance has slowly reduced, with advanced navigational aids taking over the task of keeping ships and sailors safe.

The sounds of the foghorns are slowly dying out. Artists [Joshua Portway] and [Lise Autogena] put together the Foghorn Requiem, a project which culminated on June 22nd 2013, with an armada of more than 50 ships gathered on the North Sea to perform an ambitious musical score, marking the disappearance of the sound of the foghorn from the UK’s coastal landscape.

ship_layoutUp close, a foghorn is loud enough to knock you off your shoes. But over a distance, its sound takes on a soulful, melancholy quality, shaped by the terrain that it passes over. The artists tried capturing this quality of the foghorn, with help from composer [Orlando Gough] who created a special score for the performance. It brought together three Brass Bands – the Felling Band, the Westoe Band and the NASUWT Riverside Band, almost 50 ships at sea and the Souter Lighthouse Foghorn to play the score.

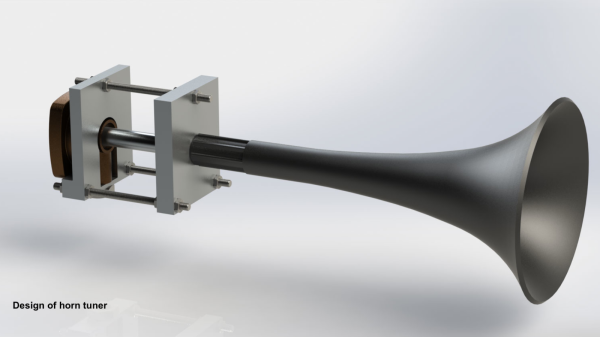
Each of the more than 50 vessels were outfitted with a custom built, tunable foghorn, actuated by a controller box consisting of a TI Launchpad with GPS, RTC, Xbee radio and relay modules. Because of the great distances between the ships and the audience on land, the devices needed to compensate for their relative position and adjust the time that they play the foghorn to offset for travel time of the sound. Each controller had its specific score saved on on-board storage, with all controllers synchronized to a common real time clock.

Marine radios were used to communicate with all the ships, informing them when to turn on the controllers, about 10 minutes from the start of the performance. Each device then used its GPS position to calculate its distance from the pre-programmed audience location, and computed how many seconds ahead it had to play its horn for the sound to be heard in time on the shore. The controllers then waited for a pre-programmed time to start playing their individual foghorn notes. The cool thing about the idea was that no communication was required – it was all based on time. Check out the video of the making of the Foghorn Requiem after the break, and here’s a link to the audio track of the final performance.

This is a slightly different approach compared to the Super Massive Musical Instrument that we posted about earlier.

Continue reading “The Foghorn Requiem”