Measuring The Accuracy Of A Rubidium Standard

A rubidium standard, or rubidium atomic clock, is a high accuracy frequency and time standard, usually accurate to within a few parts in 1011. This is still several orders of magnitude less than some of the more accurate standards – for example the NIST-F1 has an uncertainty of 5×10-16 (It is expected to neither gain nor lose a second in nearly 100 million years) and the more recent NIST-F2 has an uncertainty of 1×10-16 (It is expected to neither gain nor lose a second in nearly 300 million years). But the Rb standard is comparatively inexpensive, compact, and widely used in TV stations, Mobile phone base stations and GPS systems and is considered as a secondary standard.

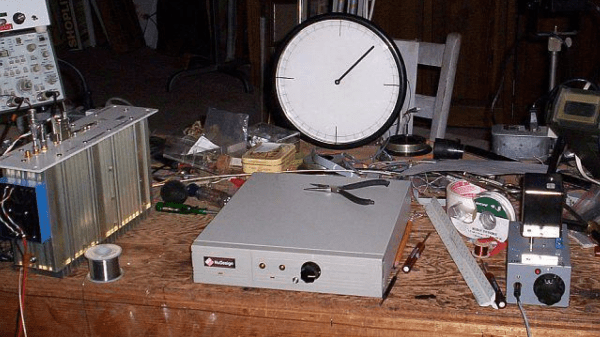
[Max Carter] recently came into possession of just such a unit – a Lucent RFG-M-RB that was earlier in use at a mobile phone base station for many years. Obviously, he was interested in finding out if it was really as accurate as it was supposed to be, and built a broadcast-frequency based precision frequency comparator which used a stepper motor to characterise drift.

Compare with WWVB Broadcast

WWVB Receiver
WWVB Receiver

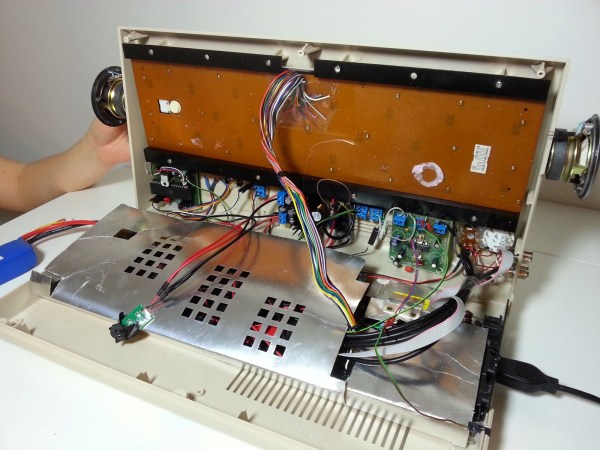
The obvious way of checking would be to use another source with a higher accuracy, such as a caesium clock and do a phase comparison. Since that was not possible, he decided to use NIST’s time/frequency service, broadcasting on 60 kHz – WWVB. He did this because almost 30 years ago, he had built a receiver for WWVB which had since been running continuously in a corner of his shop, with only a minor adjustment since it was built.

comparator1
Comparator Circuit Installed in a Case

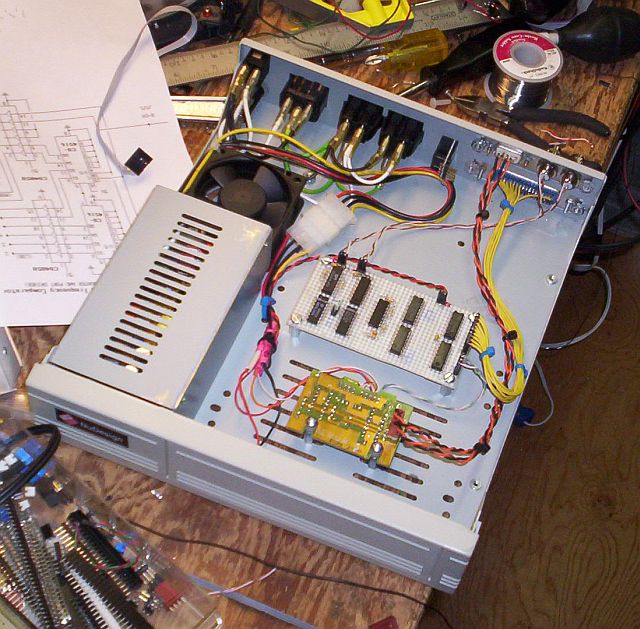
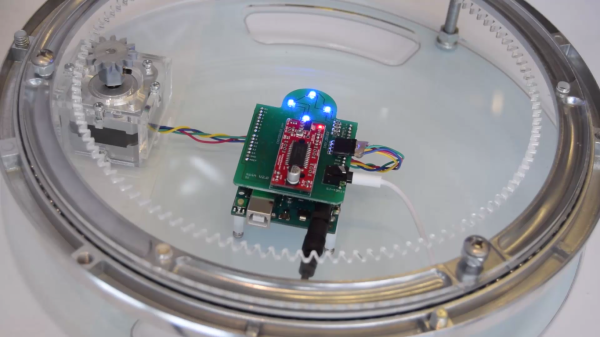
His idea was to count and accumulate the phase ‘slips’ generated by comparing the output of the WWVB receiver with the output of the Rb standard using a digital phase comparator. The accuracy of the standard would be calculated as the derivative of N (number of slips) over time. The circuit is a quadrature mixer: it subtracts the frequency of one input from the other and outputs the difference frequency. The phase information is conveyed in the duty cycle of the pulses coming from the two phase comparators. The pulses are integrated and converted to digital logic level by low-pass filter/Schmitt trigger circuits. The quadrature-phased outputs are connected to the stepper motor driver which converts logic level inputs to bi-directional currents in the motor windings. The logic circuit is bread-boarded and along with the motor driver, housed in a computer hard drive enclosure which already had the power supply available.

Continue reading “Measuring The Accuracy Of A Rubidium Standard”

Spin DIY Photography Turntable System

A motorised turntable is very handy when taking product pictures, or creating animated GIF’s or walk around views. [Tiffany Tseng] built Spin, a DIY photography turntable system for capturing how DIY Projects come together over time. It is designed to help people share their projects in an engaging way through creating GIF’s and videos which will be easy to post on social networks like Twitter and Facebook.

The device is a lazy susan driven by a stepper motor controlled via an Arduino and an Easy Driver motor driver shield. The Spin system utilizes the Soft Modem library to send signals from an iPhone to the Arduino. This connects the Arduino to the iPhone via the audio socket on the phone. The Spin iOS app is currently in Beta and is invite only. After you’ve built your own Spin turntable, take a picture of it and request the app. Of course, there are many different ways of controlling the motor so if you are handy, you can build your own controller. But [Tiffany]’s iOS app provides a way to stitch the various images to form an animated GIF and then share them easily. Building the turntable should be straightforward if you grab the design files from the github repo, follow the detailed instructions on the build page, and have access to a laser cutter and a 3D printer.

Check out a few similar turntable hacks we’ve featured in the past, such as one that uses the motor from a scanner, an attempt that just didn’t end up working smoothly, and one that uses a belt-drive system. There’s a video of the turntable in action after the break.

Continue reading “Spin DIY Photography Turntable System”

Commodore 64 Mods Make A Mobile Computer

Some Commodore C64 owners and enthusiasts keep tinkering with their precious units, adding upgrades all the time. [wpqrek]’s latest upgrade to his C64 makes it totally portable – he added DC-DC converters to allow it to run off external battery sources.

He installed two separate DC-DC converters – one for 5V and another for 9V inside the enclosure. He opted for these high-efficiency converters because he planned to use batteries to power the device and wanted to maximize the juice he was extracting. He wired up a barrel jack socket to accept a 12V input, and another XT60 socket where he could attach a LiPo battery. A common 2200mAh RC battery is enough to power his C64 for 1.5 hours. To ensure the LiPo battery doesn’t get fully discharged, he’s added a simple buzzer circuit that starts beeping at around 3.3V.

How does just adding an external battery help make it portable? Well, he’s already added a small LCD display and a couple of other mods, that we featured in an earlier post. These earlier mod’s didn’t make the unit truly portable. Adding the latest hack does. Check out the video after the break.

Continue reading “Commodore 64 Mods Make A Mobile Computer”

Forbidden Fruit Machine

Here’s another example of how today’s rapid-prototyping technologies are allowing Artists and Craftsmen to create interactive works of art rapidly and easily. [Kati Hyypa] and [Niklas Roy] teamed up to transform a classic painting in to an interactive exhibit. It’s a painting of Adam, Eve and the apple with a joystick attached. Spectators can control the destiny of the apple with the joystick and thus explore the painting.

The “Forbidden Fruit Machine” is based on a painting called “The Fall of Man” created by [Cornelis Cornelisz van Haarlem] in 1592. The painting depicts Eve and Adam in the Garden of Eden, being tempted by the serpent to eat the forbidden fruit. A public domain, high-resolution scan of the painting is available for download from the Rijksmuseum Amsterdam. Starting with that, the arms were edited out, and replaced with articulated versions (mounted on acrylic) driven by servos. The apple was mounted on a X-Y gantry driven by two stepper motors. These are driven by a motor shield, which is controlled by an Arduino Uno. The Uno also controls a Music Maker shield to play the various audio tracks and sound effects. Finally, an additional Arduino Pro-Mini is used to control the LED lighting effects via a Darlington driver and also connect to the end stops for the X-Y gantry. The joystick is connected to the analog ports of the Uno.

The LED’s give clues on where to move the apple using the joystick, and pressing the red button plays an appropriate audio or sound effect. For example, pressing the button over the cat at Eve and Adam’s feet elicits a heart-breaking meow, while letting Eve eat the apple results in an even more dramatic effect including a thunder storm.

The machine is open source with code posted on Github and 3d files on Youmagine. Watch a video after the break. The artist’s names may be familiar to some some readers – that’s because both have had their earlier work featured on our blog, for example this awesome ball sucking machine and another one too.

Continue reading “Forbidden Fruit Machine”

Colorizer For ZX81 Clone

[danjovic] is a vintage computer enthusiast and has several old computers in his collection. Among them are a couple of TK-85 units – a ZX81 clone manufactured by Microdigital Eletronica in Brazil. The TK-85 outputs a monochrome video output. And when [danjovic] acquired a SyncMaster 510 computer monitor, he went about building a circuit to “colorise” the output from the ZX81 clone (Portuguese translation).

The SyncMaster 510 supports 15kHz RGB video refresh rate, so he thought it ought to be easy to hook it up to the TK-85, which internally has the video and composite sync signals available. So, if he could lower the amplitude of the video signal to 0.7Vpp, using resistors, and connect this signal to one of the primary colors on the monitor, for example green, then the screen should have black characters with a green background.

DSCN5584-thumb
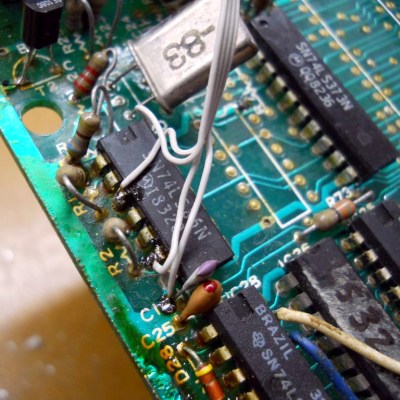
Before he could do any of this, he first had to debug and fix the TK-85 which seemed to be having several age related issues. After swapping out several deteriorating IC sockets, he was able to get it running. He soldered wires directly to one of the logic chips that had the video and sync signals present on them, along with the +5V and GND connections and hooked them up to a breadboard. He then tested his circuit consisting of the TTL multiplexer, DIP switches and resistors. This worked, but not as expected, and after some digging around, he deduced that it was due to the lack of the back porch in the video signal. From Wikipedia, “The back porch is the portion of each scan line between the end (rising edge) of the horizontal sync pulse and the start of active video. It is used to restore the black level (300 mV.) reference in analog video. In signal processing terms, it compensates for the fall time and settling time following the sync pulse.”

To implement the back porch, he referred to an older hack he had come across that involved solving a similar problem in the ZX81. Eventually, it was easily implemented by an RC filter and a diode. With this done, he was now able to select any RGB value for foreground and background colors. Finally, he built a little PCB to house the multiplexer, DIP switches and level shifting resistors. For those interested, he’s also documented his restoration of the TK-85 over a four-part blog post.

Vintage Microammeter Now Tells Temperature

[Craig] sent in this tip about a simple hack he built to convert an old analog micro-ammeter into a thermometer using a few parts. There’s a certain charm to retro analog meters, and there was enough space inside the old meter to accommodate the tiny breadboarded circuit and the three AA batteries to convert it into a cool looking centerpiece which is useful too!

He used the 3-pin MCP9700 analog temperature sensor connected to a LTC1541 – a combined comparator, op-amp and band gap reference voltage all rolled into one package. The thermometer displays 1uA per degree Celsius, has an output of 1mV per degree Celsius for external temperature monitoring / data logging, and draws just about 20uA. While the build itself is pretty simple, [Craig] took the time to walk through every design decision he made in the video after the break. This starts with the design for his circuit, and  moves on to the selection of parts and their values. The video is a must-watch for anyone wanting to learn more about precision op-amp based designs.

The three batteries will drain over time, and a circuit like this one requires a stable reference voltage. That is taken care by the bandgap reference voltage from the LTC1541. This eliminates the use of additional voltage regulators, and allows the circuit to work from 4.5V down to about 3.3V. Check the video after the break to listen to [Craig] describe how it works. We’re not sure how quickly it responds to changes in ambient temperature since the sensor is enclosed inside the meter, so maybe some vents at the back, or bringing out the sensor might be a good idea.

Continue reading “Vintage Microammeter Now Tells Temperature”

Vintage Lens On A Modern Camera

Sometimes you get plain lucky in multiple ways, enabling you to complete a hack that would otherwise have seemed improbable. [Mario Nagano] managed to attach a vintage 1950’s lens to a modern mirrorless camera (translated from Portuguese).

Photographers tend to collect a lot of gear and [Mario] is no exception. At a local fair in Sao Paolo, he managed to pick up a Voigtlander Bessa I – a bellows camera (or folding camera). It came cheap, and the seller warned him as much, commenting on the bad external shape it was in. But [Mario] had a sharp eye, and noticed that this was a camera that would have remained closed most of the time, due to its construction.

Inspection showed that the bellows was intact. What excited and surprised him was the excellent Color-Skopar objective mounted on a Prontor-S trigger, which is considered premium compared to the entry level Vaskar lens. His plan was to pick up another Voigtlander Bessa-I with a better preserved body, but the cheaper lens and do a simple swap. He never did find another replacement though. Instead, he decided to fix the excellent vintage lens to a DSLR body.

He’d read about a few other similar hacks, but they all involved a lot of complicated adapters which was beyond his skills. Removing the lens from the vintage camera was straightforward. It was held to the body by a simple threaded ring nut and could not only be removed easily, but the operation was reversible and didn’t cause any damage to the old camera body. The vintage lens has a 31.5mm mounting thread while his Olympus DSLR body had a standard 42mm thread. Fabricating a custom adapter from scratch would have cost him a lot in terms of time and money. That’s when he got lucky again. He had recently purchased a Fotodiox Spotmatic camera body cap. It’s made of aluminium and just needed a hole bored through its center to match the vintage lens. There’s no dearth of machine shops in Sao Paolo and it took him a few bucks to get it accurately machined. The new adapter could now be easily fixed to the old lens using the original 31.5mm ring nut.

The lens has a 105mm focal length, so the final assembly must ensure that this distance is maintained. And he got lucky once again. He managed to dig up a VEB Pentacom M42 macro bellows from an old damaged camera. Was it worth all the effort ? Take a look at these pictures here, here and here.