The geared DC motor has become the bread-and-butter of the modern-day beginner project. Unfortunately, with the advent of vast online catalogs peddling a wide assortment of these mechanical marvels, validating the claim that one DC motor will outperform the others is a challenge.
Such is the dilemma that our own [Gerrit Coetzee] faced as he set out to buy these geared motors in bulk. In his initial teardown, he quickly compares the change in design, from the original which possess the two-part clutch that extends on overloading, to the clones with the feature disabled altogether.
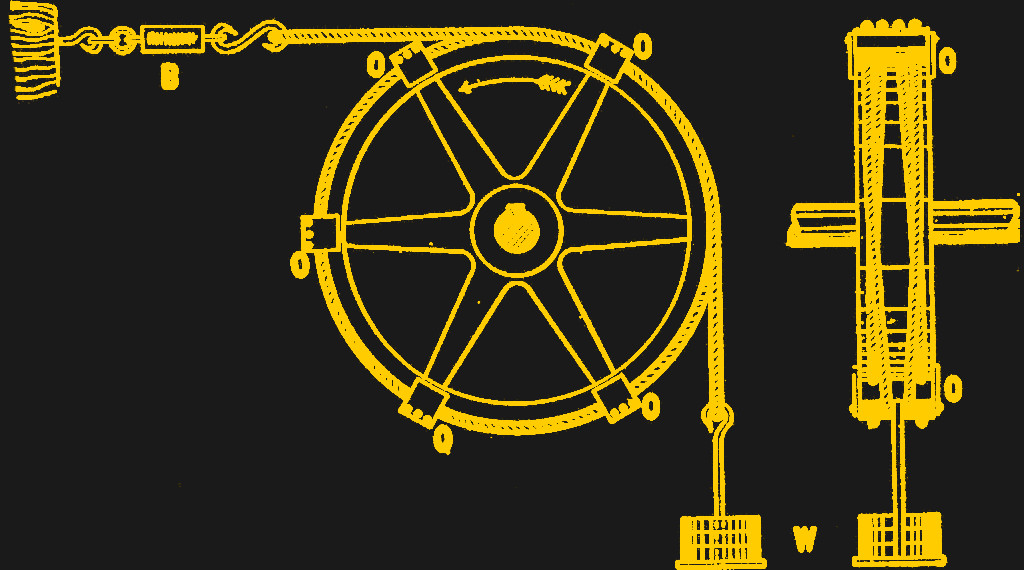 He then goes on to research methods of measuring the motor’s output where he discovers the Prony Brake which leads to the Rope Brake Dynamometer. This is where things get interesting and [Gerrit Coetzee] goes on to hack his own version of the machine. The idea is to have a rope wound to the wheel that is powered by the motor. With one end of the cord attached to a spring scale and the other end to a suspended weight, the motor speed affects the force on the spring scale. This change in force measured by the scale can be used to calculate the power output by the motor.
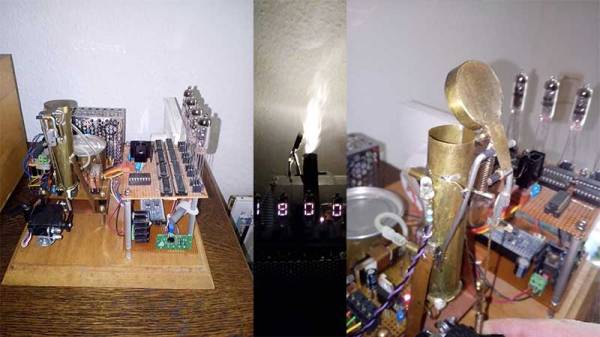
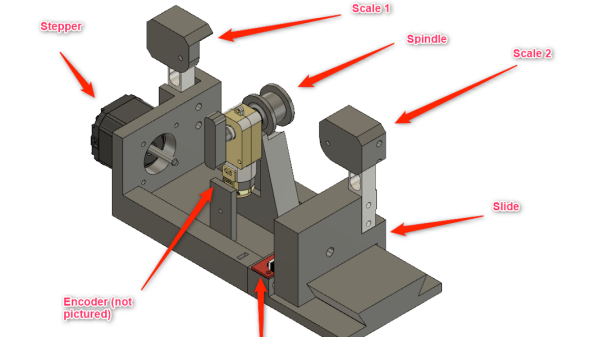
[Gerrit Coetzee] goes on to replace the weight with springs and the scale with an electronic load cell while using a stepper motor to stretch the cord thereby adding the requisite tension to the string. We thought this was a very elegant solution where the entire experiment could be controlled electronically.
This is a work in progress through the writeup is an excellent example of how to tailor a traditional experiment to the modern times. We have seen similar investigations for larger salvaged motors and dynamometers with lots of sensors.