When the Raspberry Pi was introduced, the world was given a very cheap, usable Linux computer. Cheap is good, and it enables one kind of project that was previously fairly expensive. This, of course, is cluster computing, and now we can imagine an Aronofsky-esque Beowulf cluster in our apartment.
This Hackaday Prize entry is for a 100-board cluster of Raspberry Pis running Hadoop. Has something like this been done before? Most certainly. The trick is getting it right, being able to physically scale the cluster, and putting the right software on it.
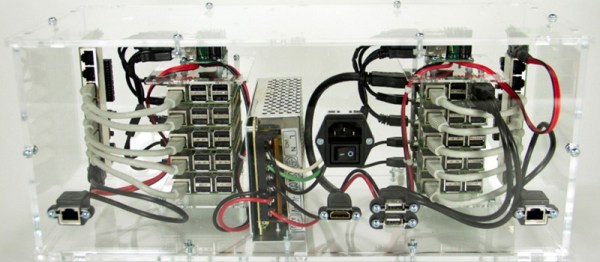
The Raspberry Pi doesn’t have connectors in all the right places. The Ethernet and USB is on one side, power input is on another, and god help you if you need a direct serial connection to a Pi in the middle of a stack. This is the physical problem of putting a cluster of Pis together. If you’re exceptionally clever and are using Pi Zeros, you’ll come up with something like this, but for normal Pis, you’ll need an enclosure, a beefy, efficient power supply, and a mess of network switches.
For the software, the team behind this box of Raspberries is turning to Hadoop. Yahoo recently built a Hadoop cluster with 32,000 nodes used for deep learning and other very computationally intensive tasks. This much smaller cluster won’t be used for very demanding work. Instead, this cluster will be used for education, training, and training those ever important STEAM students. It’s big data in a small package, and a great project for the Hackaday Prize.
The Maker movement is a wildly popular thing, even if we can’t define what it is. The push towards STEM education is absolutely, without a doubt, completely unlike a generation of brogrammers getting a CS degree because of the money. This means there’s a market for kits to get kids interested in electronics, and there are certainly a lot of options. Most of these ‘electronic learning platforms’ don’t actually look that good, and the pedagogical usefulness is very questionable. Evive is not one of these toolkits. It looks good, and might be actually useful.
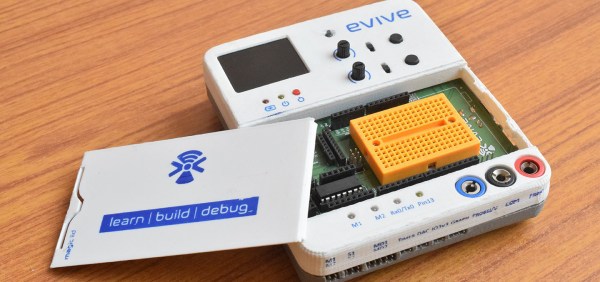
The heart of the Evive is basically an Arduino Mega, with the handy dandy Arduino shield compatibility that comes with that. Not all of the Mega pins are available for plugging in Dupont cables, though – a lot of the logic is taken up by breakouts, displays, buttons, and analog inputs. There’s a 1.8″ TFT display in the Evive, an SD card socket, connectors for an XBee, Bluetooth, or WiFi module, motor drivers, a fast DAC, analog inputs, and a plethora of buttons, knobs, and switches. All of this is packed into a compact and seemingly sturdy plastic case, making the Evive a little more durable than a breadboard and pile of jumper wires.
You can check out a remarkably well produced video for the Evive below.
[Yann]’s DYPLED entry into this year’s Hackaday Prize isn’t very useful to most people. It’s a tiny module that connects to a 16-bit parallel bus, and displays a hexadecimal number on a few LEDs. It’s useful if you’re diagnosing a problem on a computer from 1982, but just barely. The real wonder here is how [Yann] is doing this cheaply and easily using some weird techniques and strange parts.
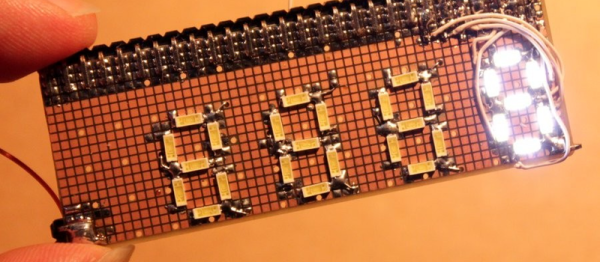
The display for this tiny device is an array of 36 LEDs, arranged into a set of five seven-segment displays. Homebrew seven-segment displays are cool, but how is he driving it? Not with a microcontroller, that’s for sure. Instead, [Yann] is using an old trick of using parallel memory to store the patterns of the seven-segment displays. This parallel memory comes in the form of a two megabit Flash chip, with the data inputs tied to the 16-bit input on the board and the data outputs connected directly to the LEDs. It’s a brute force approach, but it works.
There are a few additional features for this tiny board, including a switch to display a 16-bit bus in hexadecimal or decimal, signed or unsigned, and a pot to change how bright the LEDs are. The most amazing part is how [Yann] managed to fit all of this on a very, very small PCB. Most of that trick is due to using a thin, small TSSOP package for the Flash memory, but fitting this circuit onto a two layer board is amazing work, and a great entry for the Hackaday Prize.
An ophthalmoscope is a device used to examine the back of the eye. This is useful for diagnosing everything from glaucoma, diabetic retinopathy, to detecting brain tumors. As you would expect from anything related to medicine, these devices cost a lot, making them inaccessible for most of the world’s population. This project for the Hackaday Prize is for an ophthalmoscope that can be built for under $400.
An ophthalmoscope is a relatively simple device, that really only requires a clinician to wear a head-mounted lamp and hold a condensing lens in front of the patient’s eye. Light is reflected off the retina and into the clinician’s view. Of course, the simplest ophthalmoscope requires a bit of training to get right, and there’s’ no chance of being able to take a picture of a patient’s retina to share with other clinicians.
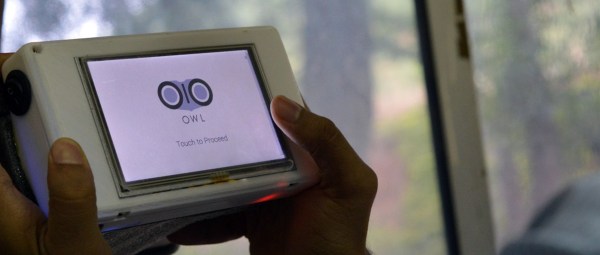
The Open Indirect Ophthalmoscope gets around these problems by using a digital camera in the form of a Raspberry Pi camera module. This camera, with the help of a 3 W LED, is able to image the back of the eye, snap a picture, and send that image anywhere in the world. It’s a simple device that can be constructed from a few mirrors, a cheap lens, and a few 3D-printed parts, but is still very valuable for the detection of ophthalmological disorders.
Computational Fluid Dynamics, or CFD, and is applied to everything from aircraft design to how good of a wing a new skyscraper will be. Of course, the science of building airfoils is much older than CFD, leading to the question of how airfoil design was done before computers.
The answer, of course, is a wind tunnel. Walk around a few very good air museums, and you’ll find wind tunnels ranging from the long wooden boxes built by the Wright brothers to fantastic plywood contraptions that are exceptionally interesting to woodworkers.
[Joel] needed final project as an upcoming aeronautical engineer, but he wanted his project to be something physical, and a tool that could be used again. He decided to build a wind tunnel that’s also his entry for The Hackaday Prize.
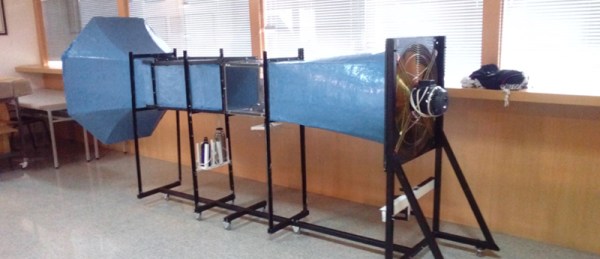
This wind tunnel isn’t a gigantic device the size of a building. The very first wind tunnels were simple devices just a few meters long. With a fan at one end, a section to stabilize the wind, a chamber, and a place for the air to go, it’s also a very simple device. Just because something is simple doesn’t mean anyone has built one recently, though: [Joel] couldn’t find anyone who built a wind tunnel with step-by-step instructions. This project is just that – an Open Source wind tunnel.
The design of this wind tunnel is simple enough, built out of fiberglass with relatively simple molds. The design can be adapted to various electric fans, and the most fun part of the build – the smoke machine – is already complete.
It doesn’t matter how many bits your password has, how proven your encryption is, or how many TrueCrypt volumes are on your computer. If someone wants data off your device, they can get it if they have physical access to your device. This is the ‘evil maid’ security scenario, named after hotel maids on the payroll of a three-letter agency. If someone has physical access to a laptop – even for an hour or two – the data on that laptop can be considered compromised. Until now, there has been no counter to this Evil Maid scenario, and for good reason. Preventing access to data even when it is in the possession of an Evil Maid is a very, very hard problem.
Software defined radios are getting better and better all the time. The balaclava-wearing hackers know it, too. From what we saw at HOPE in New York a few weeks ago, we’re just months away from being able to put a femtocell in a desktop computer for under $3,000. In less than a year, evil, bad hackers could be tapping into your cell phone or reading your text message from the comfort of a van parked across the street. You should be scared, even though police departments everywhere and every government agency already has this capability.
These rogue cell sites have various capabilities, from being able to track an individual phone, gather metadata about who you have been calling and for how long, to much more invasive surveillance such as intercepting SMS messages and what websites you’re visiting on your phone. The EFF calls them cell-site simulators, and they’re an incredible violation of privacy. While there was most certinaly several of these devices at DEF CON, I only saw one in a hotel room (you catchin’ what I’m throwin here?).
No matter where the threat comes from, rogue cell towers still exist. Simply knowing they exist isn’t helpful – a proper defence against governments or balaclava wearing hackers requires some sort of detection system.. For the last few months [Eric Escobar] has been working on a simple device that allows anyone to detect when one of these Stingrays or IMSI catchers turns on. With several of these devices connected together, he can even tell where these rogue cell towers are.
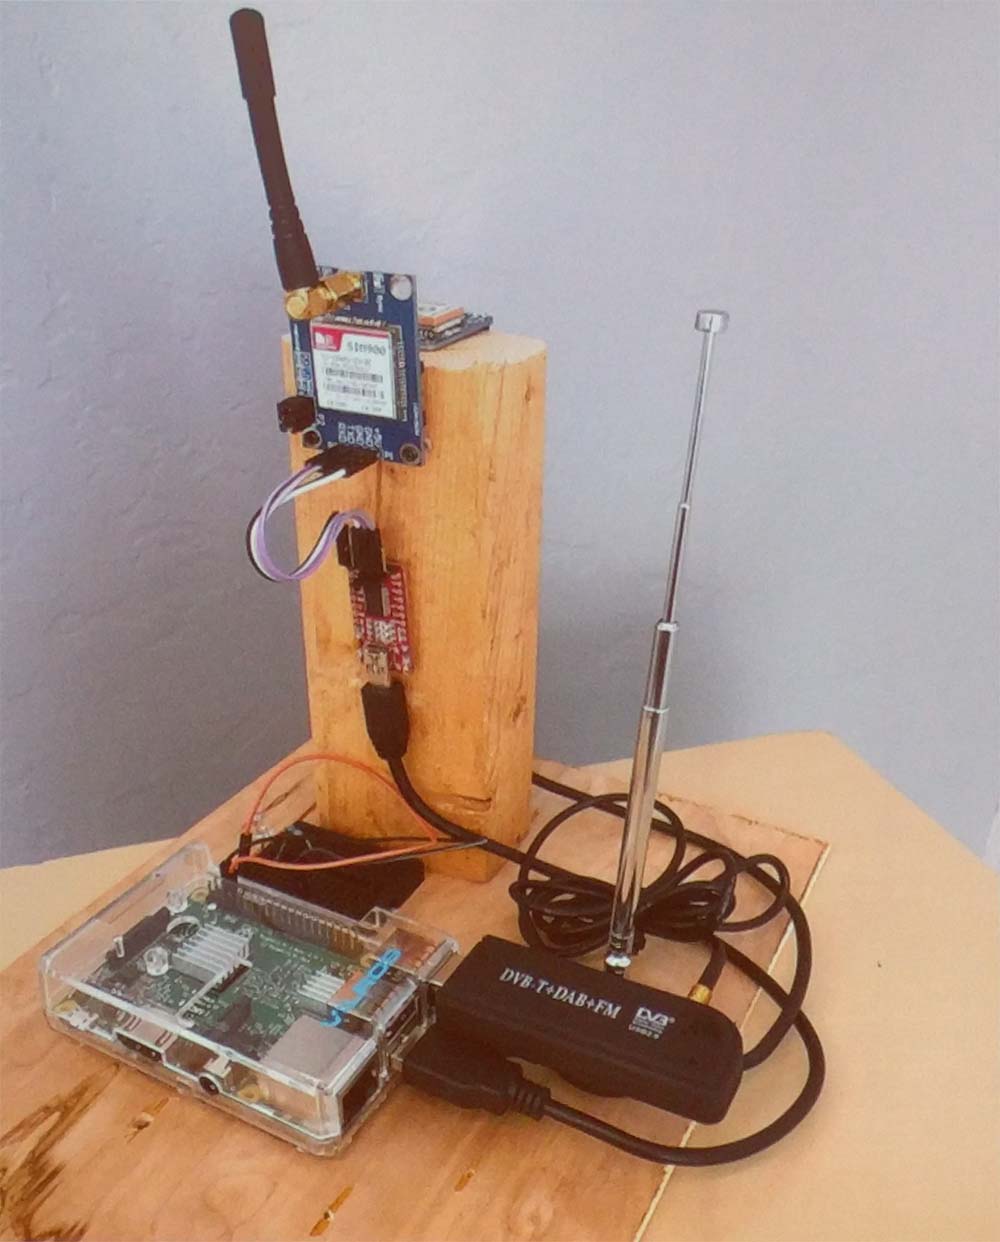
A Stingray / cell site simulator detector
Stingrays, IMSI catchers, cell site simulators, and real, legitimate cell towers all broadcast beacons containing information. This information includes the radio channel number, country code, network code, an ID number unique to a large area, and the transmit power. To make detecting rogue cell sites harder, some of this information may change; the transmit power may be reduced if a tech is working on the site, for instance.
To build his rogue-cell-site detector, [Eric] is logging this information to a device consisting of a Raspberry Pi, SIM900 GSM module, an Adafruit GPS module, and a TV-tuner Software Defined Radio dongle. Data received from a cell site is logged to a database along with GPS coordinates. After driving around the neighborhood with his rogue-cell-site detector sitting on his dashboard, [Eric] had a ton of data that included latitude, longitude, received power from a cell tower, and the data from the cell tower. This data was thrown at QGIS, an open source Geographic Information System package, revealing a heatmap with the probable locations of cell towers highlighted in red.
This device really isn’t a tool to detect only rogue cell towers – it finds all cell towers. Differentiating between a rogue and legitimate tower still takes a bit of work. If the heatmap shows a cell site on a fenced-off parcel of land with a big tower, it’s a pretty good bet that cell tower is legit. If, however, the heatmap shows a cell tower showing up on the corner of your street for only a week, that might be cause for alarm.
Future work on this cell site simulator detector will be focused on making it slightly more automatic – three or four of these devices sprinkled around your neighborhood would easily allow you to detect and locate any new cell phone tower. [Eric] might also tackle triangulation of cell sites with an RF-blocking dome with a slit in it revolving around the GSM900 antenna.