An Etsy For Electronics

A few months ago we caught wind of Tindie, a site that gives builders, tinkerers, makers, and hackers a place to sell their projects. Well, Tindie has gone live and it looks to be cooler than we expected.

Already there are some pretty awesome projects available on Tindie such as a truly awesome MIDI keyboard, an Arduino synthesizer, and even a robot that plays Angry Birds.

In addition to giving makers a place to sell their wares, Tindie also offers a place to post want ads. If you have an idea for a project but don’t have the skills or tools to pull it off, Tindie is just the place for you. Any builder is free to make a bid for jobs that include a sonic screwdriver TV-b-gone or a Pip boy

Hopefully, Tindie will pick up some steam and fill the role of a much geekier Etsy. For now, though, we eagerly await the eventual Tindie/regretsy mashup showcasing perpetual motion machines and alien overlord detectors.
How About A Nice Game Of Nixie Chess?

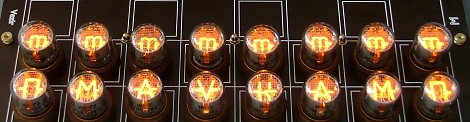
[Tony] sent in a Nixie tube chess set he’s been working on, and we’re just floored with the quality of this build. The chess pieces glow without any visible wires, the board is extremely elegant with touches of gilding and brass, and extremely well designed using (mostly) materials and components contemporary to the old Russian Nixie tubes.

Instead of numeric Nixies, [Tony] chose IN-7 and IN-7A tubes originally made to display scientific symbols such as A, V, and ~. To power the these tubes, [Tony] used 64 air-core transformers underneath each square on the chess board, allowing these Nixie tubes to be powered just like an induction charger.

Even though his blog posts are a little thin on details, we’ve got to hand it to [Tony] for an amazing build. He says there will be a kit available that includes a gigantic PCB, but we wouldn’t hazard a guess as to how much that will cost.

You can check out a pair of videos of the Nixie chess set in action after the break.

Continue reading “How About A Nice Game Of Nixie Chess?”

Simple Ambilight Clone Is Just A Few Transistors

The Ambilight system – built in to high-end Phillips TVs – is a neat system to add a bit of ambiance to regular television viewing. With this system, a series of RGB LEDs are mounted to the rear of the TV to respond to whatever is currently being displayed. [Lovro] came up with a very simple way to add an ambilight system to his computer monitor using only a handful of components.

Unlike other Ambilight clones we’ve seen controlled by custom software or a Processing sketch, [Lovro]’s system uses a few transistors wired to the red, green, and blue pins of his VGA cable. Each of these lines is connected to an RGB LED, so the intensity of each color is determined by the amount of the respective color on the screen.

There is a down side with this setup: a second video output in a mirrored mode is required for this hack to work. Luckily, [Lovro] has a dual-monitor graphics card, making setup a (relative) breeze.

You can check out [Lovro]’s videos of his Ambilight clone in action after the break.

Continue reading “Simple Ambilight Clone Is Just A Few Transistors”

Adding An OLED To A LEGO Set

Sure, as a very powerful and influential LEGO dictator you’re more than able to make the trains run on time, but how do you make your LEGO citizens realize the benefits of living under your regime? With an OLED LEGO train schedule, of course! [Dan] over at Adafruit put together a great guide to interfacing a very small OLED display to a LEGO setup, perfect for displaying which trains are on schedule and not displaying which trains are heading to a ‘camp.’

The build uses a 96×64 RGB OLED display that is just under an inch in size. After connecting the display to an Arduino, [Dan] crafted a bezel and mounted it inside a LEGO brick wall. Seems like just the thing for the Adafruit LEGO set.

Of course, the tiny Adafruit OLED display can be used for much more than showing the train schedule at a LEGO train station. We imagine this could be put to use in an awesome model train layout or even a small plastic security checkpoint.

Bike Cross Country In Your Basement With Google Streetview

Biking cross-country is a worthwhile pursuit, but then you’ll have to deal with terrible drivers, rain, bugs, and heat. [Jeff Adkins] over at lowendmac has a neat solution to exploring the country via bicycle without ever leaving the safety and air conditioning of your basement.

For his build, [Jeff] used a magnetic reed switch attached to the frame of his stationary bike and the pedal crank. Whenever the pedal crank is turned, a reed switch closes on every revolution. This reed switch is connected to a new Arduino Leonardo programmed to transmit keyboard presses to a computer for every five revolutions of the pedal. From there, it’s a simple matter of loading up Google Streetview on a laptop and letting the Arduino automatically advance through Streetview images while pedaling.

The next part of [Jeff]’s project will be adding left and right buttons to his stationary bike to navigate Google Streetview images without taking his hands off the handlebars. You can check out a demo of [Jeff] cruising around after the break.

via reddit

Continue reading “Bike Cross Country In Your Basement With Google Streetview”

Building Better Cases With A Laser Cutter

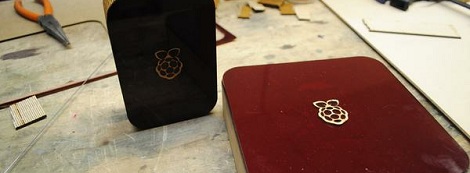
[Ryan] just got his Raspberry Pi, and what better way to add a new toy to your workbench than by building a case for it? Using a laser cutter and 3D printer, [Ryan] managed to make a case that is sure to be the envy of all the other tinkerers at his hackerspace.

The build started off with a piece of dark red acrylic in a laser cutter. After cutting the Raspberry Pi logo out of this acrylic, [Ryan] cut the same logo – a little bit larger – out of plywood. Because he was very careful to measure the kerf (or the width of the laser beam/saw blade/what have you), the wooded version of the Raspi logo fit snugly inside the acrylic cut out.

The sides of the enclosure are a single piece of plywood with a kerf bend, making for a very attractive rounded case. Finally, the Raspberry Pi is mounted on a Pi plate printed on a Ultimaker.

For as many builds we see using a laser cutter here on Hackaday, there’s surprisingly little information on exploiting the true potential of these machines with marquetry, intarsia, or fretwork. Enclosures are always cool, so if you have a very elegant laser cut box, send it in and we’ll put it up.

Melting Beer Cans And Building Engines

What do you do if you’ve got a fully equipped machine shop and you’re tired of taking old beer cans to the recycler? If you’re like [Brock], you’ll probably end up melting those cans down to build an engine.

After gathering 50 pounds of beer cans and melting them down into ingots of various sizes, [Brock] and company had a lot of aluminum and nothing to build. Eventually, someone got the idea to build an internal combustion engine out of these beer can ingots.

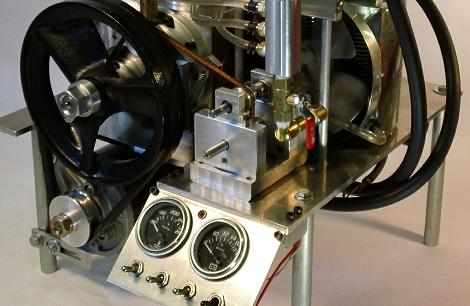
So far, the beer can engine crew has built two engines from these beer can ingots. The four-stroke engine started off as a 5-inch aluminum cube, bored and milled into something resembling an engine block. When [Brock] and the beer can engine team completed their four-stroke masterpiece, they had a water-cooled engine displacing 150cc with a single 2″ bore piston. The two-stroke engine is a much simpler affair with a 1 inch bore displacing 19cc.

Even though there’s no information at all covering the pottery kiln foundry used to melt the beer cans into ingots, it’s an amazing piece of work building and engine from the ground up.

You can check out a few videos of both engines after the break.

Continue reading “Melting Beer Cans And Building Engines”