Better Driving With A Bullduino

Despite what you may have heard from the kids hanging out in the parking lot of Taco Bell, there’s a lot to be said about driving conservatively. Not peeling out after ever red light and stop sign does wonders for the life of your engine, and not slamming on the brakes 50 feet away from an intersection will keep your brake pads going a long time. [aromaoftacoma] wanted a dashboard gauge telling him how good of a driver he is, so when he got a bullduino he knew what he had to do.

[aromaoftacoma]’s project for the Redbull creation contest uses the very cool Arduino shield/Redbull logo known as a bullduino with an accelerometer to track how conservatively he’s driving. Quick stops and starts are murder on an automobile – it’s the same reason your grandmother has had the same car for 20 years – so [aromaoftacoma] made a wonderful display using red and blue LEDs behind each charging bull.

Because simply blinking a LED in response to data pulled from an accelerometer is a little boring, [aromaoftacoma] added a servo to change the orientation of the charging bulls. When he’s driving well, the blue bull is tilted up, and when he stops short the red bull becomes the focus of attention. Not a bad build at all.

You can check out [aromaoftacoma]’s build video after the break.

Continue reading “Better Driving With A Bullduino”

Playing Video On An 8-bit Microcontroller

The LCD displays for Nokia phones have seen a ton of use as easily interfaced displays for Arduino or other microcontroller projects. Usually, these LCDs are only used for displaying a few lines of text, or if someone is feeling really fancy, a small graph. Shame, then that we don’t see more complicated and computationally difficult tasks like playing video very often. [Vinod] sent us his way of playing video on these small color screens, surprisingly using only an ATMega32 microprocessor.

The build started off by saving uncompressed image data on an SD card using code from a previous project. [Vinod] was able to write a slideshow program to go through the SD card one file at a time and displaying each image. From there, it was simply a matter of using a Python script to convert frames of an .AVI video file to an uncompressed image and display them at 15 frames/second.

Turning these videos into talkies was a bit of a problem, but after taking an uncompressed .WAV file and sending that to a PWM pin on the ATMega, [Vinod] managed to play sound alongside his video.

The result is the ability to play a video with sound at 15 frames a second and a 132 x 65 resolution. You can check out the demo video after the break.

Continue reading “Playing Video On An 8-bit Microcontroller”

[Sprite_tm] Connects An LCD To A Tiny Linux Board

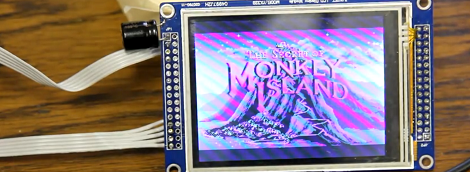
One of [Sprite_tm]’s colleagues recently challenged him to connect a small LCD touch screen to a Raspberry Pi. Sadly, [Sprite_tm] has yet to take delivery of a Raspberry Pi, but he did manage to connect an LCD to a Linux board without video capabilities.

Because [Sprite_tm]’s display has a 16-bit parallel interface, and 16 GPIO pins are hard to come by on the Carambola Linux board, a few shift registers had to be brought into the build to make the LCD work. These shift registers are connected to the Carambola board via an SPI interface; a very simple way to connect all the LCD pins to the Linux board.

Of course, there’s no way for Linux to speak to the LCD without a kernel driver; [Sprite_tm] wrote a framebuffer driver so the LCD can be used as a console, an X session, or used by any other program that can write to a framebuffer device.

Like all good driver authors, [Sprite_tm] is giving away the patch to enable SPI-ified LCD panels on the Carambola along with the shift register schematic. With any luck we’ll also see the Raspi drivers when [Sprite_tm] takes delivery of his Raspberry Pi.

Logging Temperatures With An Etch-a-Sketch

What do you do if you’re given a gigantic ancient printer? If you’re [IronJungle], you throw that printer on your workbench and salvage all the parts you can. After coming across a few stepper motors in an old Oki printer, [IronJungle] decided to automate an Etch-a-Sketch with the help of a PIC microcontroller and H-bridge chip to log the ambient temperature on an Etch-a-Sketch display.

After [IronJungle] was finished figuring out his stepper motor circuit, the only thing left to do was to add a thermometer. For this task, he chose a very cool one-wire digital thermometer that carries power and data over the same wire.

In the video after the break, you can check out [IronJungle] playing with his new Etch-a-Sketch temperature logger with a shot glass of hot water and a cold can of holy water. There’s no scale or graph lines drawn on this Etch-a-Sketch temperature logger, but [IronJungle] has a few more things planned for this rig. We can’t wait to see those plans come to fruition.

Continue reading “Logging Temperatures With An Etch-a-Sketch”

Knut Logs Data, Sends It To Your Email

[Richard] and [Jay] needed a WiFi connected data logger for remotely monitored aquariums. After working diligently for three years, they’re finally finished. While the Knut was originally designed to keep tabs on a few huge aquariums, it’s more than capable to log all sorts of data and send those sensor readings to your email address.

Knut is a small WiFi enabled device replete with a few plugs for temperature, humidity, accelerometer, and other sensors. All this data goes directly into the memory of Knut, and when the memory is full the data is sent to an email address. As a bonus, there’s also an iDevice app (Android and Windows coming soon) to parse the generated .CSV file and display the results on an iPhone

The Knut may be a touch expensive for our tastes, but if you’re looking for an off-the-shelf solution for sending alerts, logging data, or just reading a few sensors via WiFi, Knut may be just the ticket.

[Richard] and [Jay] put together a demo video showing off the capabilities and operation of the Knut app; check that out after the break.

Continue reading “Knut Logs Data, Sends It To Your Email”

Crayolascope Turns Flat Displays Into Volumetric Coolness

[Blair] sent in a project he’s been working on for a while. It’s called the Crayolascope, and it allows for the creation of an extremely low-fi volumetric display using a Crayola Glow book.

The Crayola Glow Book is a pretty neat toy composed of four clear plastic panels. Each of these four panels are illuminated from the side to reveal the image drawn with fluorescent ‘glow pens’. [Blair] had the idea to take several of these Glow Books and draw a rudimentary 3D animation by sequentially lighting one of the 12 plastic panels.

After tracing single frames from a rotating cube animation, the Crayolascope pages through the plastic panel-based 3D display with the help of an Arduino Mega. For each frame of animation, the Arduino illuminates a single display with edge-mount LEDs. Of course there’s a control panel to regulate how fast the frames are shown, along with the ability to scrub a frame and apply a fade effect.

[Blair] admits there are a few problems; there’s a lot of internal reflections in the array of clear plastic sheets, and frames near the end of an animation are really only observable in a very dark room. [Blair] hopes the next version of the Crayolascope will use thinner plastic panels to increase the depth of the animations – a solution that may just solve the decreasing brightness of ‘deeper’ panels.


Using The Raspi As An Ethernet Shield

[Alexandre] wanted to set up a web-based temperature logger with his Arduino, but found the Arduino Ethernet shield a little finicky. Since his Raspberry pi was just delivered, he figured he could use the Raspi as an Ethernet shield with just a little bit of coding.

After [Alexandre] set up his Arduino to send a thermocouple through the USB, the only thing left to do was to add node.js to the Raspi’s Debian installation. Every five minutes, the Arduino wakes up, takes a temperature reading, and sends it over to the Raspberry pi. From there, it’s easy parse the Arduino’s JSON output and serve it up on the web.

In the end, [Alexandre] successfully set up his Raspberry pi as an Ethernet shield to serve a web page displaying the current temperature (don’t F5 that link, btw). One interesting thing we have to point out is the cost of setting up this online temperature logger: the Arduino Ethernet shield sells for $45 USD, while the Raspberry pi is available for $35. Yes, it’s actually less expensive to use a Raspberry pi as an Ethernet shield than the current Arduino offerings. There you have it, just in case you were still on the fence about this whole Raspi thing.