Two Interesting Boards Coming Down The Pipe

Hey, it’s a hardware twofer! Here’s two platforms coming down the pipe:

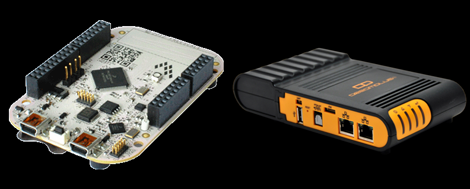
First up is the Mimo Dreamplug, the latest in a continued expansion of choices for very tiny, single-board Linux computers. The Dreamplug should be extremely capable of just about any task you can throw at it. With a 1.2GHz Marvell Sheeva CPU, eSATA, fiber optic/TOSLINK, WiFi, Bluetooth, two Gigabit Ethernet connections, and 512 MB of RAM, we’re thinking this could be used for just about anything. It’s a little pricy at $250, but that’s  what you pay for all those features. No idea when it will be available, though. Never mind, you can get the same thing for $150 here. Thanks, [Scott].

Next up is the Kinetis KL25Z Freedom Board, an Arduino-compatable, Cortex-M0+ based dev board being made available for pre-order. The specs on this machine seem pretty good – with a 48MHz ARM chip, on-board accelerometer, a capacitive touch ‘slider’ built into the PCB, and OpenSDA for a USB debug interface, you should be able to make a few cool projects with this board. As a neat bonus, it costs $13, and Freescale is giving away a version of their Codewarrior development environment (limited to 128kB, but that’s all the Flash the Kinetis has). Hopefully, it’ll be a much more open development platform than what our own [Mike Szczys] has been able to wrangle from the STM32 board that has been floating around. The Kinetis should be available this fall.

Thanks [Impulse405] and [Hussam] for sending these tips in.
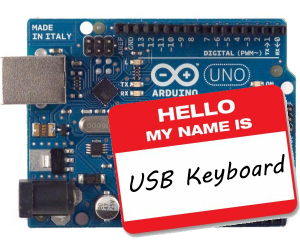
Turning An Arduino Into A USB Keyboard

The newly released Arduino Leonardo has a few very interesting features, most notably the ability to act as a USB keyboard and mouse thanks to the new ATmega 32U4 microcontroller. This feature isn’t exclusive to the Leonoardo, as [Michael] explains in a build he sent in – the lowly Arduino Uno can also serve as a USB HID keyboard with just a firmware update.

The Arduino Uno (and Mega) communicate to your computer through a separate ATmega8U2 microcontroller. Simply by uploading new firmware with the Arduino Device Firmware Upgrade, it’s easy to have your old Arduino board gain some of the features of newer boards such as the Teensy or Leonardo.

[Michael] goes through the steps required to make this upgrade work and ends his build by showing off an Arduinofied ‘cut, copy and paste’ button project as well as a few multimedia controls. You can check those builds out in the video after the break.

If emulating a USB keyboard isn’t your thing, it’s also possible to install LUFA firmware to emulate everything from joysticks to USB audio devices. Very cool, and very useful.

Continue reading “Turning An Arduino Into A USB Keyboard”

Building A CMOS Clock On A Breadboard

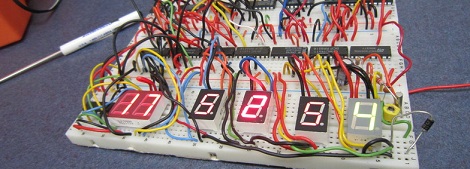
If you’re going to learn digital logic, why not aim high? That’s what [Easton] and his friend did when they built a clock using only 4000-series logic chips. On a breadboard, no less.

For a 1 Hz clock, [Easton] and his friend used a 4060 counter paired with a flip flop. This counts off 59 seconds until, with the help of an AND gate, the seconds counter rolls over to zero. After repeating that again for the minutes and building a similar circuit for the hour, and [Easton] had a working 4000-series 24-hour clock.

The breadboard clock may not be the prettiest thing, or a textbook example of how to prototype circuits,  but that was fixed with [Easton]’s friend’s PCB layout of a 12-hour clock. We couldn’t find any pics of this, but we’re sure it’s awesome and a great way to learn about logic and design.

Quadrotor Opera Begs For Lasers And Pink Floyd

In case quadrocopters aren’t cool enough, here’s an orchestrated quadrotor light show that was shown at the Cannes Lions International Festival of Creativity this last week. With 16 quadrotors and a few can lights, it’s a light show not to be missed.

This quadrotor show was created by a collaboration between KMel robotics and Marshmallow Laser Feast. The guys behind KMel are the same brilliant minds behind this nanocopter swarm that can play the [James Bond] theme. For this light show, the guys at KMel Robotics used a Vicon motion capture system to coordinate the flock of quadrotors, as seen in this picture.

With a servo-controlled mirror on the bottom of each quatrotor, each vehicle in the fleet is able to reflect beams of light around the stage and into the audience. Now it’s only a matter of time until a setup like this is used for a showing of Laser Floyd.

Tip ‘o the hat to [cesar] for sending this one in. Via IEEE Spectrum.

Edit: They’re not can lights. After watching in 1080p, [Impulse405] is pretty confident they’re High End studio spots or a wash with a tight focus. Thanks for keeping us honest, [Impulse405]!

Building A Pick And Place With 3D Printed Parts

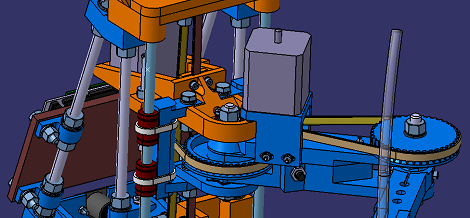
For the last few months, [HeliumFrog] has been building a SCARA bot to serve as the basis for a pick and place machine. Somewhat amazingly, this is the first robot of its kind to be printed on a 3D printer.

A SCARA-type robot is an articulated arm perfectly suited for transferring components from tubes and reels to a PCB. [HeliumFrog] began his build with an arm with large gears in joints driven by stepper motors and toothed belts. The Z axis was originally driven with a lead screw, but after a thoughtful redesign that was changed over to another toothed belt.

We’ve seen our share of DIY pick and place machines, but most of those have been based on a traditional X/Y Cartesian frame. [HeliumFrog]’s SCARA bot should be – theoretically, at least – faster and more accurate while taking up a smaller footprint in the workshop.

[HeliumFrog] is more or less done with the basics of his build, and is now moving on to building a plastic extrusion tool head for his SCARA bot. Very cool, and should make this robot capable of self-reproduction for under £400 (~$600).

You can check out a video of this articulated arm bot after the break.

Thanks, [Kyle] for sending this one in.

Continue reading “Building A Pick And Place With 3D Printed Parts”

Baking Better Bread With Steam

It’s not often we see a build that turns you into a better cook without any electronics whatsoever. [Chris]’s method of baking better bread with steam is one of those builds, and we’re more than willing to test it out on our own.

If you’ve ever tried to bake bread at home, you’ll quickly notice the crust is much thicker and harder than a loaf available at a bakery. The thickness of the crust can be controlled, however, with a careful application of steam. To make a better crust, [Chris] used a pressure cooker fitted with a valve to inject steam into an oven through his oven’s exhaust. Not only does this gelatinate the starches in the bread crust, but it keeps this gelatin from hardening too quickly.

The end result is a thin, golden brown crust that makes for the perfect loaf of bread. Of course, the proper application of steam does take a little bit of practice. If someone is up to the task of Arduinofying this hack with a few solenoid valves, PID sensors, and a high-temperature humidity sensor, send it in and we’ll put it up.

Getting Started With Software Defined Radio

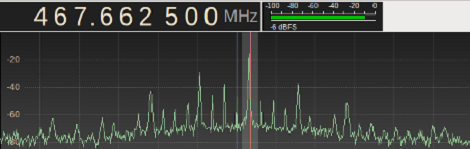
In the last few months, software defined radio has seen an explosion in popularity thanks to a small USB TV tuner dongle able to receive anything broadcast between 64 and 1700 MHz. It’s a very neat project that opens the door to a whole bunch of radio experimentations, but getting started in the SDR world can be a bit daunting. To help everyone out, [MS3FGX] is writing a getting started guide so everyone can get into the world of software defined radio.

After getting one of the TV tuners supported by the RTL-SDR project (by far the most commonly used is this one from Dealextreme), the next thing you’ll need is a decent antenna. [MS3FGX] has had some success with this Radio Shack antenna, but it’s very easy to make your own.

The most popular software package to use with the RTL TV dongle is GNU Radio, and [MS3FGX] goes over the ins and outs of setting this up along with a brief aside for the Gqrx receiver.

After your hardware and software is set up, the only thing left to do is tuning into a few of your favorite stations. The range of frequencies the RTL covers includes AM and FM radio, along with GSM and GPS signals. Of course there’s a whole lot more you can do with this project like listening in on your car’s keyless entry fob, pagers, and wireless weather stations.