The Most Portable GameCube Ever

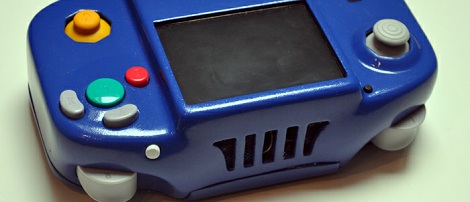
Here’s the smallest GameCube we’ve seen, straight from the fruitful workbench of [lyberty5] over on the ModRetro forums. Even though we’ve seen disc-less GameCubes before, [lyberty5] puts this project together so well it wouldn’t look out-of-place in the Nintendo product lineup.

Unlike most of the other portable GameCubes we’ve seen, [lyberty5]’s build doesn’t have a disk drive. The games are loaded off an SD card with the help of a Wiikey Fusion, a small FPGA’d device that replaces the CD drive in GameCubes and Wiis with an SD card.

The enclosure was constructed out of vacuum formed plastic with the always popular ‘dremeling and bondoing a controller for proper button placement’ method. Inside the enclosure is the hacked up GameCube, a 3.5 inch screen capable of displaying NTSC video at 640×480 resolution and enough battery power to get two or three hours of playtime from a single charge.

After the break you can check out [lyberty5] fast-paced demo video that really sets the bar for portablized console presentation.

Continue reading “The Most Portable GameCube Ever”

Win $40,000 For Squirting Plastic Out Of A Nozzle

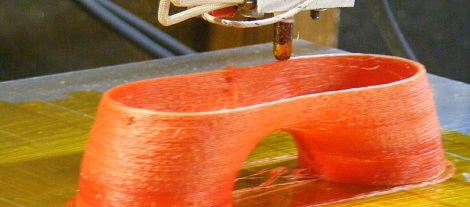
3D printers such as the RepRap and Makerbot turn spools of plastic filament into just about any object imaginable. There’s a problem though: this filament costs about $40 a kilogram, and raw plastic pellets cost about 1/10th of that. Obviously, there’s a lot of room for improvement. The folks at Inventables are throwing $40,000 at the problem in a contest to build a machine that takes plastic pellets and turns it into usable plastic filament.

The object is simple: build a device that takes ABS or PLA pellets and turns them into a 1.75mm filament. The machine has to cost less than $250, be able to add colorant to the plastic, and be usable in a 3D printer. The winner gets $40,000, a laser cutter, a 3D printer, and a CNC milling machine courtesy of Inventables. Sign up on the official contest website and don’t be shy about sending your progress into the Hackaday tip line

If you’d like to get started, here’s a great page that goes over the basics of plastic extrusion, and a few attempts (1, 2) from [Adrian Bowyer] and [Forrest Higgs] that show exactly how hard this is. There’s also the Filabot that had a successful Kickstarter, but there’s apparently been no (or very limited) progress in the four months since the Kickstarter. I’ve even given this idea a go, but am currently stuck at manufacturing a proper auger. To put this in perspective, this is the moonshot of the current crop of 3D printers; a simple device to lower the barrier of entry to 3D printing is desperately needed, and we’ve got to give props to the Inventables crew for putting this contest together.

More Kinect Holograms From [programming4fun]

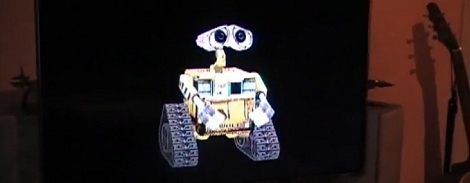
[programing4fun] has been playing around with his Kinect-based 3D display and building a holographic WALL-E controllable with a Windows phone. It’s a ‘kid safe’ version of his Terminator personal assistant that has voice control and support for 3d anaglyph and shutter glasses.

When we saw [programming4fun]’s Kinect hologram setup last summer we were blown away. By tracking a user’s head with a Kinect, [programming] was able to display a 3D image using only a projector. This build was adapted into a 3D multitouch table and real life portals, so we’re glad to see [programming4fun] refining his code and coming up with some really neat builds.

In addition to robotic avatars catering to your every wish, [programming4fun] also put together a rudimentary helicopter flight simulator controlled by tilting cell phone. It’s the same DirectX 9 heli from [programming]’s original build. with the addition of Desert Strike-esque top-down graphics. This might be the future of gaming here, so we’ll keep our eyes out for similar head-tracking 3D builds.

As always, videos after the break.

Continue reading “More Kinect Holograms From [programming4fun]”

3D Printing With Nylon For A More Useful Objects

[taulman] over on Instructables has been working on his own version of a 3D printer. Unlike the usual PLA or ABS filament all the RepRaps and Makerbots use, this printer uses nylon to make parts with very interesting properties.

Most extrusion printers are designed to print with ABS (a very hard plastic that melts around 220-230° C) or PLA (a somewhat softer plastic that melts at about 180° C). [taulman] is using Nylon 6, a very slippery and bendable plastic that melts around 320° C (about 600 degrees Fahrenheit). He’s doing this with a hot end of his own design and a ‘spiky’ extruder bolt that allows high-temperature thermoplastics to be extruded into any shape imaginable.

For the longest time, the 3D printer community has been using low-temperature thermoplastics such as PLA and ABS. There are obvious benefits to these materials: it’s pretty easy to source a spool of filament, and the low melting point of these plastics makes building a printer easier and safer. Now that [taulman] has the high-temperature plastic nut cracked, he’s moving on to easily-machiniable Delrin and transparent Polycarbonate. Very cool, and hopefully in a year’s time we’ll have a choice of what material to run in our printers.

After the break, there are a few videos [taulman] put up showing his printer at work and the properties of his 3D printed objects. It looks like [taulman] can print objects that are impossible on any other 3D printer we’ve seen; the flexible iPhone case probably couldn’t be made on any other DIY machine.

Continue reading “3D Printing With Nylon For A More Useful Objects”

Hackerspace Intro: STGO Makerspace In Santiago, Chile

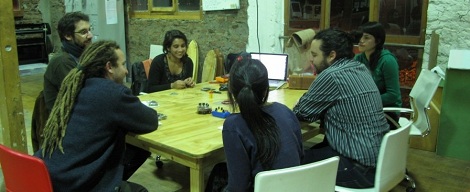
[Roy MacDonald] sent in a few links to all the cool stuff his home base – the StgoMakerSpace (Google translation) in Santiago, Chile – is putting together. They’re a new hackerspace that’s only been open for two months or so, but already they’re put together a great assemblage of tools, hosted a few awesome workshops, and even gotten a good bit of local media exposure.

The StgoMakerSpace found its first bit of fame with a very in-depth article in Qué Pasa, a Chilean magazine (Google Translate). There’s a lot of very, very talented people at StgoMakerSpace that includes [macapola], an industrial designer who spent a year in China learning all about modern, global  manufacturing processes.

StgoMakerSpace has a few workshops coming up, including a Kinect hacking workshop, and Arduino workshop, and a welding workshop. If you’re around Santiago, it’s worth checking out. In addition to very, very smart people and a whole bunch of tools, StgoMakerSpace also has a retro video game museum and FREE BEER brewed in-house.

As a small aside, [Roy] tells us the word ‘hacker’ has a negative connotation in Spanish, and it immediately associated with cybercrime; that’s the reason it’s the Santiago Makerspace. In our experience, the same connotation sometimes applies in English, something that hasn’t stopped all the Hackerspaces around the US.

Hackaday Links: May 21, 2012

Turning anything into a touch sensor

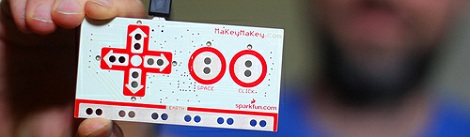
Makey Makey is a small board with a USB plug and bunch of contact points for alligator clips. Plug the Makey into your computer and attach just about anything to the contacts, and you can make anything into a video game controller, a keyboard, a piano, or pretty much anything you can imagine. If [Sprite_tm] copied it, you know it has to be cool.

RepRaps will finally cost a million dollars

The Pentagon is throwing money at 3D printers. It’s “only” $60 Million the DoD is putting into 3d printer research, but hopefully our most brilliant researchers will help refine some of the ‘unsolved problems’ – like metal and circuit printing – the 3D printer community is facing.

Getting started with FPGAs

[Tim] found a neat little $40 FPGA board aimed right at the hobby hacker. The good news: It’s compatible with Arduino shields, and it’s very cheap. The bad news: it only has 1280 logic cells, so you probably won’t be emulating CPUs on this thing. If anyone has a teardown / project with this board, send it in.

Improving a Bluetooth dongle with a bit of wire

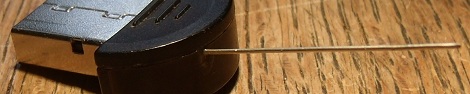
Unsurprisingly, the extremely cheap Bluetooth dongle [Mike] bought on eBay didn’t have great reception or range. No problem, because you can just replace the internal antenna with a piece of wire cut to length. Now bluetooth devices are recognized instantly, and there are no Bluetooth ‘dead spots’ around [Mike]’s computer.

Come to France, make stuff

The Toulouse Hackerspace is having a little shindig this coming weekend (May 25-27) featuring a conference, workshop, concerts and performances. If you’re in the area, drop on by,

Getting Great Bootlegs With The BootlegMIC

Go to any concert, show, or basement band practice, and you’ll find someone recording a bootleg. While these live recordings are sometimes fairly high quality, bootlegs recorded with a cell phone usually sound terrible. The guys over at Open Music Labs have a great solution to these poor quality recordings that only needs a few dollars worth of parts.

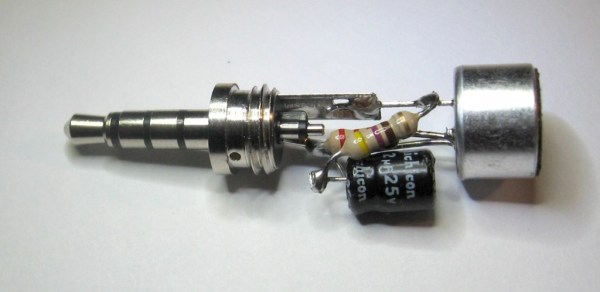
The project is called bootlegMIC. It’s a simple modification of an electret microphone – the same type of mic found in cellphones and bluetooth headsets – that allows for some very high quality recording in very noisy environments. According to the open music labs wiki, the modification is as simple as cutting a few traces on the PCB in an electret mic and soldering on a cap and a few resistors.

An electret mic contains a small JFET to amplify the signal coming from the microphone diaphragm; the specific JFET is selected by the manufacturer to ensure the microphone has the right gain and response. Usually these JFETs are chosen with the expectation of a relatively quiet environment, and trying to record a concert only results in a ton of distortion. By putting a resistor between the source of the JFET and ground of the microphone, it’s possible to reduce this distortion.

The circuit is easy enough to solder deadbug style, and should work with most cellphones. The guys at Open Music Lab were able to get their mic working with an iPhone, but they’re still working on figuring out the Android mic input. There’s a great demo video showing the improvement in audio quality; you can check that out after the break.

Continue reading “Getting Great Bootlegs With The BootlegMIC”