Accessing An SD Card Through A Parallel Port, Just Because

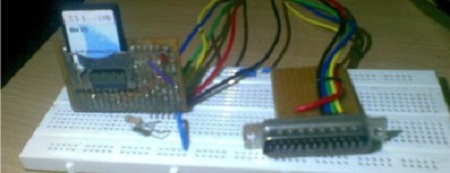
[Vinod] sent in a very cool build he says is somewhat of a ‘mad project’: he mounted an MMC and SD card under Linux using the parallel port on his computer. Even though parallel ports are getting rarer these days, we absolutely love [Vinod]’s dedication and willingness to dig around the Linux kernel.

The hardware portion of the build is very simple – just an SD/MMC header and a few resistors wired up to a parallel port. The software side of the hack gets pretty interesting with [Vinod] building a kernel module, something we rarely see on Hackaday.

We’d have to agree with [Vinod]’s ‘mad project’ sentiment, if only because of the terrible throughput of [Vinod]’s adapter; it takes him more than a minute to transfer a 1.5 MB file onto the SD card – terribly slow, to put it mildly. Nevertheless, we’ve got to respect [Vinod] for pushing the limits of uselessness and still building something cool in the process.
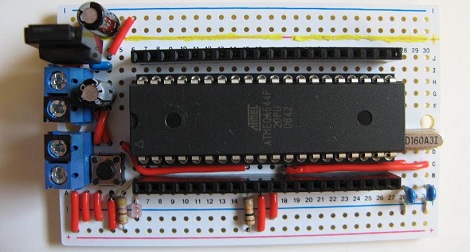

More Pins And More Power With A DIY Sanguino

Not long after [CulinarilySpeaking] got into the Arduino game, he began to want more IO pins and a larger program space for more ambitious projects. This, of course, led him down the path towards the Sanguino, the ATMega644-based dev board with many more IO pins than Arduino boards based on the ATMega328. Instead of buying new, [CulinarilySpeaking] decided to make his own Sanguino, and the results look fantastic.

After coming across an ATMega644 while browsing for parts on line, [CulinarilySpeaking] found the micro that had enough power and pins to do some fairly complex stuff. A bunch of other people though about using this chip in the Arduino environment before, so all [CulinarilySpeaking] had to do was copy the circuit with the parts he had on hand.

After soldering all the components to the neat breadboard-style PCB, [CulinarilySpeaking] fired up the Arduino IDE and put the Blink example on the 644. Everything worked, so now there’s a board with much more power than a standard Arduino built with only $8 USD in parts.

via reddit

Hacking The Kingston Wi-Drive

[Andrew] got his hands on a Kingston Wi-Drive, and being the responsible Hackaday reader he is, spent the better part of a weekend figuring out how to get root on this shiny new toy

The Kingston Wi-Drive is a small battery-powered Flash drive with a wi-fi adapter in a small, compact case. Even though Kingston is going after a fairly niche market by advertising the Wi-Drive to expand the storage of iOS and Android devices, a network attached storage solution that can fit in a pocket is somewhat interesting. Unfortunately, Kingston decided to lock down the Wi-Drive; [Andrew] can’t even get a terminal running on this little box.

After a weekend, [Andrew] is no closer to his goal of getting root on the Wi-Drive. He suspects the problem may be there simply isn’t a terminal for Telnet to bind to. [Andrew] realized he was a bit out of his league on this hack and decided to open up his research to people much more experienced in embedded Linux environments. If you’ve been playing around with a Wi-Drive, or you want a tiny battery-powered NAS, send us something on the tip line and we’ll follow up on this post.

Putting A Software Defined Radio On A Mac

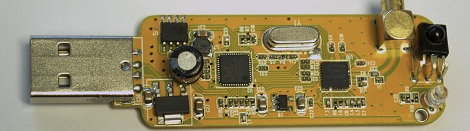
A few months ago [Antti Palosaari] discovered cheap USB TV tuners could be used as a software-defined radio. Since then, we’ve seen these TV tuners receive signals from GPS satellites and even the signals between air traffic control and passenger aircraft. Like everything cool, Mac support for these drivers is slightly terrible so [hpux735] wrote his own Cocoa app to support these amazing dongles.

[hpux735]’s driver is a port of the osmocom driver, repackaged as a native Cocoa app so the terribly fickle libusb and other dependencies aren’t needed. All the code is up on GitHub, ready for you to start playing around with SDR.

As far as tutorials for those wading into the deep waters of software-defined radio, a number of how-to guides have popped up over the last month to get SDR noobs up and running quickly. Here’s a few of the best ones we’ve seen:

[braingram] put up an Instructable for Ubuntu users.

For people who have a Windows box lying around [balint] put up a getting started guide.

There’s a slightly more thorough Windows guide here.

Most of the development in the TV tuner SDR community is happening on the RTLSDR subreddit, and there’s more than enough info there to do just about anything with these TV tuner dongles. If you come up with a novel use for one of these dongles, send it in on the tip line.

Pipe Crawling Snake Robot Is A Masterpiece Of A Senior Project

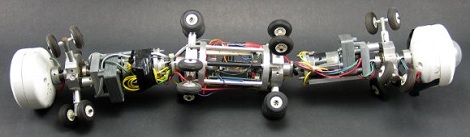
Here’s an oldie but a goodie: [Eiki], [Mark], and [Sheraz] built a pipe crawling robot for their senior engineering project at Florida Atlantic University way back in 2004. Despite being a rather old build, its aged well and still demonstrates the clever ways the guys overcame some engineering obstacles.

The original plan for the pipe crawler was to mount three spring-loaded wheels 120° apart at the fore and aft of each robot section. Six independent wheels for each section of the robot is overly complex, and too much for a single operator to control; the team moved on to a ‘screw drive’ system where each wheel is canted forward a few degrees. This drive system propels the snakebot along by simply spinning, although it does bring in a few challenges all its own.

The robot had separate sections consisting to house a motor, camera, and electronics, so a way to pass wires through a rotating shaft was needed. This came in the form of a few pairs of incredibly small ball bearings around a hollow shaft. After the mechanical portion of the build was finished, the team moved on to the electronic part where an IMU was built out of three small gyroscope sensors mounted perpendicularly to each other.

Sadly, there are no videos of the inside of a sewage pipe from the pipe crawler’s point of view, but YouTube wasn’t launched until a year after this project was finished.

Defying Gravity For New User Interfaces

[Jinha Lee] at the MIT Media Lab created a new interface allowing new ways to modify and play with 3D objects. It’s called ZeroN, and it’s nothing short of a futuristic device straight out of Star Trek.

ZeroN is simply a platform for levitating a small spherical permanent magnet in 3D space. It does this by mounting a hall effect sensor on an electromagnet. The hall sensor measure the strength of the magnetic field of the ball every few milliseconds and keeps the spherical magnet levitated. To move the object in 3D space, a few webcams track the ball over the platform and tell the electromagnet to move on a CNC-like x y table.

[Jinha] showed off a lot of cool stuff that is possible with the ZeroN; ping-pong is by far the coolest implementation, but it’s also possible to use the magnetic sphere to demonstrate n-body gravity or as a camera flying around a digital scene.

It’s a really amazing piece of work with an exceptional demo video. You can check that video out after the break. Thanks, [ferdinand] for sending this one in.

Continue reading “Defying Gravity For New User Interfaces”

Hackaday Links: May 11, 2012

Three days of work in 5 minutes

[Celso] bought himself a Ultimaker kit and put together a time-lapse video of him putting it together. There’s a lot of work that goes into these machines, but being able to print a nearly perfect cube on the first run is nearly magical.

How about a CNC mill, too?

The folks over at Inventables have put together a tiny CNC mill kit designed from the fruitful mind of [Edward Ford]. The Shapeoko mill is designed around the Makerslide linear bearing system, so you’re getting a lot of precision very easily. Here’s some more info on the Shapeoko

Update the firmware on your RasPi

[Hexxeh] has been playing around with the Linux images for his Raspberry Pi, so he needs to reinstall the firmware on an image quite a lot. He wrote a tool to automate this task, but it should be useful for RasPi users that want to keep kernel and firmware up to date. You can get the rpi-updater at [Hexxeh]’s GitHub.

Your robotic barista is still always on the phone

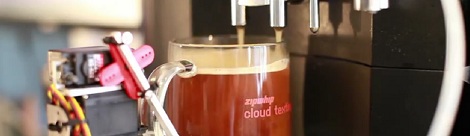
Zipwhip is a company that provides a bridge from your phone to your computer so text messages can be displayed on your desktop. To show off their tech, they created a text enabled espresso machine. Everything on this robotic barista is automatic: the cups are grabbed from a warming tray with a servo arm, coffee is automatically brewed, and the last three digits of your cell phone number are printed on the foam to identify each cuppa. Check out the video; action starts at 1:30.

Awesome reading material

If you’re looking for something to read on that fancy tablet computer of yours, here’s every issue of New Scientist from 1956 to 1985. The early 60s issues say fusion power plants are about 50 years away, so we should be just fine in a couple of years.