Build An 8-bit TTL Computer

Very rarely do we see an Instructable so complete, and so informative, that it’s a paragon of tutorials that all Instructables should aspire to. [8 Bit Spaghetti]’s How to Build an 8-bit computer is one of those tutorials.

[8 Bit Spaghetti]’s build began on his blog. He originally planned to build a 4-bit computer but decided a computer that could only count to 15 would be too limiting. The build continued by programming an NVRAM as the ROM on a breadboard and finally testing his bundle of wires.

What really makes [8 Bit Spaghetti]’s special is the Instructable – he covers just about all the background information like the definition of a Turing machine, a brief introduction to electronics and logic chips, and binary numbers. Even though he’s doing some fairly complicated work, [8 Bit Spaghetti]’s tutorial makes everything very clear.

The computer isn’t quite done yet – there’s still a few nixie tubes to add – but we couldn’t imagine a better project for the budding electronic hacker.

Using Arduino Shields With The Raspberry Pi

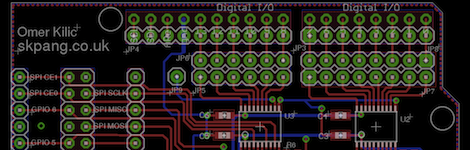
Since the Arduino was launched years ago, many ‘shields’ or add-on boards providing additional functionality have been released. There are hundreds of different shields, from video capture shields to touch screen shields. Now that the Raspberry Pi is out in the wild, it was only a matter of time before a RasPi to Arduino shield bridge was created.

[Omer] calls his bridge ‘Ponte’ and it allows Arduino shields to be used with the incredible  horsepower of an embedded Linux system. While [Omer] originally expected to write the RasPi to Arduino software converter himself, but found WiringPi halfway through the build. Of course this build comes just a day after we saw a tutorial on controlling the GPIO pins on the RasPi, and we expect to see similar GPIO-hacking builds in the future.

Right now, the Ponte only supports Arduino Uno-sized shield, so the possibility of an all-in-one RepRap controller using the RAMPS motor driver is impossible for now. We expect that to change very quickly as more people get their RasPis delivered.

Monitoring The Status Of A Unisex Bathroom

Years ago, someone at [Chuck]’s job came up with the brilliant solution of an indicator to display if the unisex bathroom is currently vacant, a men’s bathroom, or a women’s bathroom. The old system worked well, but [Chuck] thought it would be a great idea to display the current status of the bathroom on the large TV in the office, saving his coworkers from getting up only to wait in line until the bathroom became vacant.

Like the previous paper sign, [Chuck]’s build has three statuses: a men’s room, a women’s room, and vacant with a manual dial that is turned whenever someone is entering or leaving. The new build vastly improves on the paper-based indicator by using a laser cut indicator on a rotary switch.

The electronics are dead simple; just an XBee and a Explorer USB board. Whenever the switch state is changed, the XBee sends a bit of data off to a mac mini and displays the status on the office TV. It may be funny to our immature sense of humor, but it’s still a very nice project.

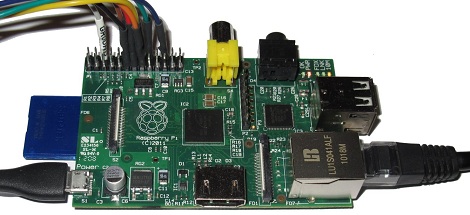
Controlling Raspberry Pi Expansion Pins With A Web Interface

For the lucky few who have a Raspberry Pi board in their hands, you can now use the GPIO pins as a web interface (German, google translation). [Chris] is turning this magical board is turning a small device that can play 1080p video into something that can blink LEDs via the web.

The build started with an example of driving GPIO pins under Linux. [Chris] cobbled together a bit of PHP and Javascript on the Raspberry pi. Whenever he goes to the website hosted on the Pi, he’s greeted with the status and direction of a couple of expansion IO pins.

On a semi-related note, [Tony] is building a GPIO MIDI interface for his Pi. Yes, he could just get a USB to MIDI adapter and call it a day, but this is a far more professional looking solution to all the MIDI goodness the RasPi will deliver. If you’ve got any info on other RasPi breakout boards you’ve seen, send them in on the tip line.

Building A Prosthetic Leg From Scratch

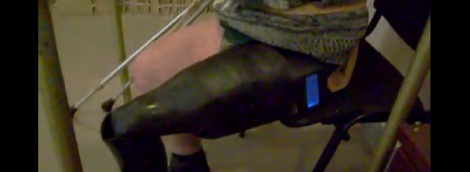
[Radek] from Poland sent in a neat video of a bionic prosthetic leg he made for one of his patients. Even though [Radek] says it’s a ‘prototype of a prototype,’ we’d have to agree with him that it’s a very neat build that could provide inexpensive motorized prosthetic legs to amputees in the future.

[Radek] has been working on his project for about two years now, after building the motor and electronics by hand. The leg is powered by 1.5 kilogram battery pack – no details on the chemistry of the batteries, but [Radek] says it will last 12 hours on one charge. There are also small vibration sensors in the leg for a bit of feedback, and a few switches so the knee joint can be operated by the stump.

If you’re wondering where [Radek] got the proper tools and materials to make a carbon fiber prosthesis, he works for Carbon Prosthetics where builds simple prosthetic devices. His bionic leg creation looks really cool, and he says the final product will be much less expensive than the very high-end bionic prosthetic legs.

[Radek] was kind enough to share some more videos and a few pictures of his robotic prosthetic leg; you can check those out after the break.

Continue reading “Building A Prosthetic Leg From Scratch”

DIWire Bender Makes Nearly Any Shape Imaginable

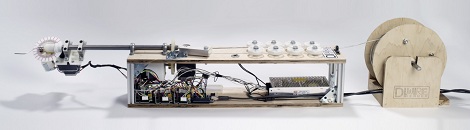
The people over at Pensa posted an awesome CNC wire bender on their blog. Robotic wire benders are common industrial machine that are very fun to watch. These machines can turn out custom wire-bent parts or sculptures in a matter of seconds. The Pensa team’s “DIWire Bender” might not be as fast as the big boys, but it works just the same.

From their Tumblr blog, we see that there are motors to draw the wire off a spool and into a hollow shaft. At the business end of the machine, there’s a small gear-driven bender that can form wire in just about any shape. There’s an awesome video of the DIWire Bender in action after the break if your mind is still trying comprehend how wire top hats and glasses can be made.

The Pensa team says they built this to fill a void in DIY fabrication machines – 3D printers are great and all, but some things can be done more easily by bending some wire.

Continue reading “DIWire Bender Makes Nearly Any Shape Imaginable”