Heat pumps are taking the world by storm, and for good reason. Not only are they many times more efficient than electric heaters, but they can also be used to provide cooling in the summer. Efficiency aside, though, they’re not perfectly designed devices, largely with respect to their climate control abilities especially for split-unit setups. Many of them don’t have remotely located thermostats to monitor temperature in an area, and rely on crude infrared remote controls as the only user interface. Looking to make some improvements to this setup, [Danilo] built a setup more reminiscent of a central HVAC system to control his.
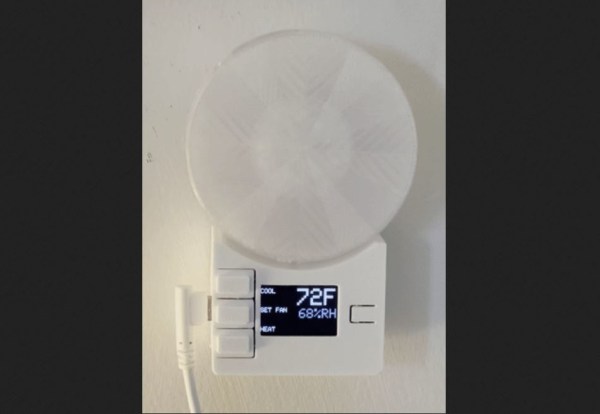
Based on an ESP32 from Adafruit with an integrated TFT display, the device is placed away from the heat pump to more accurately measure room temperature. A humidity sensor is also included, as well as an ambient light sensor to automatically reduce the brightness of the display at night. A large wheel makes it quick and easy to adjust the temperature settings up or down. Armed with an infrared emitter, the device is capable of sending commands to the heat pump to more accurately control the climate of the room than the built-in controls are able to do. It’s also capable of logging data and integrating with various home automation systems.
While the device is optimized for the Mitsubishi heat pumps that [Danilo] has, only a few lines of code need to be changed to get this to work with other brands. This is a welcome improvement for those frustrated with the inaccurate climate controls of their heat pumps, and since it integrates seamlessly into home automation systems could also function in tandem with other backup heat sources, used in cold climates when it’s too cold outside to efficiently run the heat pump. And, if you don’t have a heat pump yet, you can always try and build your own.