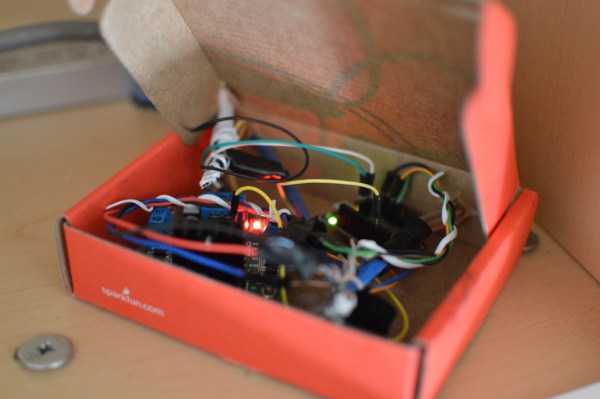
[nebulous] has a lot of problems with his kitchen cabinets. Aside from a noted lack of micro-controllers, he was especially suspicious of the dark spaces under them. Anything could be hiding there.
The core of the project is a $10 Arduino-compatible esp8266 board from digistump. The board is powered by the five volt regulator of an L298N motor driver module hooked to a power-supply. All this controls a set-of LED strips adhered to the underside of the cabinets with the traditionally bad adhesive strips with which they come standard. We can predict an hour spent bent awkwardly cursing at them, a hot-glue gun in one hand, in [nebulous]’s future. The whole set-up is housed in a SparkFun cardboard box above the microwave. You can barely tell it’s not a commercial product.
We’re not certain if we like a future where even our cabinetry has an IP address. However, this is a good weekend project that could make all our cabinetry brighter, safer, and more connected.
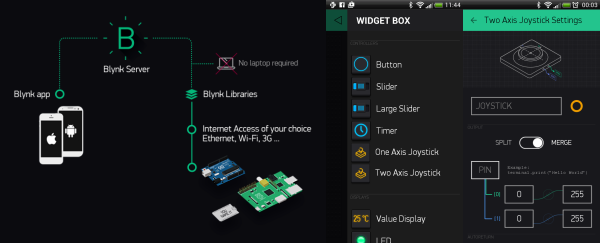
App development is not fun for everyone, and sometimes you just want to control a device from your phone with minimal work. Blynk appears to be a fairly put-together library for not only hooking up any Arduino or esp8266 to a phone through WiFi, but also through the net if desired.
Install the app onto your iPhone or Android device. Install the libraries on your computer. Next, modify your Arduino source to either pass direct control of a pin to Blynk, or connect Blynk to a virtual pin inside your code for more advanced control. If you want to go the easy route, create an account, log into the app, and drag and drop the interface you’d like. If the idea of letting some corporation host your Arduino project sends shivers down your spine, there is also an option to host your own server. (Editorial snark: Yes, it requires a server. That’s the cost of “simplicity”.)
There have been a few times where we’ve wished we could add app control to our projects, but installing all the libraries and learning a new language just to see a button on a screen didn’t seem worth it. This is a great solution. Have any of you had experience using it?
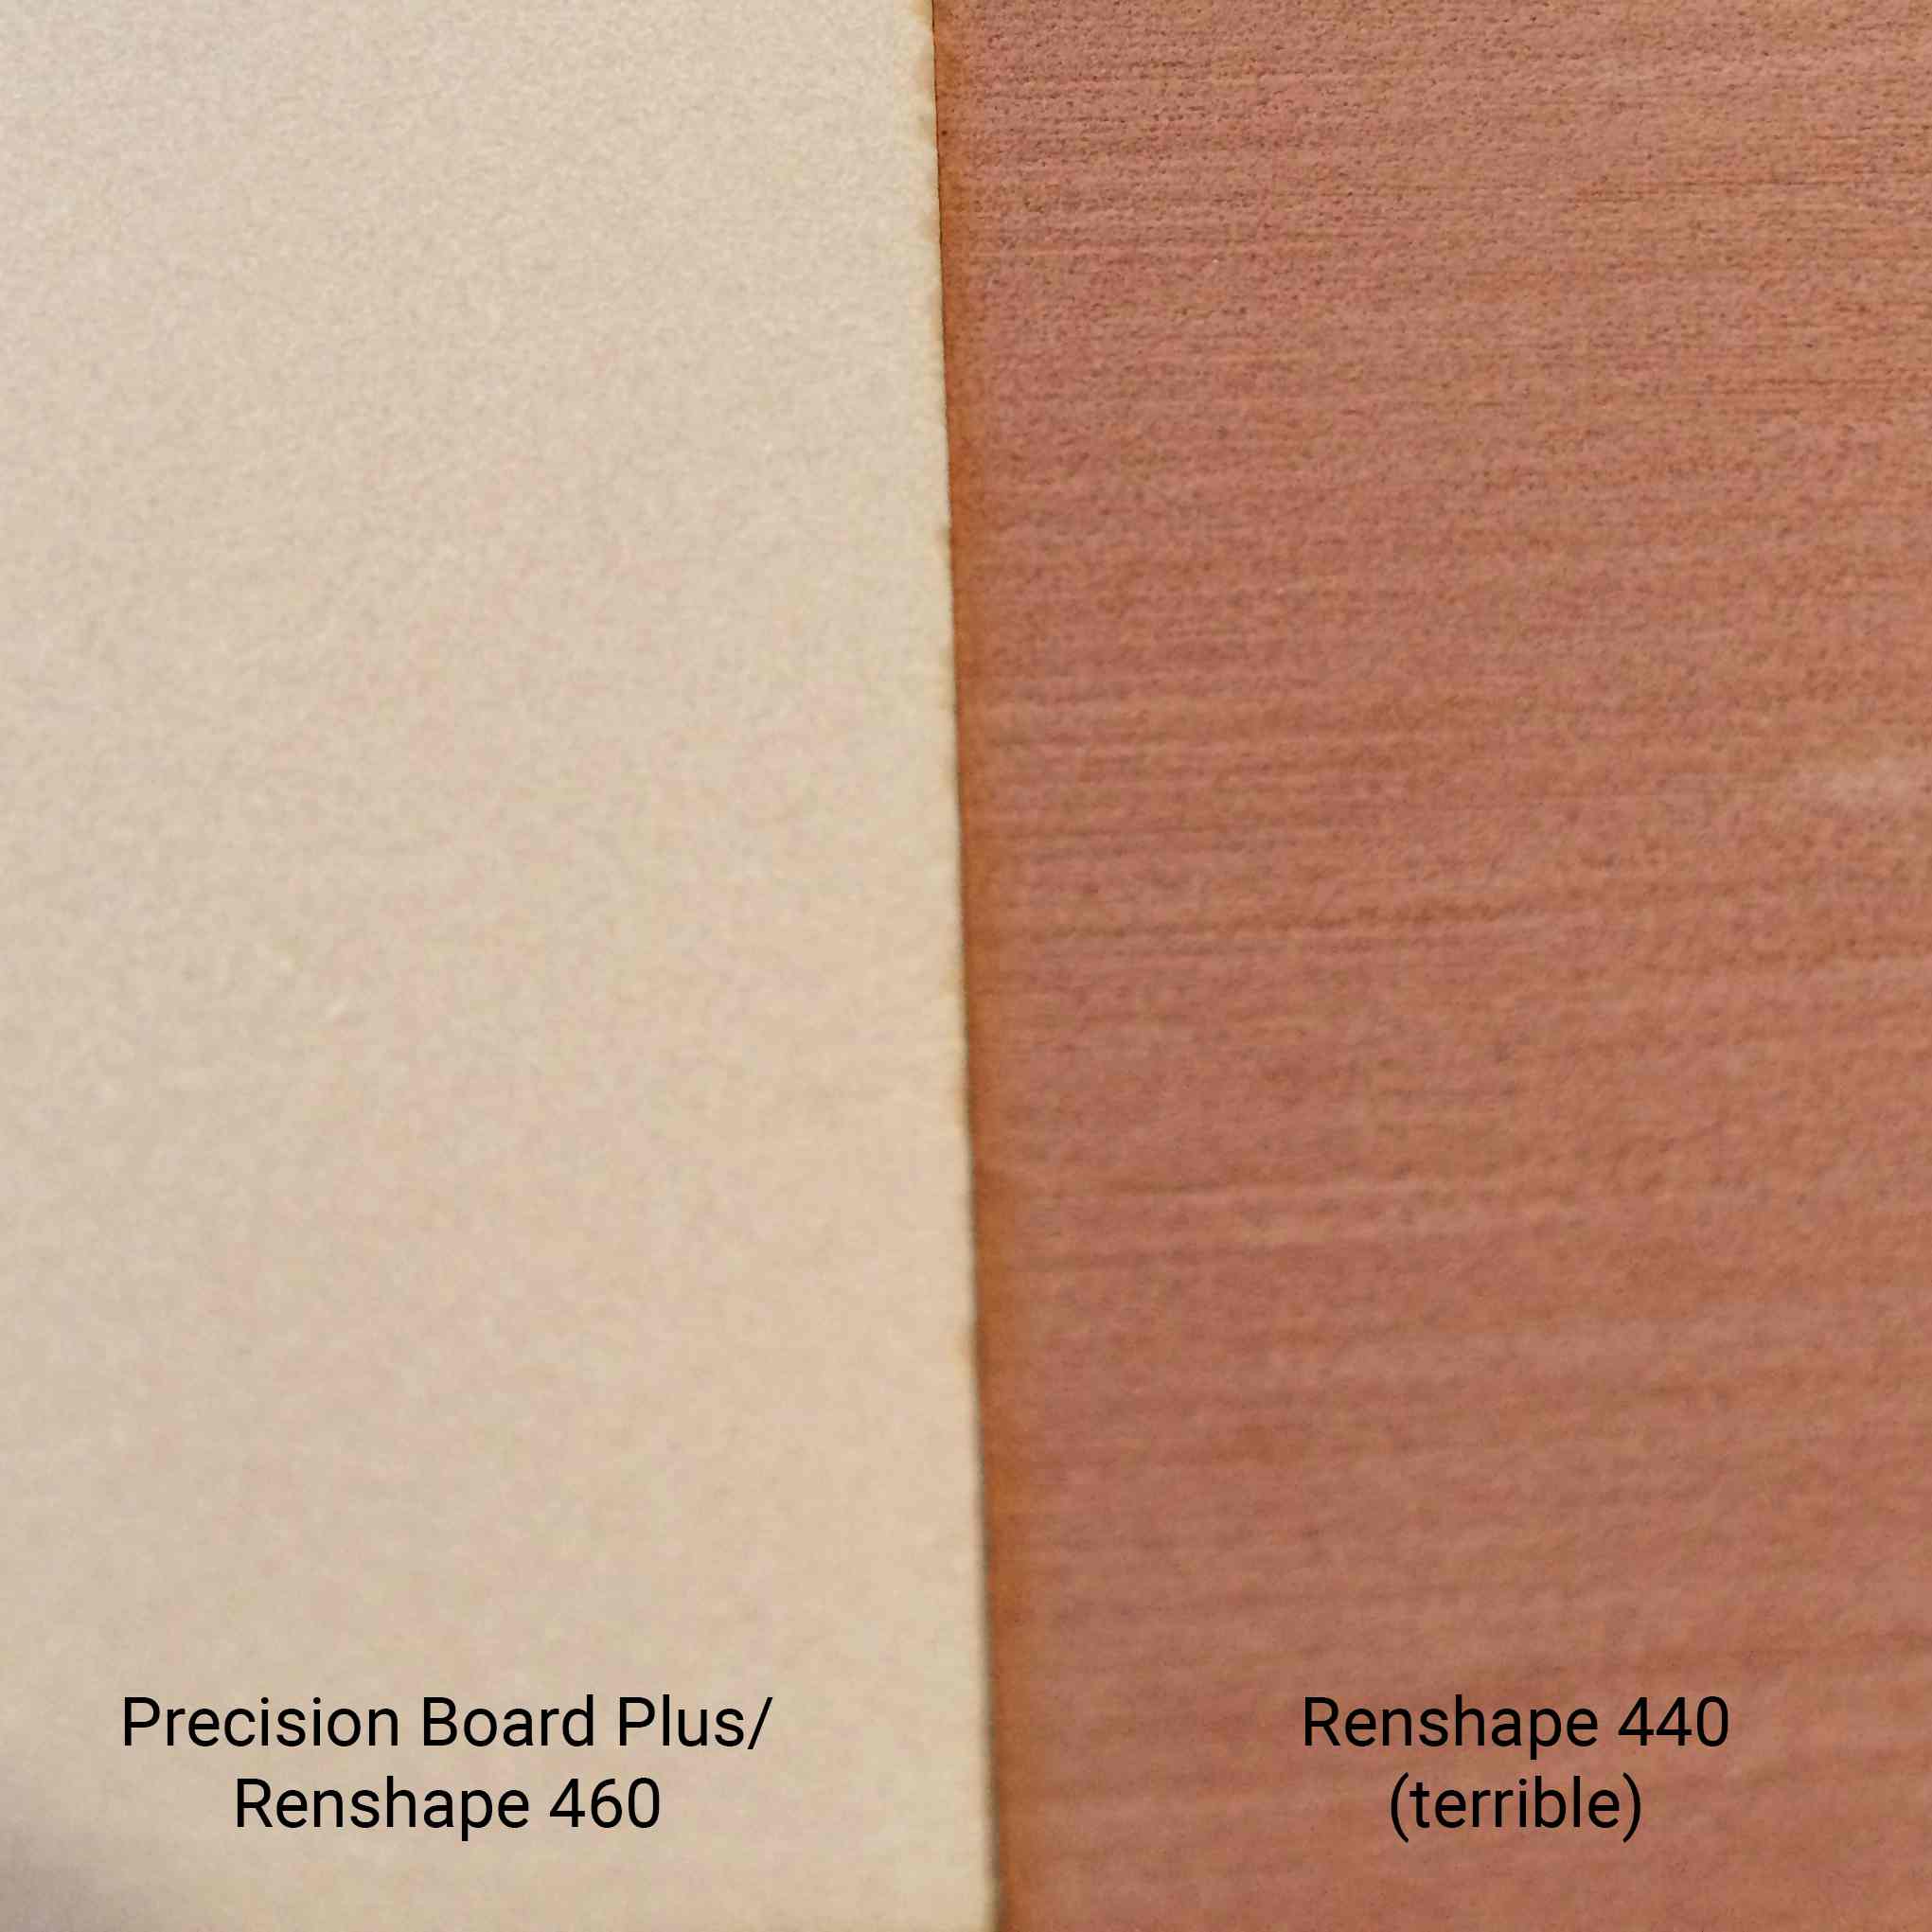
I was in a fit of nerd glee the first time I used tooling board. I’d used MDF for similar purposes before, and I doubt I ever will again. Called Renshape, Precision Board Plus, or that green stuff people on another continent buy; it’s all the same extremely useful, unfortunately expensive, stuff. It’s hard to pin down exactly what tooling board is. Most of the blends are proprietary. It is usually a very dense polyurethane foam, sometimes by itself, sometimes with a fine fiber filler.
What makes tooling board so good is its absolute dimensional stability and its general apathy to normal temperature swings. (It even comes in versions that can go through curing ovens.) It is impervious to humidity. It has good surface finish, and it machines perfectly without wearing down tools.
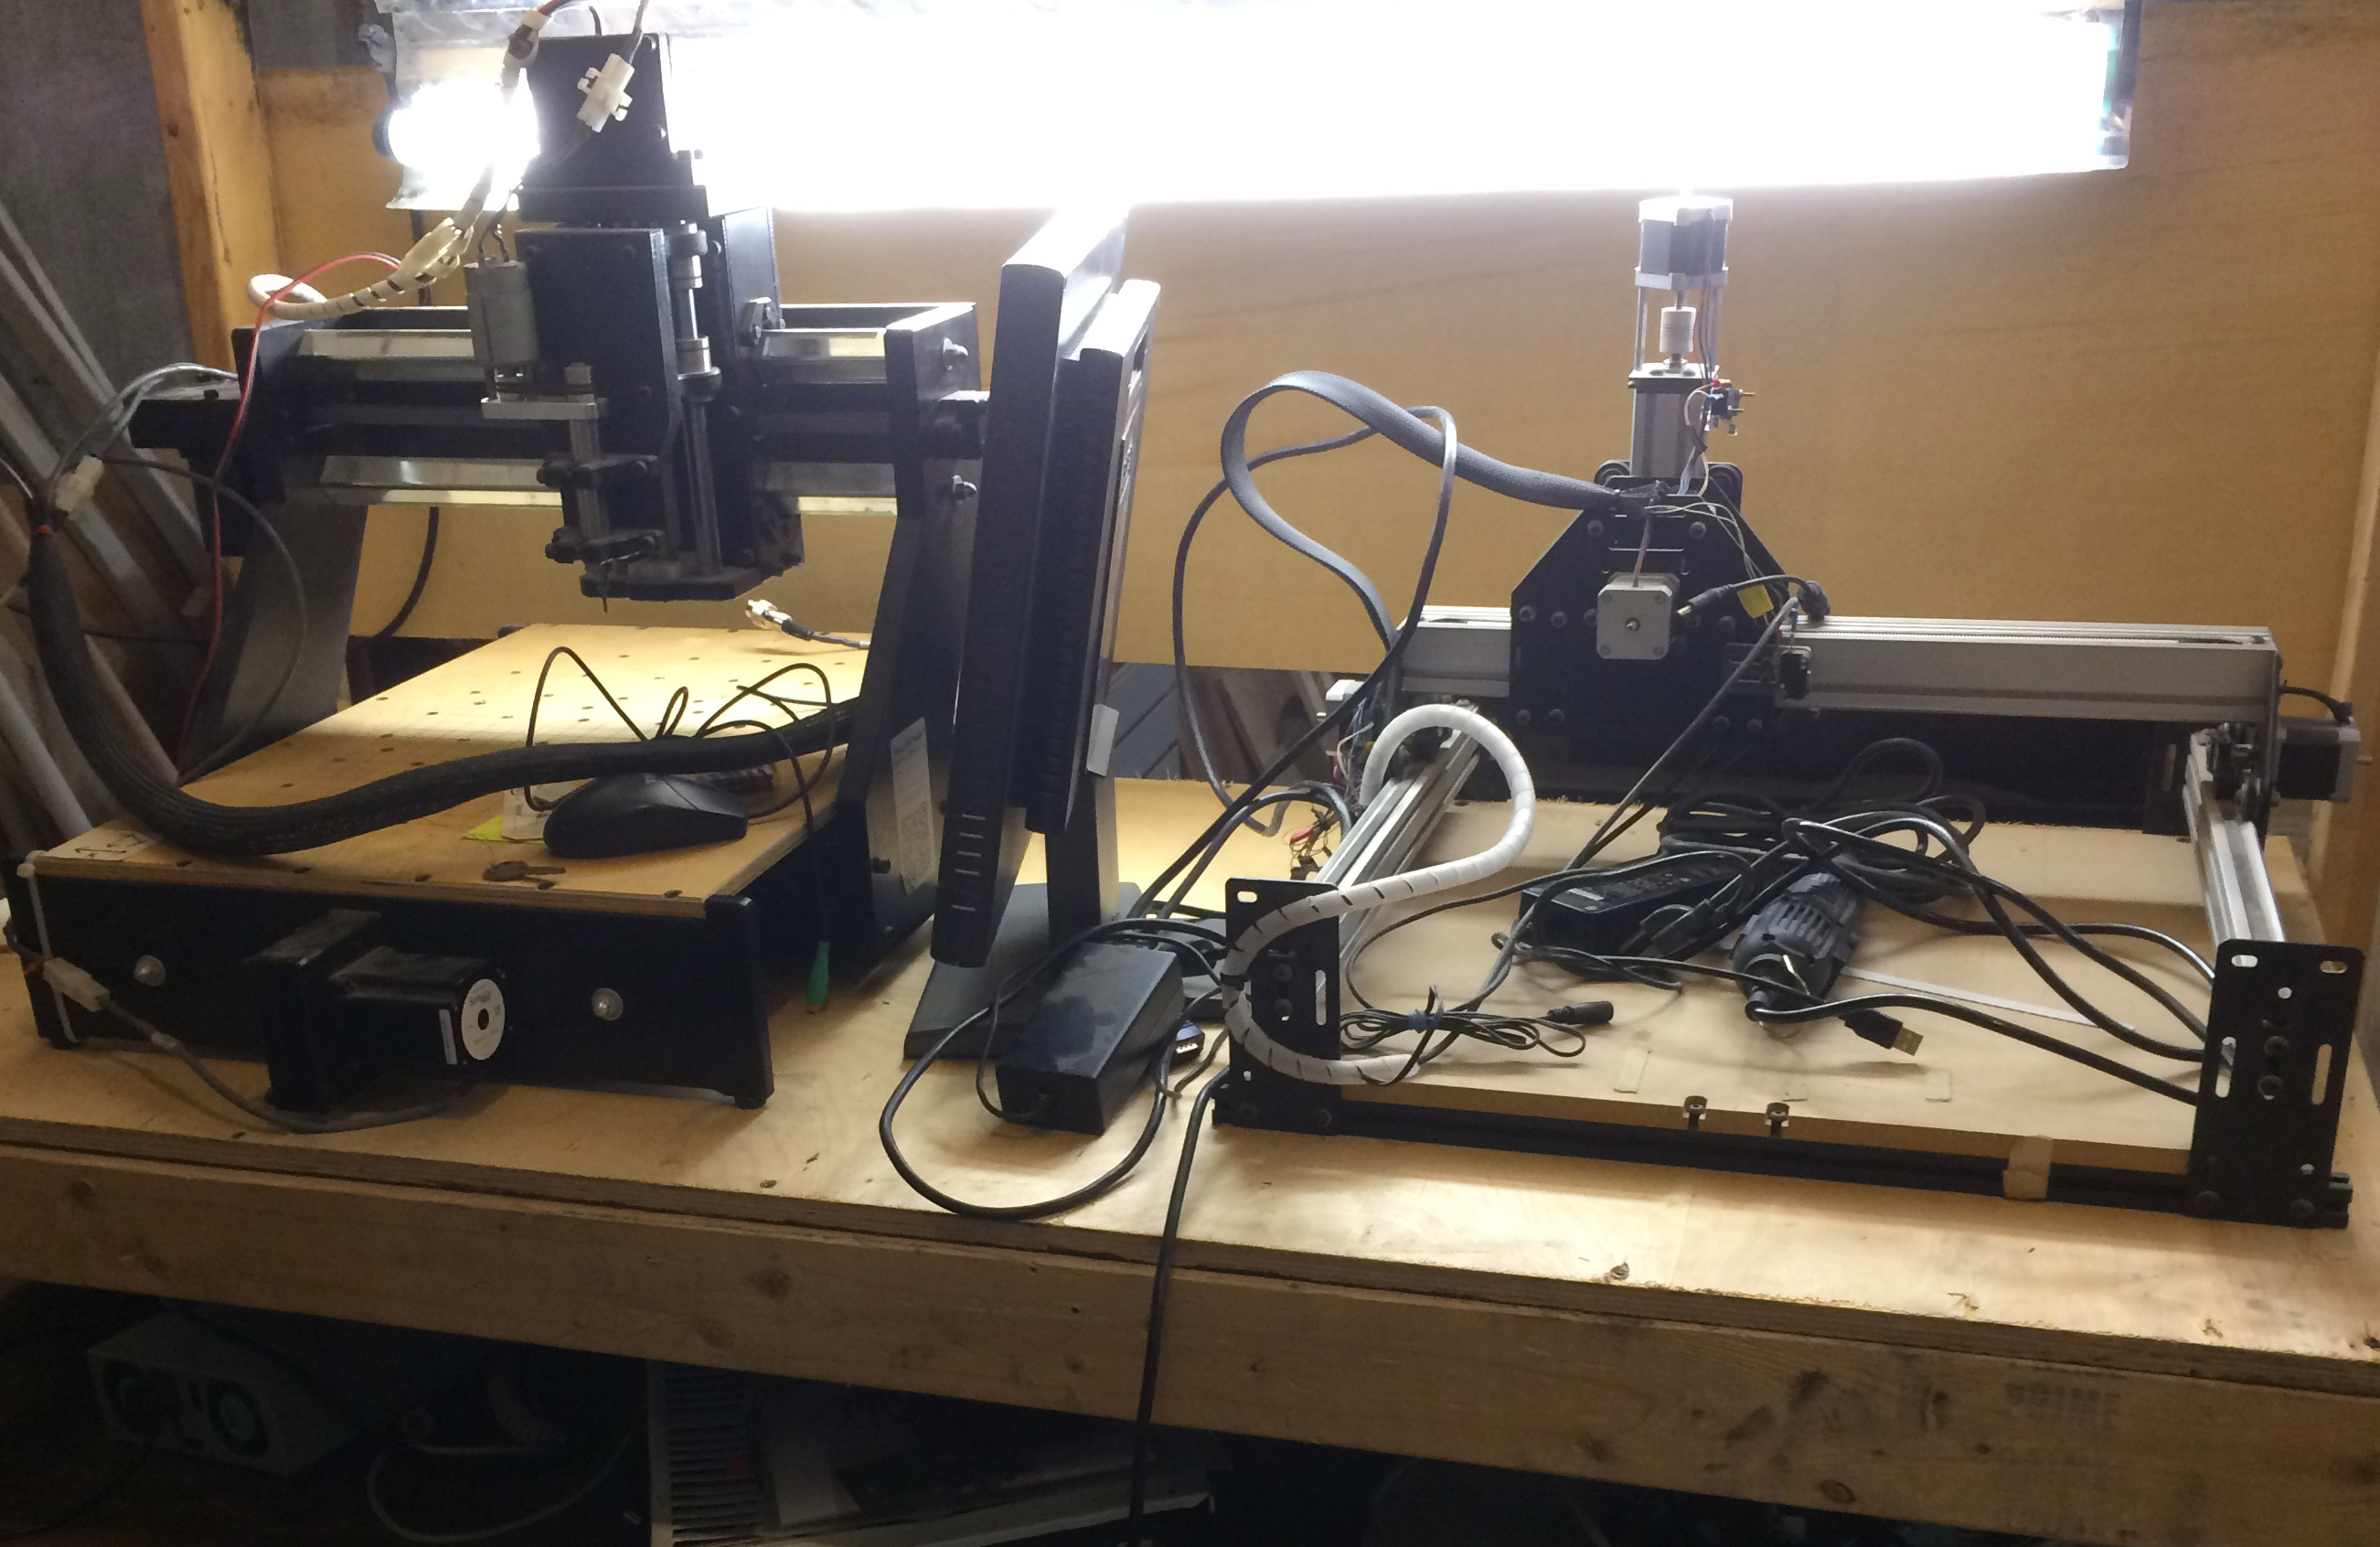
The CNC set-up I coaxed precision molds out of.
This stuff is really tops as far as machining goes. I got super precise molds out of a very basic CNC machine at the LVL1 hackerspace. Renshape cut easily at a high spindle speed, and put practically no load on the machine. Climb and conventional milling were equal load wise with no immediately perceivable difference in finish. In the end I hit the precision range of my cheap digital calipers: +-.005mm, when the temperature is right, the battery is a charged, and the planets align.
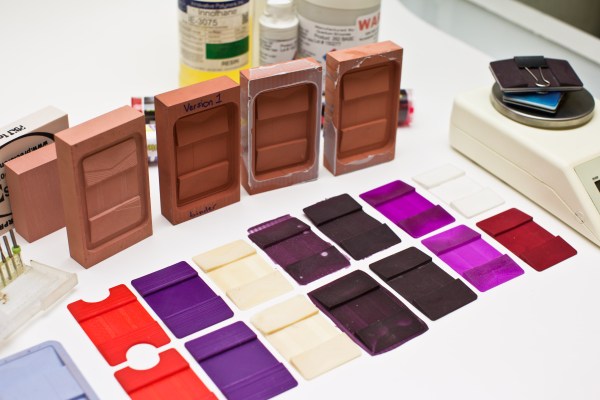
I like to do resin casting when I get serious about a part. If you are making a master mold, there’s nothing better than tooling board. I’ve used both Renshape 460 and Precision Board Plus. Both impart a very light matte pattern, equivalent to a light bead blast on an injection mold. There’s no finishing required, though I mistakenly bought Renshape 440 at first and had to sand it a little to get the finish I wanted.
Tooling board is great for masters in metal casting, and is often used in the industry for just that, especially if quick and accurate prototypes are needed. It’s also tough enough to last through a few rounds of metal stamping in the home shop.
If you are doing lay-up for carbon fiber, fiberglass, or leather, this is also a very good choice. It will be unaffected by the chemicals, heat, and vacuum you may use in the process. It is tough enough hold alignment pins for proper set-up without premature ovaling. It is also a very good choice for vacuum forming.
Tooling board is, unsurprisingly, really good for tooling. It’s a great material for soft-jaws, alignment fixtures, and assembly fixtures, especially if you are doing delicate precision assemblies.
If you’re made of money, tooling board can be used for models, signs and props. It sands, shapes, and files extremely well. It bonds well to a lot of substances. It also takes paint very well with none of the absorption properties of wood or MDF. Most professional model shops will use it. The one big flaw of tooling board is its price — this stuff is expensive. There’s no good DIY version that I’ve scrounged up so far. If you’re making a mold master, a fixture, or anything where you need tooling board’s properties and you are likely to get a few uses out of the board, then it’s probably worth it. Also, be careful of sellers selling plain “Renshape” it is probably going to be the lower grade Renshape 440 and not the more expensive Renshape 460 (or equivalent), where you start to really see the surface finish advantage of the material.
Tooling board is an industrial material. Typically you can call up a supplier and tell them what you’d like to do with it and they will be able to help. If you are making tools for carbon fiber quadcopter frame lay-up, let them know and they’ll have a formulation for that. If you are resin casting, there’s a formulation that gives superior surface finish.
It’s a pretty common material in the industrial scene, but I don’t see it a lot on the hobby scene. This is almost certainly due to its cost, as well as a shortage of small quantity re-sellers. (If someone starts selling assorted sizes on eBay for a reasonable price you have at least one buyer in me.) However, after using it in the niches it is designed for, I really don’t use anything else. I used to hack MDF to fit, but MDF is awful to paint, has no dimensional stability, and dulls tools really fast.
Are you a fan of tooling board? Have a good source? If you have anything to add, let us know in the comments.
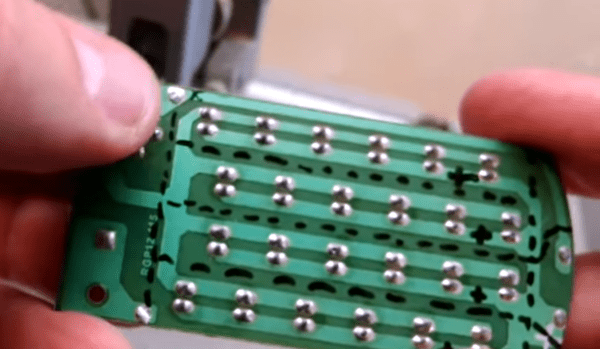
Harbor Freight is always trying to sweeten the deal by throwing in a free flashlight, or a multimeter with a CAT III rating so poorly-met it might as well be a hand grenade. We usually donate the meters to our local hackerspace, but the flashlights tend to accumulate around the shop. Aside from borrowing the occasional magnet, we’ve not found a good use for them till now.
[Ben Brandt] realized that a ultra-low cost board such as the one likely to be in a free flashlight is probably going to contain a very easily hackable single-sided board. Which is exactly the case here. Once the plastic casing is removed it’s only a quick trip to the saw until you have four fresh mini LED strips.
[Ben] uses his hacked loot to build a neat little, “Thanks For Watching,” sign. We can picture lots of places these could fit in the occasional project, and the work to break these up into parts is less than making equivalent boards with any proto technique. We love his wooden battery compartment. Video after the break.
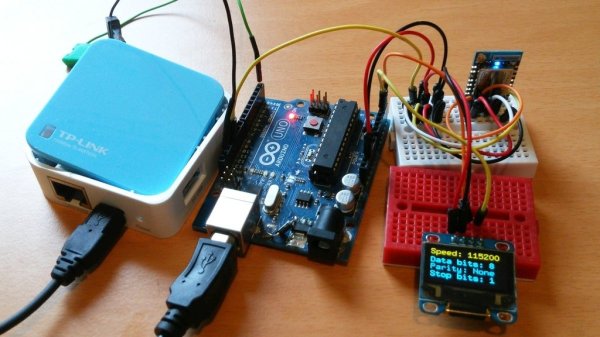
This simple WiFi serial port monitor would have saved us a lot of trouble. We can’t count how many times where being hooked into an Arduino with USB just to get the serial out has nearly been more trouble than it’s worth. Times where we sat cross-legged on the floor and could choose comfort or accidentally shifting the set-up and ruining everything, but not both.
[Frenky]’s set-up is simple and clever. The Ardunio’s serial out is hooked to an ESP8266. The Arduino spams serial out to the ESP8266 in its usual way. The ESP8266 then pipes all that out to a simple JavaScript webpage. Connect to the ESP8266’s IP with any device in your house, and get a live stream of all the serial data. Neat.
As simple as this technique is, we can see ourselves making a neat little box with TX, RX, GND, and VCC screw terminals to free us from the nightmare of tethering on concrete floors just for a simple test. Video after the break.
We watched the video introduction for this little open source robot, and while we’re not 100% sure we want tiny glowing eyes watching us while we sleep, it does seem to be a nice little platform for hacking. The robot is a side project of [Matthew], who’s studying for a degree in Information Science.
The robot has little actuated grippy arms for holding a cell phone in the front. When it’t not holding a cellphone it can use its two little ultrasonic senors to run around without bumping into things. We like the passive balancing used on the robot. Rather than having a complicated self-balancing set-up, the robot just uses little ball casters to provide the other righting points of contact.
The head of the robot has plenty of space for whatever flavor of Arduino you prefer. A few hours of 3D printing and some vitamins is all you need to have a little robot shadow lurking in your room. Video after the break.
With the advances in rapid prototyping, there’s been a huge influx of people in the physical realm of hacking. While my overall view of this development is positive, I’ve noticed a schism forming in the community. I’m going to have to call a group out. I think it stems from a fundamental refusal of software folks to change their ways of thinking to some of the real aspects of working in the physical realm, so-to-speak. The problem, I think, comes down to three things: dismissal of cost, favoring modularity over understanding, and a resulting insistence that there’s nothing to learn.