Don’t Trust Your Ears For The Freshest Chips

We hear fables of how to restore the crispness to your crisp and the crackle to your crackers, but they are more hot air than some of the methods. We found one solution that has some teeth though, and it doesn’t require any kitchen appliances, just a pair of headphones. Keep reading before you mash potato chips into your Beats. [Charles Spence] co-authors a paper with [Massimiliano Zampini] titled The Role of Auditory Cues in Modulating the Perceived Crispness and Staleness of Potato Chips. It’s a mouthful, so folks refer to it as the “Sonic Chip Experiment,” which rolls off the tongue. The paper is behind paywalls, but you can find it if you know where to look.

The experiment puts participants in some headphones while they eat Pringles, and researchers feed them different sound waves. Sometimes the sound file is a recording of crackly chewing, and other times it is muffled mastication. The constant was the Pringles, which are a delight for testing because they are uniform. Participants report that some chips are fresher than others. This means we use our ears to help judge consumable consistency. Even people who knew all about the experiment report they can willingly fool themselves with the recordings.

What other foods would benefit from the augmented crunch, and which ones would suffer? If shapely food is your jam, we have a holy cookie which is probably best enjoyed with your eyes. If you prefer your Skittles organized by color, we have you covered.

Continue reading “Don’t Trust Your Ears For The Freshest Chips”

A Self-Expanding PWM Driver

For smaller microcontrollers, having enough outputs for the job is sometimes a challenge. A common solution is to do some sort of multiplexing with the available outputs or perhaps something more advanced such as Charlieplexing, but another good option is to use a specialized driver board. What’s even better is if you can daisy chain driver boards to get even more outputs.

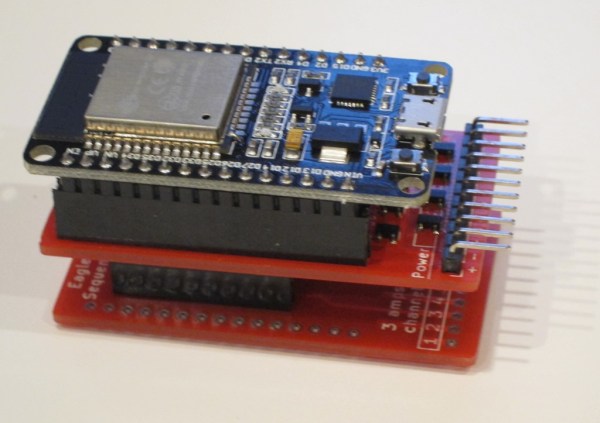
[Eric] has been working on a 16 channel LED project but first wanted to build a driver board with 8 channels. Before building a full 16 channel version he realized that he could take the same 8 channel board, make a mirror image of it, and attach it underneath the first board with headers in order to double the number of channels available. Without having to build a separate 16-channel board, this shortcut saved [Eric] some time and a great deal of effort.

This is a great example of working smarter, not harder. Each of the 8 or 16 channels has full PWM support as well to support PWM dimming, and a similar board could be built for motor control as well. It’s a good illustration of how good design can end up working for you as well. And if you need even more outputs, Charlieplexing is one way to get them.

Continue reading “A Self-Expanding PWM Driver”

Cut Through The Noise, See Tiny Signals

An oscilloscope is a handy tool for measuring signals of all kinds, but it’s especially useful if you want to measure something with a periodic component. Modern oscilloscopes have all kinds of features built-in that allow you sample a wide range of signals in the hundreds of megahertz, and make finding and measuring your signal pretty easy, provided you know which buttons to push. There are some advanced oscilloscope methods that go beyond the built-in features of even the best oscilloscopes, and [AM] has a tutorial on one of them.

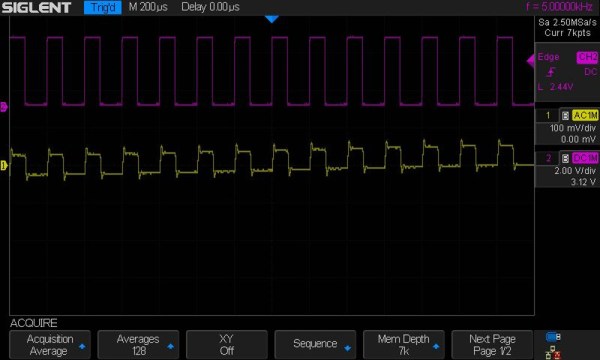
The method used here is called phase-senstitive detection, and allows tiny signals to be found within noise, even if the magnitude of the noise is hundreds of times greater than the signal itself. Normally this wouldn’t be possible, but by shifting the signal out of the DC range and giving it some frequency content, and then using a second channel on the oscilloscope to measure the frequency content of the source and triggering the oscilloscope on the second channel, the phase of the measured signal can be sifted out of the noise and shown clearly on the screen.

In [AM]’s example, he is measuring the intensity of a laser using a photodiode with a crude amplifier, but even with the amplifier it’s hard to see the signal in the noise. By adding a PWM-like signal to the power source of the laser and then syncing it up with the incoming signal from the photodiode, he can tease out the information he needs. It’s eally a fascinating concept, and if you fancy yourself a whiz with an oscilloscope this is really a tool you should have in your back pocket.  If you’re new to this equipment, we do have a primer on some oscilloscope basics, too.

Continue reading “Cut Through The Noise, See Tiny Signals”

Animated Progress Bar Shows LCD New Tricks

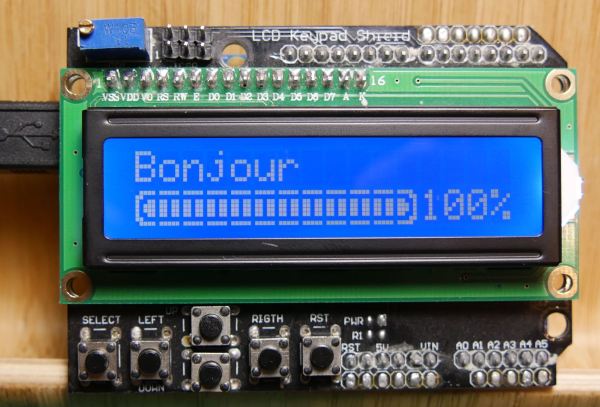
A small LCD screen can be extremely helpful with small microcontroller projects. Not everything needs to communicate to a fancy server using an ESP8266. However, if the simplicity of the character displays irks you, it’s possible to spice them up a little bit with custom characters and create animations, like [Fabien] did with his animated Arduino progress bar. (Google Translate from French)
The project started out simply enough: all [Fabien] needed was a progress bar. It’s easy enough to fill in the “characters” on the 2×16 character LCD screen one-by-one to indicate progress, and the first version of this did exactly that. The second version got a little bit fancier by adding a border around the progress bar and doubling its resolution, but the third version is where knowing the inner machinations of the microcontroller really paid off. Using a custom charset reuse optimization, [Fabien] was able to use 19 custom characters at a time when the display will normally only allow for eight. This was accomplished by placing the custom characters in memory in the correct order, to essentially trick the microcontroller into displaying them.
These types of microcontroller hacks get deep into the inner workings of the microcontroller and help expose some tricks that we can all use to understand their operation on a deeper level. Whether you’re using PWM to get a microcontroller to operate a TV, or creating the ATtiny-est MIDI synth, these tricks are crucial to getting exactly what you want out of a small, inexpensive microcontroller.

Monitor A Serial Port From Anywhere

This simple WiFi serial port monitor would have saved us a lot of trouble. We can’t count how many times where being hooked into an Arduino with USB just to get the serial out has nearly been more trouble than it’s worth. Times where we sat cross-legged on the floor and could choose comfort or accidentally shifting the set-up and ruining everything, but not both.

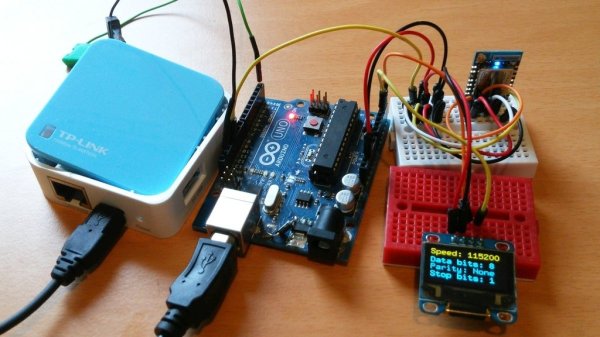
[Frenky]’s set-up is simple and clever. The Ardunio’s serial out is hooked to an ESP8266. The Arduino spams serial out to the ESP8266 in its usual way. The ESP8266 then pipes all that out to a simple JavaScript webpage. Connect to the ESP8266’s IP with any device in your house, and get a live stream of all the serial data. Neat.

As simple as this technique is, we can see ourselves making a neat little box with TX, RX, GND, and VCC screw terminals to free us from the nightmare of tethering on concrete floors just for a simple test. Video after the break.

Continue reading “Monitor A Serial Port From Anywhere”

Pain Box Project

Making The Dune “Pain Box” A Reality

If you are unfamiliar with Dune, then you may not know what the pain box is. The pain box is a fictional device that produces an excruciating burning sensation without causing any actual damage. [Bryan] has been working on a project to duplicate this effect in the real world. It sounds like he may be on the right path by using the “thermal grill illusion”.

The thermal grill illusion is a sensory trick originally demonstrated back in 1896. The trick is made up of two interlaced grills. One is cool to the touch, and the other is warm. If the user touches a single grill, they won’t experience any pain because neither temperature is very extreme. However if the user places their hand over the interlaced grills simultaneously they will immediately experience a burning heat. This usually causes the person to pull their hand away immediately. It’s a fun trick and you can sometimes see examples of it at science museums.

The thermal grill illusion sounded like the perfect way to make the pain box a reality. [Bryan] has set specific constraints on this build to make it more true to the Dune series. He wants to ensure the entire package fits into a small box, just big enough to place an adult hand inside. He also wants to keep safety in mind, since it has the potential to actually cause harm if it were to overheat.

[Bryan] has so far tried two methods with varying success. The first attempt involved using several thermoelectric coolers (TECs). [Bryan] had seen PCBs etched a certain way allowing them to radiate heat. We’ve seen this before in 3D printer surfaces. He figured if they could become hot, then why couldn’t they become cold too? His idea was very simple. He etched a PCB that had just two large copper pours. Each one branched out into “fingers” making up the grill.

Each side of the grill ultimately lead to a flat surface to which a TEC was mounted. One side was cold and the other was hot. Heat sinks we attached to the open side of the TECs to help with performance. Unfortunately this design didn’t work. The temperature was not conducted down to the fingers at all. The back side of the PCB did get hot and cold directly under the TECs, but that wouldn’t work for this illusion.

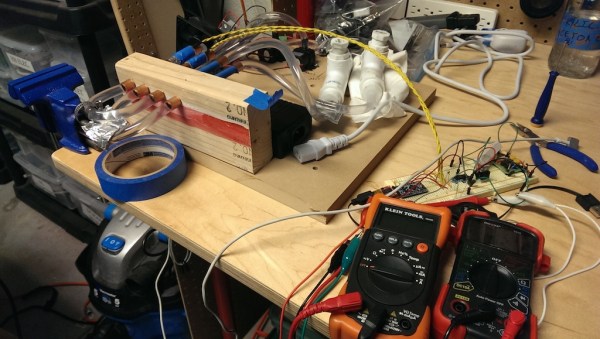
The latest version of the project scraps the PCB idea and uses small diameter copper tubing for the grill. [Bryan] is working with two closed loop water systems. One is for warm water and the other is for cold. He’s using an aquarium pump to circulate the water and the TECs to actually heat or cool the water. The idea is that the water will change the temperature of the copper tubing as it flows through.

While the results so far are better than the previous revision, unfortunately this version is having problems of its own. The hot water eventually gets too hot, and it takes over an hour for it to heat up in the first place. On top of that, the cold water never quite gets cold enough. Despite these problems, [Bryan] is hopefully he can get this concept working. He has several ideas for improvements listed on his blog. Maybe some Hackaday readers can come up with some clever solutions to help this project come to fruition.