Serving The Feline Masters: A Chair To Follow The Sunny Spot

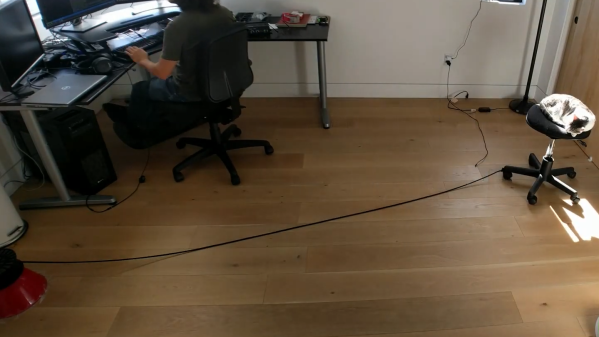
Terry Pratchett once wrote, “In ancient times cats were worshipped as gods; they have not forgotten this”. [Jonathan]’s cat has clearly not forgotten, and makes it loudly known whenever her favorite chair needs to be moved to stay in the spot of sunlight. He was looking for a fun hack anyway, so he decided to give in to her majesty’s demands, and automated the task.

[Jonathan] first considered adding motorizing the chair itself, but decided to keep it simple and just drag the chair across the room with a spool attached to a motor. The rope spool was attached to a small geared DC motor, mounted on a salad bowl base, and connected to an ESP8266 via a motor driver. The ‘8266 is running  NodeMCU with a web server that accepts simple motor commands through a RESTful API. This setup can’t reset the chair to it’s starting position at the end of the day, but this is a small price to pay for simplicity. The motor was a bit underpowered, but it only needed to move the chair in small distances at a time, so [Jonathan] removed the chair’s back to reduce the weight, and upped the motor voltage.

Determining when and how far to move the chair is the second part of the challenge. [Jonathan] considered a simple lookup table for the time of day, but the motor’s movement wasn’t consistent enough. The final solution was a set of three BH1750 digital ambient light sensors to give feedback. A pair of sensors on the chair determines its position relative to the sunny spot, by comparing light levels to a reference sensor mounted in the window. These light sensors are also attached to NodeMCUs, and send movement commands to the winding unit as necessary.

Continue reading “Serving The Feline Masters: A Chair To Follow The Sunny Spot”

USB-C Programmable Power Supply For Any Project

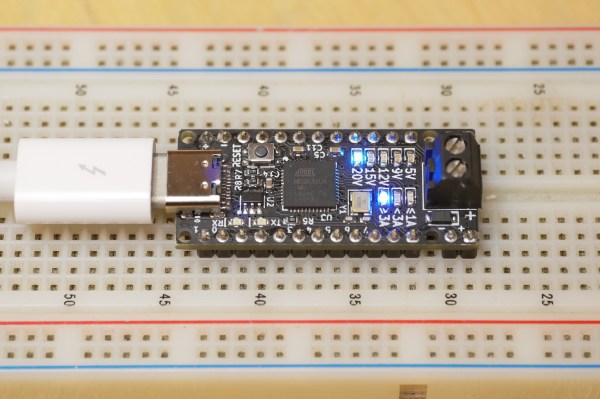
USB-C Power Delivery 3.0 (PD3.0) introduces a new Programmable Power Supply (PPS) mode, which allows a device to negotiate any supply of 3.3-21 V in 20 mV steps, and up to 5 A of current in 50 mA steps. To make use of this new standard, [Ryan Ma] create the PD Micro, an Arduino-compatible development board, and a self-contained software library to allow easy integration of PD3.0 and the older PD2.0 into projects.

The dev board is built around an ATMega32U4 microcontroller and FUSB302 USB-C PHY. The four-layer PCB is densely packed on both sides to fit in the Arduino Pro Micro Form factor. The board can deliver up to 100W (20 V at 5 A) from an appropriate power source and shows visual feedback on the PD status through a set of LEDs.

The primary goal of the project is actually in the software. [Ryan] found that existing software libraries for PD take up a lot of memory, and are difficult to integrate into small projects. Working from the PD specifications and PD PHY chip data sheet, he created a lighter weight and self-contained software library which consumes less than 8 K of flash and 1 K of RAM. This is less than half the Flash and RAM available on the ATmega32U4.

[Ryan] is running a Crowd Supply campaign (video after the break) to get some of these powerful boards out in the wild, and has released all the source code and schematics on GitHub. The PCB design files will be released during the last week of the campaign, around 25 January 2021.

USB-C and power delivery are not simple standards, but the ability to add a high-speed data interface and a programmable power supply into almost any project has real potential.

Continue reading “USB-C Programmable Power Supply For Any Project”

Six Degrees Of Freedom Omnicopter With Ardupilot

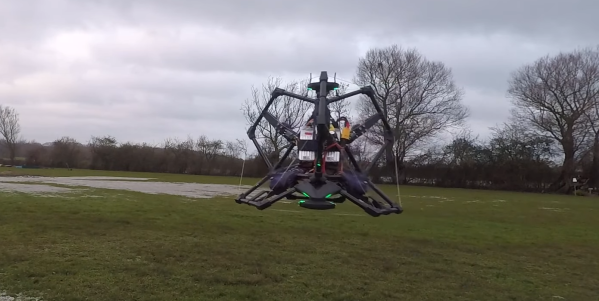
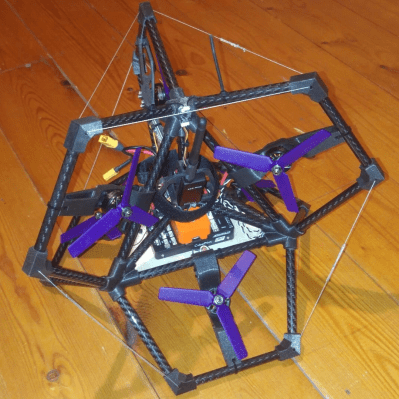
Modern multirotors are very maneuverable but are mostly limited to hovering in a single orientation. [Peter Hall] has gotten around this by building an omnicopter drone with six motors mounted in different orientations on a collapsed tetrahedron frame.

The shape of the frame consists of six tetrahedrons all joined together at a single point. With a motor in each frame, the drone can produce a thrust vector in any direction, to achieve six degrees of freedom. The control system is the challenging part of this project, but fortunately [Peter] is one of the Ardupilot developers. Unlike a standard multirotor, it doesn’t need to tilt to move around laterally but can keep its orientation constant. One of the limiting factors is that the motors need to stop and reverse rotation for direction changes, which takes time. At slow maneuvering speeds this isn’t a major problem, but at higher speeds rotation is noticeably less smooth.

Because the drone is symmetrical all around, keeping track of orientation is challenging for a human pilot, but it’s perfect for an autopilot system like Ardupilot. In the video after the break, [Peter] demonstrates this by flying the drone around while the autopilot rotates it randomly. The 6DoF control system is open source and a pull request is live to integrate it into the official version of Ardupilot. The obvious application for this sort of drone is for inspection in and around structures.

This omnicopter is an entry into the Lynchpin drone competition by the celebrity [Terrence Howard]. We’re not quite following his claims regarding the scientific significance of this shape, which he named the “Lynchpin”, but it works for drones. Continue reading “Six Degrees Of Freedom Omnicopter With Ardupilot”

DIY Laser Tag System Comes With All The Bells And Whistles

While VR is becoming really immersive, it still can’t compete with a game of good old laser tag to get the blood pumping and spending quality time with friends. [Xasin] has been working on a DIY laser tag system for a while now, and it has grown to include an impressive array of features and customizability.

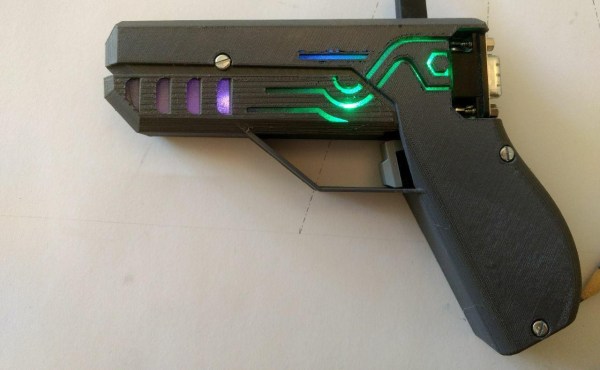
Named LZRTag, the project started back in 2018 with simple ATmega328 based prototypes on breadboards. It has since evolved to a fully-featured system with ESP32s in the 3D printed pistol communicating with a Raspberry Pi/Linux game server over MQTT. Each pistol also features an accelerometer, I2S audio amp and speaker for game sounds, and WS2812 RGP LEDs for light effects. IR Lasers are used as emitters to target wearable IR receivers with more RGB LEDs wired to the pistol.

A Ruby server on a Linux machine takes care of all the communications, game management, shot validation, and scoring. It can handle up to 255 players and is designed to be extremely customizable for game modes, weapons classes, or any other feature you would like to have. [Xasin] has also created IR beacons to add even more possibilities, such as capture the flag, safe zones, and revive zones.

We really like the flexibility of the system, and it would make an awesome group project for a hackerspace. You could also add a shock module to motivate players a bit more to avoid getting shot. If you want more gun, take a look at the laser tag rifle with a HUD we featured earlier in the year Continue reading “DIY Laser Tag System Comes With All The Bells And Whistles”

GPS Guided Parachutes For High Altitude Balloons

Most amateur high altitude balloon payloads descend back to earth with a simple non-steerable parachute and can land hundreds of kilometers from the launch site in inaccessible areas. [Yohan Hadji] experienced this first-hand during a balloon launch conducted by his high school, which inspired him to R2Home, a GPS-guided parachute recovery system.

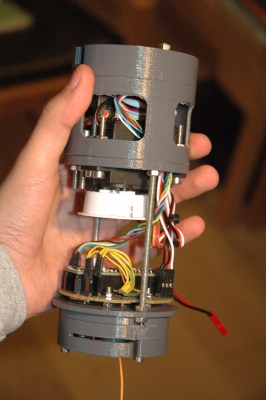
A Teensy runs the show, and controls a pair of sail winch servos pulling the brake lines

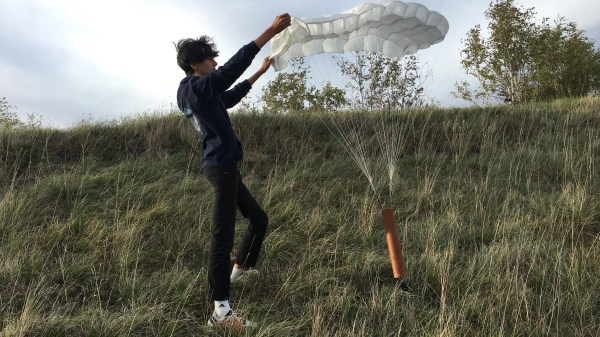
[Yohan]’s first challenge was to create a steerable parachute that can deploy reliably, so he started doing tests with a borrowed scale model paragliding wing. He quickly learned that a canopy aspect ratio of below two was needed for reliable deployment, so he started sewing his own canopies. Steering a parachute involves pulling on a pair of brake lines, one for each side of the parachute. A control stroke of about 20 cm was required, and [Yohan] found that RC sailboat winch servos work perfectly for this application. The entire system is designed to fit in a 7×40 cm tube, and the parachute is deployed with the help of a small drogue chute and a servo-operated release mechanism.

[Yohan] is working on a custom flight controller, built around a Teensy 4.1, GPS receiver, and digital compass. A possible alternative is Ardupilot, which we’ve seen used on several autonomous drones, gliders, and rovers. While this system might not be possible to return to the launch point, it could certainly close the gap, and land safely in a designated area.

So far [Yohan] has done a series of test drops from a drone at low altitude to test deployment and steering, using an RC controller. The project is open source, and the mechanical design files and control code is up on GitHub. As with most 16-year-olds, [Yohan]’s resources are limited, so feel free to drop him some financial help on the R2Home GoFundMe page. See the videos after the break for a development montage and project presentation. Continue reading “GPS Guided Parachutes For High Altitude Balloons”

Tighten This Bolt In Any Direction You Want

Metal lathes are capable machines that played a large role in the industrial revolution, and an incredible tool to have at your disposal. But that doesn’t mean they can’t be used to have a little fun, as demonstrated by [Oleg Pevtsov] who made a bidirectional bolt as a machining exercise just because he could.

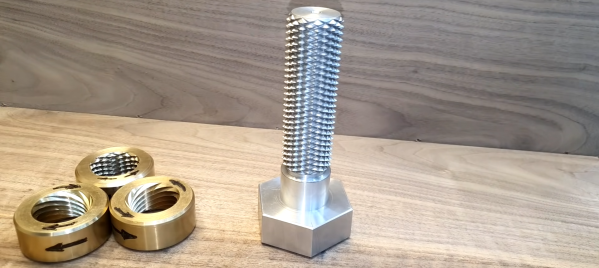
Both videos after the break are in Russian, but the video and auto generated subtitles are enough to get the main points across. The bolt is an M42 size with a 40 mm pitch, with grooves cut in both directions to allow left-handed and right-handed nuts to be threaded. The large pitch means that instead of a single continuous groove like a normal bolt, ten separate grooves need to be cut for each threading direction to cover the bolt surface. Since this was all machined on a manual lathe, a dial indicator was required to maintain accurate spacing. It took [Oleg] four painstaking attempts to get it right, but the end result looks very good. Instead of a fixed cutter, he used a trimming router mounted on a custom clamp.

[Oleg] also machined three different brass nuts to go on the bolt with a fixed cutter. First left-hand and right hand threaded nuts were made, followed by a bidirectional nut. Due to the large pitch and careful machining, all three nuts will spin down the bolt under the force of gravity alone. Although the bidirectional nut doesn’t move as smoothly as the other two, it can change rotation and translation direction at random.

While this is a one-of-a-kind fidget toy, have any of our readers seen a bidirectional bolt or lead screw in the wild? We can imagine that the ability to move two nuts in opposite directions on a single lead screw might have some practical applications.

It’s possible to make incredible parts on a manual lathe. A handbuilt V10 engine and a pneumatic hexacopter model are just two examples of what’s possible with enough skill, knowledge, and patience. Sadly it is a fading form of craftsmanship, rendered mostly obsolete outside of hobby projects by CNC machines.

Continue reading “Tighten This Bolt In Any Direction You Want”

ABS Mercedes Rims Push The Limits Of 3D Printing

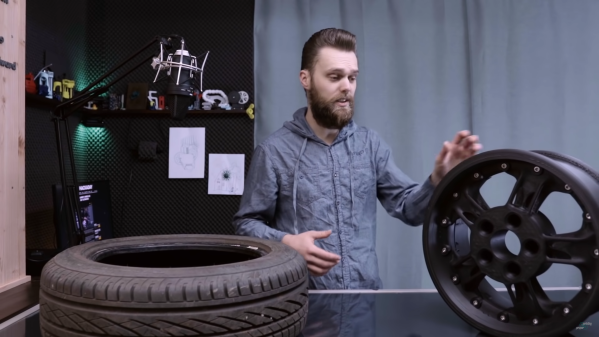
While we’re big believers in 3D printing here at Hackaday, there’s no denying that some things just aren’t meant to be printed. For example, most of us would agree that it’s not the first choice for making rims for a passenger car. We imagine that [Jón Schone] from Proper Printing probably feels the same way, but that didn’t stop him from trying to do it anyway.

A couple of months ago [Jón] got a test subject in the form of an older Mercedes with 19-inch rims. The first two challenges are bed size and warping, so he modified a Creality CR10 S5 with a heated chamber capable of reaching 70 °C to reduce warping with the ABS filament he intended to use. Another challenge is the amount of filament required for the print, especially since [Jón] wasn’t keen on babysitting the machine to replace the spool every so often. His attempt at building a filament joiner ultimately didn’t work out, so in the end he simply sourced the filament in bulk size rolls.

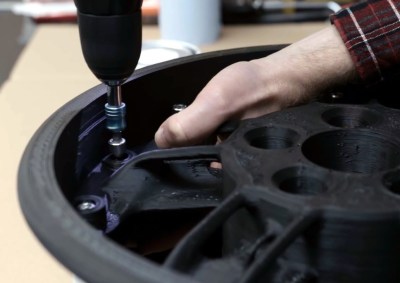
Bolts hold the two halves of the rim together.

Eventually [Jón] managed to print a complete rim in two halves, bolted together around its circumference. Unfortunately, even with the heated chamber, the parts still warped all around the edges. This left a gap at the seam, but to fit a tubeless tire, the rim had to be airtight. So the entire inside surface was painted to close any small gaps, and the larger gaps were filled with sealant.

In the end it was still unable to hold pressure with a tire mounted, so it was test fitted to the car just to see if it would carry the weight. This test also failed, splitting on the thinnest part of the rim. [Jón] has headed back to the drawing board to try again in 2021. We probably would have moved on by now, but you have to admire his tenacity. We hope to see success in the new year.

Printing large parts brings its own set of challenges, but if you stick to good old PLA it’s not too difficult. [Ivan Miranda] has made a name for himself with massive 3D printed projects like a ride-able tank, and also built a supersized 3D printer for future projects.

Continue reading “ABS Mercedes Rims Push The Limits Of 3D Printing”