Signal The End Of A Print With MIDI Of Your Choice

The end of every 3D print should be a triumphant moment, and deserves a theme song. [FuseBox2R] decided to make it a reality, and wrote tool for converting MIDI tracks to G-code that uses the buzzer on your 3D printer.

The tool is up on GitHub, and uses the M300 speaker command that is available in Marlin and some other 3D printer firmware packages. It takes the form of a static HTML page with in-line JavaScript that converts a midi track to series of speaker commands with the appropriate frequency and duration parameters, using the Tone.js framework. Simply add to your slicer G-code to add a bit of spice to your prints. You can also build a MIDI jukebox using the RAMPS board and LCD you probably have gathering dust somewhere. See the video after the break for a demonstration, including a rendition of the DOOM theme song, and off course Mario Bros.

For more quarantine projects, you can also play MIDI using the stepper motors on your printer, or build a day clock if time is becoming too much of a blur.

Continue reading “Signal The End Of A Print With MIDI Of Your Choice”

3D Printed Speakers With Many Lessons Learned

Although we all wish that our projects would turn out perfect with no hiccups, the lessons learned from a frustrating project can sometimes be more valuable than the project itself. [Thomas Sanladerer] found this to be the case while trying to build the five satellite speakers for a 5.1 surround sound system, and fortunately shared the entire process with us in all its messy glory.

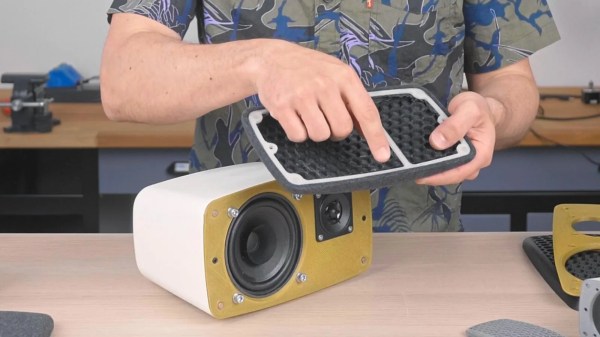
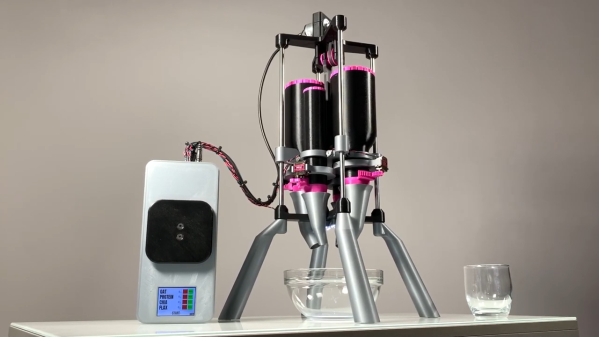
[Thomas] wanted something a little more attractive than simple rectangular boxes, so he settled on a very nice curved design with few flat faces and no sharp corners, 3D printed in PLA. Inside each is an affordable broadband speaker driver and tweeter, with a crossover circuit to improve the sound quality and protect the drivers. The manufacturer of the drivers, Visatron, provides very nice speaker simulation software to select the appropriate drivers and design the crossover circuit. The front of each speaker consisted of a 3D printed frame, covered with material from a cut-up T-shirt. These covers attach to the main body using magnets and really look the part.

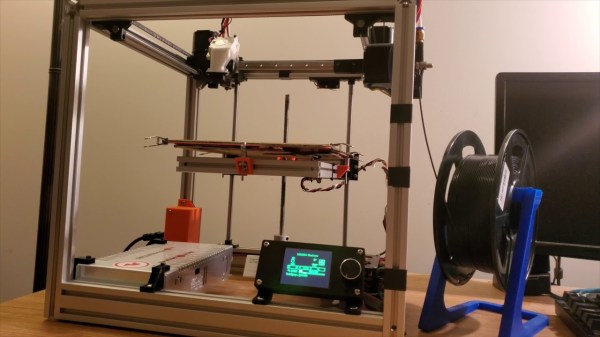
After printing, [Thomas] soaked all the parts in water to clean of the PVA support structures but discovered too late that the outer surfaces are not watertight and a lot of water had seeped into the parts. In an attempt to dry them he left them in the sun for a while which ended up warping some parts, so he had to reprint them anyway. The main bodies were printed in two parts and then glued together. This required a lot of sanding to smooth out the glue joints, and many cycles of paint and sanding to get rid of the layer lines. When assembling the different pieces, he found that many parts did not fit together, which he suspects was caused by incorrect calibration on the delta-bot printer he was using.

In the end, the build took almost two years, as [Thomas] needed breaks between all the frustration, and eventually only used one of the speakers. We’re glad he shared the messy parts of the project, which will hopefully spare someone else a bit of trouble in a project.

Listening to a high-quality audio setup is always a pleasure, and we’ve covered several projects from audiophiles, including affordable DML speakers, and 3D printed speaker drivers.

Continue reading “3D Printed Speakers With Many Lessons Learned”

Perfect Wire Hose Clamps With A Simple DIY Tool

Hose clamps have been around as long as we’ve been using flexible hoses. Usually, a clamp consists of a slotted metal strap, and a screw for tightening. Most of us know how quickly they slip when you want to add a bit more torque, or the frustration of not having the right size. Fortunately [Max Egorov] reminded us of DIY wire clamps (video after the break), an excellent alternative that is very effective, covers an infinite size range and is easy to make with a simple tool.

The wire clamp is in effect a doubled girth hitch, that is pulled tight with the ends bent over to keep the tension. [Max] shows you how to easily make your own clamper tool with basic tools and a few bits of steel. Making it as ornate as his one is definitely not required.  You can also buy a commercial tool that is sold under the name ClampTite, which uses a leadscrew type design.

To achieve a tight seal with a hose clamp, the main requirement is constant pressure around its entire circumference. These wire clamps do this very well and are popular among aircraft mechanics, since flying in a plane with a leaky coolant or fuel hose could shorten your lifespan a bit. [Max] also demonstrates a variety of other uses for these including fixing tool handles and even building a ladder.

We love simple but effective tools like this, and we’ll definitely be adding one to our toolbox. Have you used these before? Let us know in the comments!

There is (almost) never such a thing as too many tools, and making your own is very satisfying. We’ve seen people build an outfit a complete carpentry workshop using plywood, and build sheet metal press brake with no welding.

Thanks [Keith O] for the tip!

Continue reading “Perfect Wire Hose Clamps With A Simple DIY Tool”

Getting Your Morning Mix Exactly Right, Every Time

In historical times, before the pandemic, most people had to commute to work in the mornings, and breakfast often ended up being a bit rushed. [Elite Worm] is very serious about getting his breakfast mix exactly right, and o shave a bit of time off the prep, he built a 3D printed automatic ingredient dispenser for his breakfast bowl.

[Elite Worm] breakfast consists of four ingredients, that have either a powder or granular consistency. They are held in 3D printed hoppers, with a screw top for refilling and a servo-operated door with a funnel at the bottom. The hoppers need to be shaken to properly dispense the ingredients, so all four are mounted on a bracket that can slide up and down on linear bearings. The shaking is done by a brushed DC motor with a slider-crank mechanism, which moves bracket and hoppers up and down very vigorously. [Elite Worm] notes that the shaking is probably a bit too violent and can make the entire table shake if it isn’t sturdy enough, and reducing the motor RPM might be a good idea. Below the hopper system sits a movable weighing station with a load cell, a custom ATmega328P based control board and a Nextion touch screen display, which allows for various ingredient combinations to be saved. The load cell is used to keep track of the ingredient quantities by weight, as they are dispensed one at a time.

We really like the ingenuity of the build, but personally, we would have swapped out the hopper for something that’s moulded, since all the crevices in 3D printed parts is a perfect place for bacteria to grow and can be tricky to clean properly Continue reading “Getting Your Morning Mix Exactly Right, Every Time”

The Drone That Flies In Any Orientation

Modern radio-controlled multi-rotor drone can be incredibly agile, but can only make orientation changes around the yaw axis while remaining in approximately the same position. Researchers at ETH Zurich have again built and tested multirotor with controllable motion six degrees of freedom, this time dramatically improving efficiency.

We covered a similar design from ETH Zurich previously which was hexacopter with arms with limited rotation. This new design is also a hexacopter, but with 2 coaxial motors on each rotating arm. Each arm has an increased range of rotation over the previous design, beyond 360 degrees. With the range of rotation and the very complex control system, the drone can efficiently fly in any orientation, while still being able to apply effective torque or linear force in any direction. This opens up a lot of possibilities for tasks that drones can perform, like close-up industrial inspection, using tools or pulling cables while keeping the rotors clear.

The arms do have a limited amount of rotation before winding the motor cable tight, but the control system keeps track of this and can unwind during or after movement. See the video after the break to see it in action. The complete scientific paper is not light reading, but definitely interesting. We’re looking forward to seeing if and when these type designs get used in real-world applications.

There are without a doubt a lot of drones in our future, and probably the most successful project to date is the Zipline fixed-wing drones in Rwanda and Ghana, which have made over 35000 deliveries of emergency medical supplies since 2016.

Thanks [Qes] for the tip!

Continue reading “The Drone That Flies In Any Orientation”

Quieting Down A Bandoneon Accordion With MIDI

The bandoneon, known as the tango accordion, is quite a loud instrument to practice within the confines of an apartment, and could possibly lead to some neighborly disputes. [HLB] enjoyed playing his but wanted a way to turn down the volume a bit without, in consideration to his neighbors. Instead of building a whole soundproof room, he decided to throw Arduino’s and MIDI at the problem.

Bandoneons, like all accordions, are operated by pushing air from manually pumped bellows through a series of reeds, which are each opened and closed by a valve mechanism. [HLT] turned each valve lever into a simple on/off switch by attaching a magnet, with hall-effect sensors on long custom PCBs next to each row of valves. The hall effect sensors are connected to I2C I/O expander ICs which connect to an Arduino Nano, one for each side of the instrument, which sends out MIDI messages via serial. Everything is mounted inside what looks like quite an old instrument with Blu Tack to avoid having to make a lot of permanent modifications.

The bandoneon still functions normally with no permanent modifications, so to play with MIDI-only the bellow is simply not pumped. This means [HLB] can’t modulate the MIDI velocity (loudness) while playing, which he admits is a limitation but better than not playing at all. He does, however, note that he could add a pressure sensor inside the bellow if we wanted to add velocity to the midi output when neighbourliness isn’t a consideration. On the audio output side [HLB] built a small stand-alone synthesizer with an Odroid SBC running FluidSynth and a HiFi shield.

Continue reading “Quieting Down A Bandoneon Accordion With MIDI”

Harvesting Energy From Ambient Moisture

Generating electricity out of thin air is the fantasy for our modern technology dependant world, but still falls squarely in the world of science fiction. However, researchers from the University of Massachusetts Amherst claim that they have found a way to do exactly that, using protein nano-wires to produce tiny amounts of electricity from ambient humidity.

The protein nano-wires in question are harvested from the microbe Geobacter sulfurreducens, to create a 7 µm thick film that is placed between two gold electrodes. One electrode completely covers the back of the film, while the front electrode covers only a tiny portion of the surface area. When the film is exposed ambient moisture, researchers measured 0.4 V – 0.6 V produced continuously for more than two months. The current density was about 17 µA/cm². This is only a fraction of the output of a commercial solar panel, but it can be layered with air gaps in between. The electricity is supposedly produced due to a moisture gradient through the thickness of the film. Harvesting energy using ambient humidity is not new, but the improvement in power density on this study is at least two orders of magnitude larger than that of previous studies.

The researches have named the technology Air-Gen and hope to develop it commercially. As we have seen many times before, promising lab results often don’t translate well into real world products, but this technology is definitely interesting.

We’ll continue to see all sorts of weird and wonderful ways to free up electrons, like using sweat, but we’ll have to wait and see what sticks.

Thanks for the tip [William Polo]!