Rasberry Pi Analog Input Using Only Passive Components

The Raspberry Pi is a very capable device whose hardware has been pushed to the limit in all sorts of interesting ways. But even the most ingenious of experimenters have to agree on one point; it doesn’t possess an analog-to-digital converter. If you want analog inputs you will have to buy or build them.

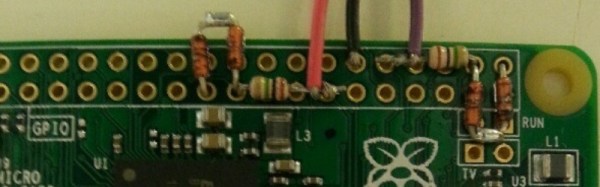
[Mincepi] has done just that, but not as you might expect by adding an integrated circuit on one of the Pi’s interfaces. Instead the circuit [Mincepi] is using consists only of passive components, measuring the time taken to discharge the parasitic capacitance of one of the Pi’s inputs from logic 1 voltage to logic 0 voltage through a resistor into the voltage to be measured. This is a long-established approach to A to D conversion, one that was achieved back in the day with purpose-designed timers as microprocessor ancillaries.

The problem is that the Pi does not have a timer peripheral, so [Mincepi] has used the shift registers that form part of the Pi’s SPI and PCM inputs to perform this task on two channels. A sample rate of 100kHz and 6-bit resolution is claimed, with enough voltage range for a 1V peak-to-peak audio signal to be sampled.

Of course, simplicity does not guarantee a good ADC, and this circuit does not perform very well. It is noisy, non-linear, and as [Mincepi] puts it, probably sensitive to temperature. And though [Mincepi] talks in detail about the software to drive it, none is forthcoming. To quote: “It doesn’t include code since I’m in the process of writing a proper sound device module. My previous code was a simple character device, but it worked just fine, and served to prove the concept.

We really want this to work, even if it’s not the best ADC ever. So we eagerly await the sound device module, and look forward to more news from the project.

This may be the simplest of simple ADCs we’ve yet featured here on Hackaday, but it’s not the first we’ve seen. There is this one using a comparator for example, or this one using a flip-flop. It is the essence of creative electronics to eke a function from a component that was never meant to be, please keep them coming!

Mechatronic Cat Ears For The Rest Of Us

Every now and then you see a project that makes you smile. It may not be something that will deliver world peace or feed the hungry, but when it opens in your browser in the morning you go to work a bit happier for the experience.

Just such a project is [Radomir Dopieralski’s] set of wearable mechatronic cat ears. A cosplay accessory that moves as you do. Very kawaii, but fun.

You may have seen the commercially available Necomimi brainwave activated mechatronic ears. [Radomir’s] version does not share their sophistication, instead he’s using an accelerometer to detect head movement coupled to an Arduino Pro Mini driving a pari of servos which manipulate the ears. He provides the source code, and has plans for a miniaturised version using an ATtiny85 on its own PCB.

Amusing cuteness aside, there are some considerations [Radomir] has had to observe that apply to any a head-mounted wearable computer. Not least the problem of putting the Pro Mini and its battery somewhere a little more unobtrusive and weatherproof than on top of his head. He also found that the micro-servos he was using did not have enough range of movement to fully bend the ears, something he is likely to address in a future version with bigger servos. He’s yet to address a particularly thorny problem: that a pair of servos mounted on your head can be rather noisy.

We’ve covered quite a few cosplay stories over the years. This is not even our first cat ear story. More than one example of a Pip Boy, a HAL 9000 costume, and a beautifully made Wheatley puppet have made these pages, to name a few. So scroll down and enjoy [Radomir’s] video demonstration of the ears in action.

Continue reading “Mechatronic Cat Ears For The Rest Of Us”

Samsung ARTIK Dev Boards Start To Ship

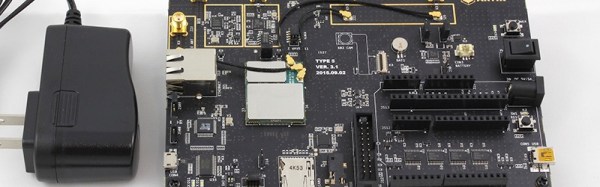
Another week’s news, another single board computer aimed at Internet of Things applications is launched. This time it’s Samsung’s Artik 5, a platform they’ve been talking about for a while now but which you can now buy as a dev board from Digi-Key for $99.99. For that you get Wi-Fi, Bluetooth and Zigbee connectivity, a dual-core ARM Cortex A7 running at 1GHz, 512MB of memory, and 4GB of eMMC storage. There are the usual plethora of interfaces: GPIO, I2C, SPI, UART, SDIO, USB 2.0, JTAG, and analogue.

The single board computer marketplace is starting to look rather crowded, and with so many competitors to choose from at more reasonable prices you might ask yourself why the ARTIK could be of interest to a maker. And given that Samsung are positioning it in their literature on its increased security for use in commercial  applications such as IoT hubs, IP cameras and industrial and commercial lighting systems, you’d probably be on to something. If you were to make a very rough analogy with the Raspberry Pi range this has more in common with the Compute Module when it comes to intended marketplace than it does with the Pi Zero.

One answer to that question though could be that it is one of the first devices to support the Thread networking protocol for IoT devices. Thread is a collaboration between Google and a range of other interested parties that has been designed to deliver reliable and secure mesh networking for IoT devices in connected homes. As with all new connectivity protocols only time will tell whether Thread is the Next Big Thing, but it is interesting to note in this board nevertheless.

The ARTIK hasn’t made many waves as yet, though we covered the story when it was announced last year. It is worth mentioning that the ARTIK 5 is only the first of three platforms, the ARTIK 1 will be a tiny board with Bluetooth LE aimed at portable and wearable applications while the ARTIK 10 will be an octo-core powerhouse aimed at mulitmedia processing and network storage applications.

CNC Scrapbooking With A Raspberry Pi

It is perhaps a surprise that the widespread adoption of CNC machinery in the home has not come from 3D printing or desktop mills, but as a quiet revolution in the crafting industry. CNC cutters for plastic or card have been around for quite a while now, and while the prospect of cutwork greetings cards might not set all maker pulses racing these cutters do have significant untapped potential in other directions. Perhaps you have to own a carburetor whose gaskets have been unavailable since the 1960s to truly appreciate that.

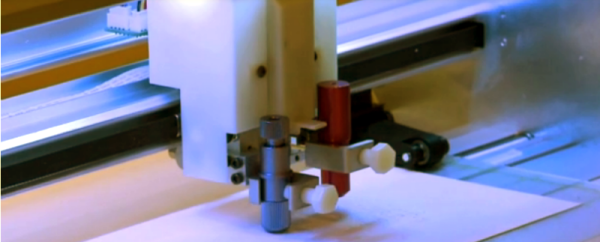
[James Muraca] has a KNK Force, something of an object of desire in the world of desktop CNC cutters. The computer inside the Force is a Raspberry Pi, so of course [James] set about investigating its potential for running his own software. His progress so far is on GitHub, a web interface through which you can upload and cut an SVG file, but his plans are more ambitious. He hopes to turn his machine into a complete PCB manufacturing station, able to both cut the PCB, and with the addition of a vacuum attachment to pick and place components.

The KNK Force is an interesting machine not just because it is powered by a Raspberry Pi. Its cutter head is a rotary tool with a Z axis, so it can perform more heavy-duty and complex cutting tasks than its competition. In addition it has a camera built-in, and it is this feature that [James] hopes to use in his PCB project.

We’ve covered plenty of cutter projects before, from projects turning CNC machines and pen plotters into vinyl cutters to using a cutter as a laser engraver and even cutting solder paste stencils with one. We look forward to further progress on [James’s] project.

8-bit Computer Made Solely From NAND Gates

As an electronics rookie, one of the first things they tell you when they teach you about logic gates is, “You can make everything from a combination of NAND gates”. There usually follows a demonstration of simple AND, OR, and XOR gates made from NAND gates, and maybe a flip-flop or two. Then you move on, when you want a logic function you use the relevant device that contains it, and the nugget of information about NAND gates recedes to become just another part of your electronics general knowledge.

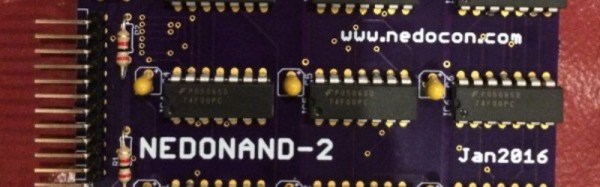
Not [Alexander Shabarshin] though. He’s set himself the task of creating an entire CPU solely from NAND gates, and he’s using 74F00 chips to give a hoped-for 1MIPS performance.  His design has an 8-bit data bus but a 4-bit ALU, and an impressive 2-stage pipeline and RISC instruction set which sets it apart from the computers most of us had when 74-series logic was a much more recent innovation. So far he has completed PCBs for a D-type flip-flop and a one-bit ALU, four of which will work in parallel in the final machine

Unsurprisingly, we have maintained a keen interest in TTL computers here at Hackaday for a very long time. You might say that we have featured so many for the subject to deserve a review article of its own. There is the ASAP-3, the Magic-1, the Duo Basic, the Apollo181, the unnamed CPU made by [Donn Stewart], the BMOW, and a clone of the Apollo Guidance Computer. But what sets [Alexander’s] project aside from all these fine machines is his bare-metal NAND-only design. The other 74-series CPU designers have had the full range of devices such as the 74181 ALU at their disposal. By studying the building blocks at this most fundamental level a deeper understanding can be gained of the inner workings of parts normally represented just as black boxes.

One of the briefs for writing a Hackaday article is that if the subject makes the writer stop and read rather than skim over it then it is likely to do so for the reader too. This project may not yet have delivered a working CPU, but its progress so far is interesting enough for an in-depth read. Definitely one to watch.

Sputnik’s Transmitter Beeps Again

Sputnik. The first artificial satellite, the launch of which precipitated the space race. Without the frenetic pace of technological advancement as the USA and the USSR vied with each other during the decade following its launch it is safe to say that we might not yet have many of the tools and components we take for granted as electronics enthusiasts and makers today.

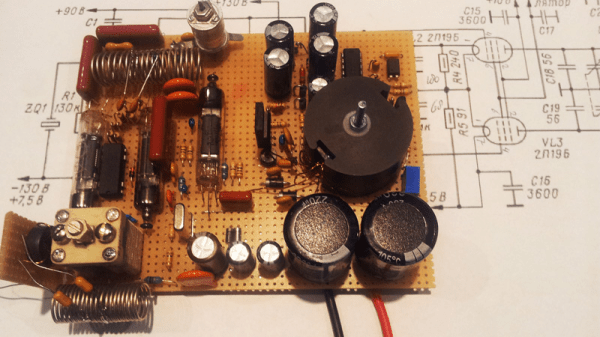
[Frank Waarsenburg PA3CNO] has taken on the interesting task of recreating one of the Sputnik radio transmitters using a set of the original Russian tubes.

Sputnik itself was an astounding achievement for the team of engineers and scientists who put it into orbit, but the drive to beat the USA to the post within the 1957 International Geophysical Year meant that it was a surprisingly simple device. A sphere pressurised with nitrogen and with those iconic whip antennas mounted on its outside, containing a battery, 20 and 40 MHz tube radio transmitters, and a fan cooling system. Its design was a Soviet state secret, but in 2013 [Oleg, RV3GM] located the schematic used for the transmitter.

The tubes are slightly unusual, being a wire-ended design with all electrodes mounted on rods the length of the glass envelope. This design feature gave them a resistance to acceleration and vibration, making them suitable for use in aircraft, missiles, and rockets.

[Frank] faced one or two hurdles during his construction, including the development of a suitable power supply and finding an unfortunate bug in the Russian schematic. If you speak Dutch or are prepared to use a translation tool his full write-up can be found in the Dutch-language RAZzies magazine, December issue featuring the power supply (PDF, Dutch), and January issue featuring the transmitter (PDF, Dutch).

The Sputnik satellite has not appeared on its own in these pages before, but we have recently featured the early OSCAR amateur radio satellites and the revival of a piece of space-race-era Soviet rocket technology.

Via [Stefan, HB9TWS], whose English-language coverage of the transmitter was of great help.

BBC Micro:Bit Gets An App

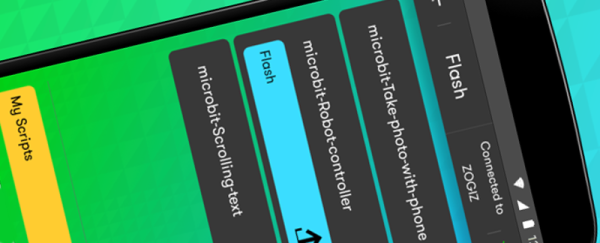
It’s a small, cheap, British single board computer, and nobody can get hold of them. Another Raspberry Pi Zero story, you might think, but no, this is about the other small cheap and difficult to find British SBC, the BBC micro:bit. Samsung UK have produced an app for the micro:bit that allows owners to write code on their Android phones, and upload it to their micro:bit via Bluetooth.

The micro:bit story has played out with agonising slowness over the last year, but it seems that there may now be light at the end of the tunnel. The idea is a good one: give a small but very capable single board computer to every Year 7 (about 12 years old) child, and watch them learn something more useful about computers than how to use a Windows application. It has echoes of the BBC Micro 8-bit computer for schools sponsored by the UK government in the 1980s, and the hope is that it will help reproduce the same technical literacy enjoyed by 1980s kids.

The plan was for the youngsters to receive their boards last October but the project as been plagued by a series of delays and the latest estimate from January was that the boards would reach the kids after the school half-term. In other words within the next couple of weeks, depending on which part of the UK the school is located in.

We recently had a brief opportunity here at Hackaday to examine a micro:bit in the wild. It is a capable little board in its own right, being at heart an mbed, however the recommended web-based micro:bit IDE and compiler differs from the more usual mbed toolchain. One thing that caught our attention in the demo we were given was the micro:bit’s use of USB to deploy code; since schools lock down computer hardware to the n’th degree we were concerned that the micro:bits might not be visible on school USB ports. Easy Bluetooth deployment through the Samsung app promises to bypass that barrier, which can only be a good thing.

We’ve been watching the micro:bit story here at Hackaday from the start, most recently we noted the arrival of Python on the platform. If it has a formative influence on the generation of developers and engineers you’ll be hiring in the mid-2020s then we expect it to feature in many future stories.