Porting Contiki To The TI MSP430 Launchpad

For many years Contiki has been one of the main choices when it came to choosing an IPv6 over Low power Wireless Personal Area Networks stack (aka 6LoWPAN). It is developed by a world-wide team of developers with contributions from Atmel, Cisco, ETH, etc… and is open source. As most platforms to which Contiki has been ported are quite expensive, [Marcus] decided to bring the operating system to the TI Launchpad. For our readers that don’t know, the latter is based on a msp430g2452/2553 microcontroller, which only have 256/512 bytes of RAM and 16kB of ROM. As a side note, Contiki typically requires 10k RAM and 30k ROM.

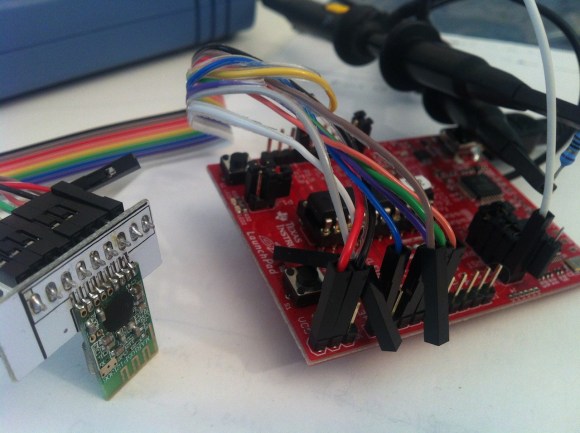
[Marcus] therefore had to remove several features from Contiki: queue-buffering, energy estimation and regrettably uIP. His test setup (shown above) uses the TI CC2500 radio that can be found for less than $2 on Aliexpress, for which he wrote radio drivers from scratch. He also coded his own radio duty-cicling layer, as the one included in Contiki was too big.

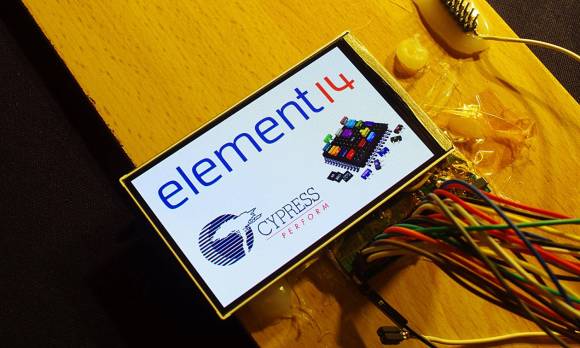
Interfacing With The HTC Desire Display And Its Touch Panel

Part of [Linas]’ submission to last year’s Cypress Smarter Life Challenge involved using the HTC Desire display and its touch screen. This particular phone includes a full-color active-matrix OLED (AMOLED) display that has a 3.7″ diagonal and a 480×800 resolution, resulting in a 252ppi pixel density. Using a MSO2024B oscilloscope, [Linas] originally started his adventure with the touchscreen by sniffing the I2C signals. As some math was required to extract the data, he later found the HTC Desire source code and included it on his STM32F429 (so much for reverse engineering!).

After spending many hours searching for the AMOLED display and controller datasheets, [Linas] resorted to pay a company to get the resources he needed. He produced a custom-made PCB to provide the display with the required voltages, as well as offering a 0.1″ connector to interface with it. A RGB565 interface is used to communicate with the screen so only 65k out of the 16 million colors are used. You may download all the program files and datasheets in [Linas] write-up.

A Low Cost Dual Discriminator Module For The Easy-phi Project

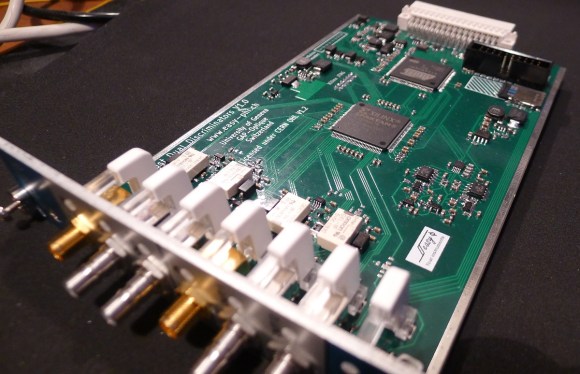
A few months ago I presented you the Easy-phi project, which aims at building a simple, cheap but intelligent rack-based open hardware/software platform for hobbyists. With easy-phi, you simply have a rack to which you add cards (like the one shown above) that perform the functions you want.

Recently my team finished testing our FPGA-based discriminator or “universal input” if you prefer. As easy-phi cards use a well-defined electrical signal to communicate with each other, we needed to make a card that would translate the different kinds of electrical signals from the outside, as well as perform plenty of other functions. It was therefore designed to have a 100MHz input bandwidth with an AC/DC coupled 50 ohm/high impedance input stage (x2) and 4 easy-phi outputs. For this module, we picked the (old) spartan3-an FPGA to perform the different logic functions that may be needed by the final users (high speed counter, OR/XOR/AND, pulse creation,…). Using the cortex-m3 microcontroller present on the board, it may be easily reconfigured at will. All design resources may be found on our Github, and you can always have a look at our official website.

QtLedTest – Software To Evaluate OLED Displays

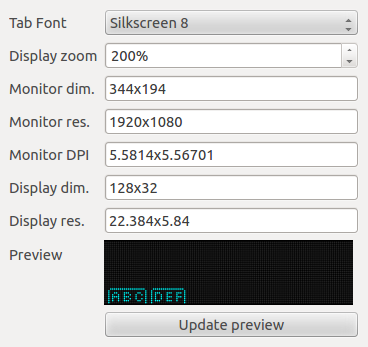
A few days ago we featured the USBPass, an offline password keeper made with very few components. At the end of our write-up we mentioned that [Josh] was already working on another version of his hardware, which involved adding an OLED screen to the platform. To help him pick one he created QtLedTest, a Qt-based tool that simulates different OLED displays and GUI layouts for them. Internally QtLedTest is composed of QLedMatrix (a widget that simulates LED matrices), an SSD1306 OLED controller simulator, a simple graphics drawing library and some functions to draw text on the simulated screen. [Josh] used Fontbuilder together with a program he made in order to convert fonts he had found on the internet to C files. All the source code [Josh] made can be found on Github and should be updated in coming weeks as the final program is a bit slow to render the simulated screens.

USBPass – A Mooltipass-like Project

In our Developed on Hackaday series some readers may recall a sentence we wrote: “if one’s idea is not yet in the market, it’s either completely stupid or people are already working on it”. Well, [Josh] casually mentioned that he was also working on an offline password keeper after having recently subscribed to our google group. Similarly to the Hackaday-developed platform, the USBPass is connected to a computer via USB and is detected as an HID keyboard. As you can see in the picture shown above, it uses very few components: an ATMega32U2, a USB connector, three buttons and a few passives chips.

A total of 20 passwords can be stored in the microcontroller’s memory, which can be ‘typed’ by the platform using the push buttons. The USBPass firmware is based around the LUFA USB stack, to which [Josh] added HID report functionality to allow data transfer from his desktop application. The latter uses the Linux/Windows/OS X HID API library so bringing his software to other operating systems can be done in no time. All the project resources can be found on GitHub, while [Josh] is currently working on a B revision which will include an OLED screen.

Hacking SD Card & Flash Memory Controllers

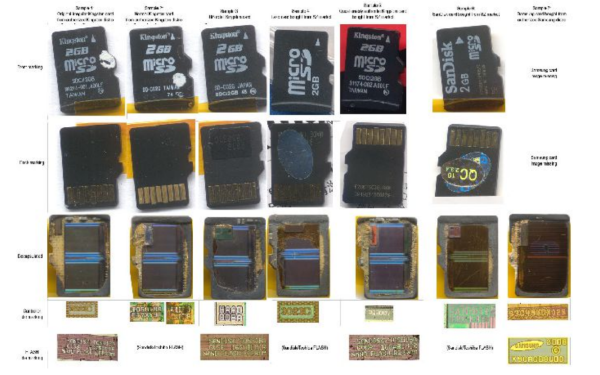
We hope that some of our readers are currently at this year’s Chaos Communication Congress (schedule can be found here and live streams here), as many interesting talks are happening. One of them addressed hacking the memory controllers embedded in all memory cards that you may have. As memory storage density increases, it’s more likely that some sectors inside the embedded flash are defective. Therefore, all manufacturers add a small microcontroller to their cards (along with extra memory) to invisibly ‘replace’ the defective sectors to the operating system.

[Bunnie] and [xobs] went around buying many different microSD cards in order to find a hackable one. In their talk at 30C3 (slides here), they reported their findings on a particular microcontroller brand, Appotech, and its AX211/AX215. By reverse engineering the firmware code they found online, they discovered a simple “knock” sequence transmitted over manufacturer-reserved commands that dropped the controller into a firmware loading mode. From there, they were able to reverse engineer most of the 8051 microcontroller function-specific registers, allowing them to develop novel applications for it. Some of the initial work was done using a FPGA/i.MX6-based platform that the team developed named Novena, which we hope may be available for purchase some day. It was, among others, used to simulate the FLASH memory chip that the team had previously removed. A video of the talk is embedded below.

Continue reading “Hacking SD Card & Flash Memory Controllers”

Making An ARM Powered MIDI Synthesizer

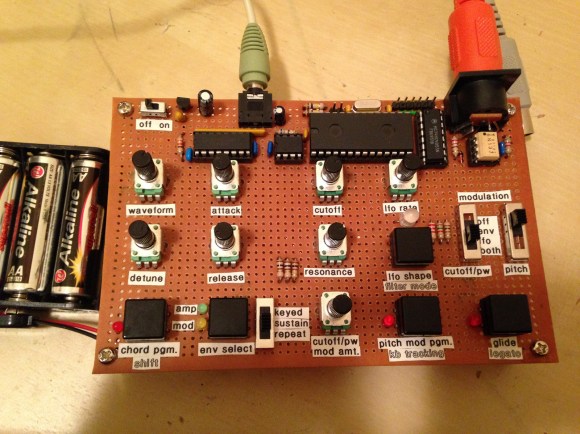
What you see in the picture above is a hand-made 4-oscillator synthesizer with MIDI input, multi-mode filter and a handful of modulation options. It was built by [Matt], an AVR accustomed electronics enthusiast who made an exception to his habits for this project. The core of the platform is a DIP packaged 32-bit Cortex-M0 ARM processor (LPC1114), stuffed with ‘hand’ written assembly code and compiled C functions. With a 50MHz clock speed, the microcontroller can output samples at 250kHz on the 12bit DAC while being powered by 3 AA batteries.

Reading [Matt]’s write-up, we discover that the firmware he created uses 4 oscillators (sawtooth or pulse shape) together with a low frequency oscillator (triangle, ramp, square, random shapes). It also includes a 2-pole state-variable filter and the ability to adjust the attack-release envelopes (among others). The system takes MIDI commands from a connected device. We embedded videos of his creation in action after the break.

Continue reading “Making An ARM Powered MIDI Synthesizer”