Flip-Dots Enter The Realm Of Fine Art

Flip-dot displays look and sound awesome. At least to all of us electronics geeks who dumpster dive for second-hand panels to add to our collections of esoteric display technology. But there are people thinking beyond the yellow/white dots on a black background. [BreakfastNY] have produced a new take on what a flip-dot display can be with color and a bit of theatrics.

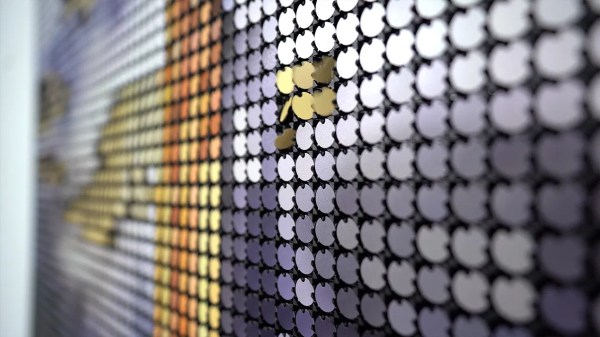
Mechanically these are standard pixels that use an electromagnetic coil to pivot a disc between two states. But immediately you’ll see the inert display has a mosaic printed right on the dots. It gets even more fun to realize the same image is present on the rear of the dots but in a different color palette. In the case of this piece, entitled Empire State, it looks like a sunny day on one side and an overcast day on the reverse.

We wondered what this art collective was up to when they began selling flip-dot modules they had designed back in 2016. Having those kinds of connections meant they were able to sweet-talk their manufacturing partners into custom printing colors on the discs during manufacture. The group continues to use their camera-based interactivity that represents silhouettes on the display. The innovative color palette still lets that work quite well, but one really interesting animation choice here is an indeterminate flutter of the pixels. It builds a Matrix-style waterfall animating into the image, beckoning the viewer to walk over with the ulterior motive that this brings them within camera range.

If you want to give the flutter effect a try for yourself, you might want to peek at the 30 FPS flip-dot driver we saw a few weeks back as a responsive option.

Continue reading “Flip-Dots Enter The Realm Of Fine Art”

Video Ram Transplant Doubles RTX 3070 Memory To 16 GB

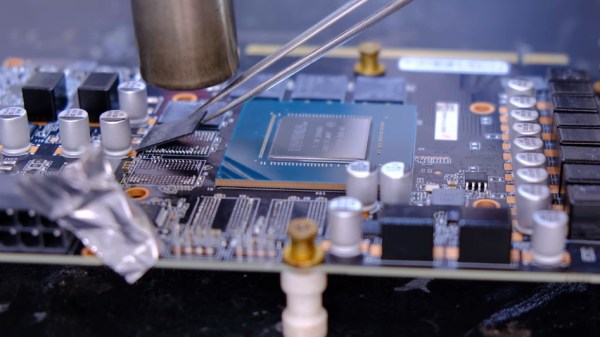
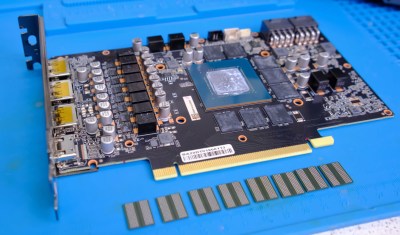
Making unobtainium graphics cards even more unobtainable, [VIK-on] has swapped out the RAM chips on an Nvidia RTX 3070. This makes it the only 3070 the world to work with 16 GB.

If this sounds familiar, it’s because he tried the same trick with the RTX 2070 back in January but couldn’t get it working. When he first published the video showing the process of desoldering the 3070’s eight Hynix 1 GB memory chips and replacing them with eight Samsung 2 GB chips he hit the same wall — the card would boot and detect the increased RAM, but was unstable and would eventually crash. Helpful hints from his viewers led him to use an EVGA configuration GUI to lock the operating frequency which fixed the problem. Further troubleshooting (YouTube comment in Russian and machine translation of it) showed that the “max performance mode” setting in the Nvidia tool is also a solution to stabilize performance.

The new memory chips don’t self-report their specs to the configuration tool. Instead, a set of three resistors are used to electronically identify which hardware is present. The problem was that [VIK-on] had no idea which resistors and what the different configurations accomplished. It sounds like you can just start changing zero Ohm resistors around to see the effect in the GUI, as they configure both the brand of memory and the size available. The fact that this board is not currently sold with a 16 GB option, yet the configuration tool has settings for it when the resistors are correctly configured is kismet.

So did it make a huge difference? That’s difficult to say. He’s running some benchmarks in the video, both Unigine 2 SuperPosition and 3DMark Time Spy results are shown. However, we didn’t see any tests run prior to the chip swap. This would have been the key to characterizing the true impact of the hack. That said, reworking these with a handheld hot air station, and working your way through the resistor configuration is darn impressive no matter what the performance bump ends up being.

Continue reading “Video Ram Transplant Doubles RTX 3070 Memory To 16 GB”

Hackaday Podcast 110: One Unicode To Rule Them, Hacking Focus Stacking, Virtual Typing, And Zombie Weather Channel

Hackaday editors Elliot Williams and Mike Szczys cover a great week of hardware hacking. We saw a fault-injection attack that used an electric flyswatter and hand-wound coil to twiddle bits inside of an AVR micro. Focus-stacking is what you want when using a microscope to image circuit boards and there’s a hack for the Eakins cameras that makes it automatic. In our “can’t miss articles” we riff on how to cool off cities in a warming climate, and then gaze with quiet admiration at what the Unicode standard has accomplished. But when it comes to head-spinning hacks, you can’t beat the reverse-engineering efforts being shown off with the rack-mount box that made the Weather Channel awesome back in the 80’s and 90’s.

Take a look at the links below if you want to follow along, and as always, tell us what you think about this episode in the comments!

Direct download (~54 MB)

Places to follow Hackaday podcasts:

Continue reading “Hackaday Podcast 110: One Unicode To Rule Them, Hacking Focus Stacking, Virtual Typing, And Zombie Weather Channel”

An Anti-Tamper Mesh Plugin For KiCad

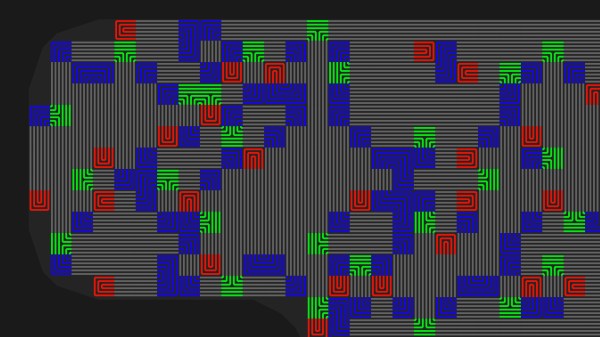
Physical access to electronics generally means all bets are off when it comes to information security. But in special cases this is just unacceptable and a better solution must be found. Consider the encryption keys used by point of sale machines. To protect them, the devices incorporate anti-tamper mechanisms that will wipe the keys from memory if the device is opened. One such technique is to use a mesh of traces on a circuit board that are monitored for any changes in resistance or capacitance. [Sebastian Götte] has been researching in this area and wrote a KiCad plugin to automatically generate tamper-detection mesh.

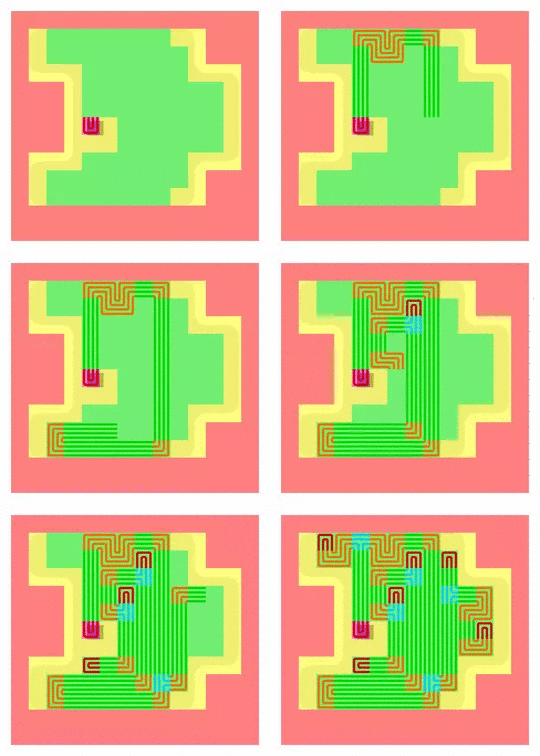
The idea is pretty simple, place traces very close to one another and it makes it impossible to drill into the case of a device without upsetting the apple cart. There are other uses as well, such as embedding them in adhesives that destroy the traces when pried apart. For [Sebastian’s] experiments he’s sticking with PCBs because of the ease of manufacture. His plugin lays down a footprint that has four pads to begin and end two loops in the mesh. The plugin looks for an outline to fence in the area, then uses a space filling curve to generate the path. This proof of concept works, but it sounds like there are some quirks that can crash KiCad. Consider taking a look at the code if you have the expertise to help make it more stable.
We’ve seen these anti-tamper meshes in practice in the VeriFone payment terminal that [Tom Nardi] tore down a couple of years ago. The approach that [Sabastian] took with the plugin actually produces a more complex mesh than was in use there as it only really used vertical lines for the traces.

Hackaday Podcast 109: Cars That Suck, A Synth Packed With 555s, X-ray Letter Reading, And Pecking At A PS/2 Keyboard

Hackaday editors Mike Szczys and Elliot Williams riff on the week’s most interesting hacks. It’s hard to imagine a more perfect piece of art than an original Pong circuit board mounted in a shadow box and playable along with some tasty FPGA tricks to capture the original look of the screen. You could make a synth with a 555 timer, but what about using 20 of them for perfect polyphony? We ogle an old video showing off a clever toothed-disc CNC machine for cutting pastry with a water jet. And the episode wouldn’t be complete without looking at the strange tech that goes into making a fan car.

Take a look at the links below if you want to follow along, and as always, tell us what you think about this episode in the comments!

Direct download (~60 MB)

Places to follow Hackaday podcasts:

Continue reading “Hackaday Podcast 109: Cars That Suck, A Synth Packed With 555s, X-ray Letter Reading, And Pecking At A PS/2 Keyboard”

Decoding The PS/2 Keyboard Protocol Using Good Old Fashioned Hardware

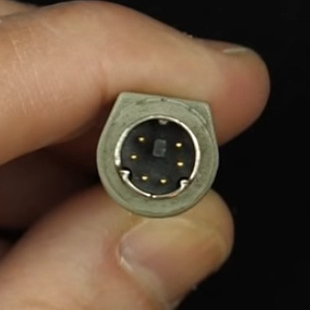
1987 was a glorious year.  It brought us the PS/2 keyboard standard that’s still present on many a motherboard back panel to this day. (It also marked the North America/Europe release of The Legend of Zelda but that’s another article.) Up until this point, peripherals were using DIN-5 and DE-9 (often mistakenly called DB9 and common for mice at the time) connectors or — gasp — non-standard proprietary connectors. So what was this new hotness all about? [Ben Eater] walks us through the PS/2 hall of fame by reverse-engineering the protocol.

The PS/2 connector in all its glory

This is a clocked data protocol, so a waveform is generated on the data pin for each key pressed that can be compared to the clock pin to establish the timing of each pulse. Every key sends a unique set of encoded pulses and voila, the whims of the user can quickly and easily be decoded by the machine.

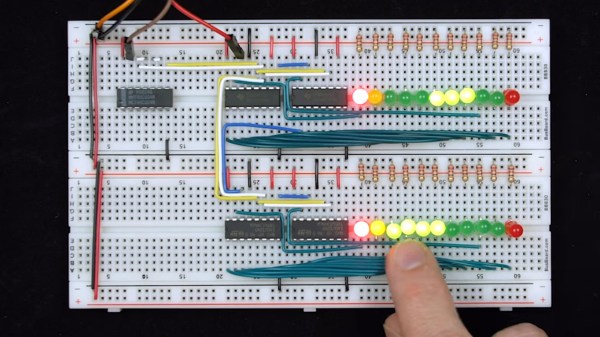
This is where [Ben’s] dive really shines, we know he’s a breadboarding ninja so he reaches for some DIP chips. A shift register is an easy way to build up a parallel PS/2 interface for breaking out each data packet. There are a few quirks along the way, like the need to invert the clock signal so the shift register triggers on the correct edge. He also uses the propagation delay of a couple inverter gates to fire the 595 shift register’s latch pin slightly late, avoiding a race condition. A second 595 stores the output for display by a set of LEDs.

Beyond simply decoding the signal, [Ben] goes into how the packets are formatted. You don’t just get the key code, but you get normal serial interface error detection; start/stop bits and a parity bit as well. He even drills down into extended keys that send more than one packet, and a key-up action packet that’s sent by this particular keyboard.

This is the perfect low-level demo of how the protocol functions. On the practicality side, it feels a bit strange to be breaking out the serial to parallel when it would be very easy to monitor the two signal lines and decode them with a microcontroller. You might want to switch it up a bit, stick with the clock and data pins, but connect them to a Raspberry Pi using just a few passive components.

Continue reading “Decoding The PS/2 Keyboard Protocol Using Good Old Fashioned Hardware”

ESP8266-Powered Receipt Printer Puts RESTful API On Dead Trees

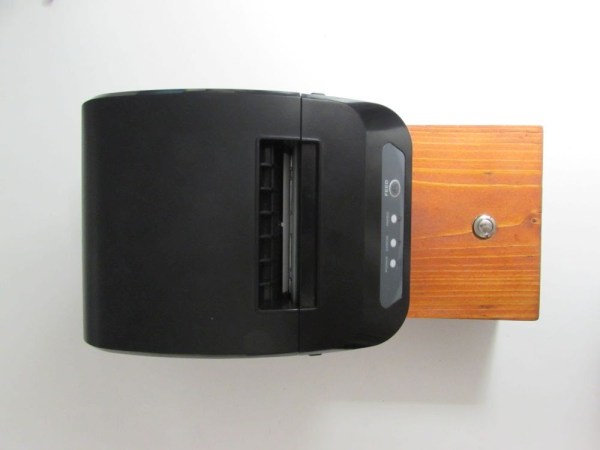
Taking his digital information into the real-world, [Davide Gironi] has built his own note transcriber from a point-of-sale receipt printer and an ESP8266.

You’ve seen these receipt printers at the order window of restaurants. A server puts in an order from any of the machines throughout the restaurant and a paper summary spits out for the chef line to start in on (and even cuts itself off from the roll).  Why shouldn’t we have this convenience in our own lives?

The printer communicates using a variant of the Epson Standard Code for Printers, for which [Davide] has written a library and thankfully shared the code. Adding an ESP8266 using a couple voltage regulators and some passive components makes this wireless, except for power. It has all the fun bells and whistles to set up the WiFi credentials and once running, just push the button on the base and it’ll spit out your data.

But wait, where is that data coming from? The web-based settings page lets you configure a URI to the RESTful source of your choosing. (XKCD has one, don’t they?) It also lets you configure header, footer, error messages, and of course your company hacker logo.

One of our favorite receipt-printer moments was when Hackaday editor of yore [Eliot Phillips] brought a selfie receipt printer to Supercon. We couldn’t find any pictures of that one, so we’ll leave you with the excellent hack [Sam Zeloof] pulled off by cramming one of these into a Polaroid camera.

Continue reading “ESP8266-Powered Receipt Printer Puts RESTful API On Dead Trees”