Homemade Silicon Carbide LED

Here’s an LED indicator which was made at home out of a Silicon Carbide (SiC) crystal (Internet Archive Mirror). The concept is simple, but a bit of trial and error goes into getting that tiny amber spot to light up.

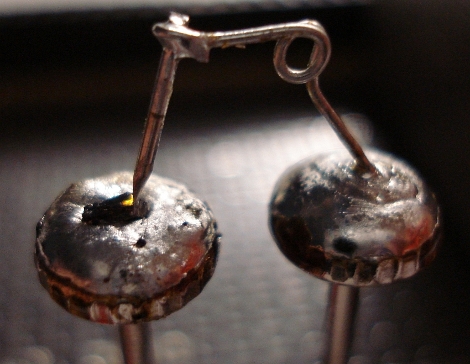
The guesswork comes in finding the right piece of crystal. First [KOS] broke it into tiny pieces, then he started poking the chunks with electrified probes to see if he could get some light out of them. Once an active area was found he needed a base for the crystal. The image above shows the two nails which he used. This provides a large mounting area that also acts as a heat sink to make sure the LED won’t burn itself out. There’s a solder blob which he kept molten with his iron until the crystal could be pushed into place. That holds it securely as the pin which serves as the cathode is positioned.

The whole setup is soldered to some protoboard and is ready to use. This is the second time we remember seeing this technique used to fabricate LEDS. The first time was an accident.

Blu-ray CNC Looks Great For Branding And Engraving

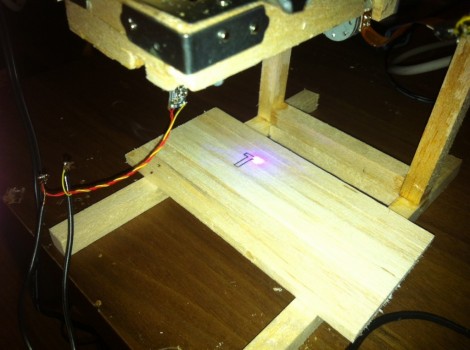
[Nav] got the bug for a tiny little laser cutter. He pulled off the build, and has just finished the second rendition which makes some nice improvements. He’s was hoping for a laser cutter, but we think this really shines when it comes to branding objects like the scrap wood seen above.

This joins a long line of optical drive parts builds. For instance, we saw this plotter that used the lens sleds from some CD-ROM drives. You may think that [Nav] doesn’t need to worry about the Z axis since this is a laser but you’d be wrong. The focal point of the light needs to hit at the right place to cut efficiently, and this is often the trouble with laser cutters. As material is burned away the laser becomes less efficient if you don’t adjust the lens for vertical position. That’s why we think it’s best as an engraver, but the original build writeup for his cutter does show some success cutting letters in dark paper.

Check out a clip of this design being burnt into the wood after the break.

Continue reading “Blu-ray CNC Looks Great For Branding And Engraving”

Large-scale Arduino Controlled Greenhouse Does Some Serious Farming

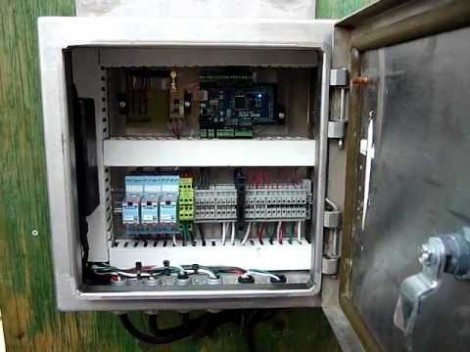
[Instrument Tek] isn’t messing around with a hobby-sized greenhouse. In fact if it were any bigger we’d call it a commercial operation. But what interests us is the professional-quality greenhouse automation he built around and Arduino board.

The greenhouse is about what you’d expect to see at a nursery, except the footprint is somewhere around 10’x10′. It’s a stick-built frame with walls made of poly. Professional greenhouses monitor and regulate temperature and humidity and this one does just that. The video after the break starts off by showing the controller box. It has temperature, humidity, and light sensors that allow the Arduino to judge growing conditions. If it gets too hot, some slats are opened and a fan exhausts air from the structure. If it gets to cold, a series of light fixtures are energized. They contain heat lamps, as this setup is in northern Alberta, Canada and it can get quite cold some nights. The drip system is also automated, with a solenoid to turn water on and off.

In addition to that 3:26 show-and-tell, we’ve embedded a 27-minute video that shows how to build the controller box. So you can start you plants indoors on the rack, then populate the greenhouse when they get large enough.

Continue reading “Large-scale Arduino Controlled Greenhouse Does Some Serious Farming”

Home Automation With RC Wall Plugs And Raspberry Pi

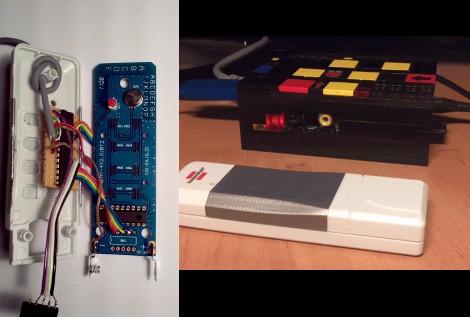
[Jake] took some cheap hardware and figured out a way to use it as a huge home automation network. He’s chose a Raspberry Pi board to connect the radio controlled power outlets to his network. He wrote about his project in two parts, the first is hacking the RC outlet controller and the second is using the Raspberry Pi to manipulate it.

These RC outlets are a pass-through for appliances that connect to mains (lamps, consumer electronics, christmas trees, etc). Often the protocol used by the cheap-as-dirt remote is difficult to work with, but [Jake] really hit it out of the part on this one. In addition to simulating button presses for up to fifteen devices on the remote, he replaced the DIP switch package. This lets him change the encoding, essentially allowing the one device to control up to 32 sets of outlets. Theoretically this lets him command 480 devices from the Raspberry Pi. Since that board is a web server it’s just a matter of coding an interface.

Some of the inspiration for this hack came from the whistle-controlled appliance hack.

Update: Many Improvements To Optical-sensor-based Piano

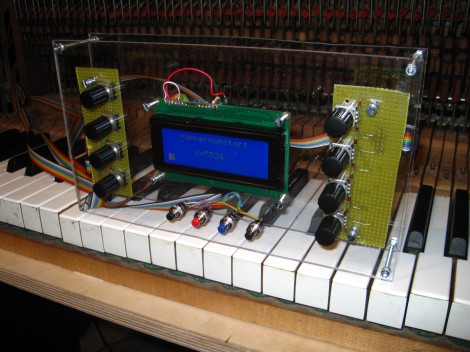
[Sebastian] wrote in to update us about the optical sensor project he started a couple of years ago. You’ll find his most recent update here, but there are four different post links after the break that document various parts of his progress.

You may not recall the original project, but he was looking to add resolution and sensitivity to the keystroke of an electric keyboard. With the sensors built, he started experimenting with using the force data to affect other parts of the sound. His post back in January shows this bending the pitch as the keys receive more force from the player.

In March he installed the sensor array in an old piano. The video he posted where he plays the piano, but we hear the sound generated from the sensor inputs. We’ve embedded it after the break.

Last week he published two posts. They cover a redesign of the sensor boards, and the panelization work he’s done to help bring down manufacturing costs. The base unit was redesigned to use an AT90USB microcontroller which consolidates the separate chips used in the previous version.

Continue reading “Update: Many Improvements To Optical-sensor-based Piano”

Chibikart: Step-by-step Lets You Build Your Own Tiny-wheel Racer

[cHaRlEsg] posted a rant, then posted full instruction on how to build this electric go-kart for yourself.

Now the rant calls this an unobtainium-free sibling to the Chibikart. We’re sad to report that the unobtainium he’s talking about are the hyper-awesome hand-wound hub motors that powered the original kart which left us dumbstruck after seeing it for the first time. But look, few mortals have the skills and tools necessary to manufacture those circular marvels of modern engineering.

So you’ll just need to settle for stuff you can buy to assemble the tiny kart seen here. It’s all-electric, using two DC motors to power the rear wheels. You can catch it racing around the hallways in the video after the break. The only thing we can see missing from the equation (other than red shells and the like) is a helmet and bumpers (you’ll see why at the end of the clip).

Continue reading “Chibikart: Step-by-step Lets You Build Your Own Tiny-wheel Racer”

This Is Not Real: Lifelike Renderings From Eagle Files

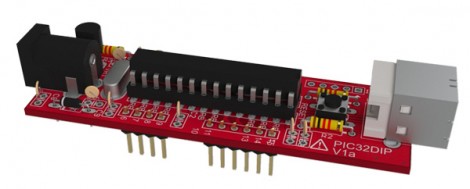
Look at it. Just look at it! This board is a lie. It doesn’t exist (at least not what’s seen in the image here). Instead this is a lifelike rendering made from Eagle CAD files.

We’ve already seen that it is rather easy to pull Eagle CAD files into Google SketchUp thanks to the EagleUp package. You’ll get a 3D model that looks quite nice but it’s hardly photo-realistic. This process starts exactly the same way. But you’re going to want to process the SketchUp file one more time.

A program called Kerkythea does this for you. It’s an open source project aimed at producing realistic renderings. It has a plugin which will process any SketchUp model and apply the textures and shadings that look so wonderful in the image above. It’s not a one-click process, but reminds us of the mountain of options you’d find in a program like Blender3D. You’ll need to map out settings for each different material you’d like to map, but the guides found at the link above do a good job of showing how it’s done.