No Quarters Required For This Sidescrolling Game In A Box

teagduino_game_in_a_box

[Adam] from Teague Labs wrote in to share a new gadget they built to help demonstrate the capabilities of the Teagueduino. Their table top video game in a box was made with a bunch of electronic components they had sitting around, as well as soda straws, plenty of painter’s tape, and some popscicle sticks.

When someone pulls the string on the front of the box, a servo opens it automatically, and a second servo starts spinning the game reel. As the reel moves, the player is presented with a set of obstacles to dodge, guiding the “hero” via a knob-controlled servo. A hall sensor attached to the back of the character is tripped when passing over any of the obstacles, which are attached to the reel with magnetic tape. When the hero collides with an obstacle, the game ends and proceeds to close itself, much to the chagrin of the player.

As you can see in the video below, it’s a pretty entertaining and challenging game.

Looking to make one of your own? Swing by the Teagueduino site to grab the game’s code and be sure to share your creations with us in the comments.

Continue reading “No Quarters Required For This Sidescrolling Game In A Box”

super_sized_3d_printer

Huge DIY 3D Printer Predictably Prints Huge 3D Items

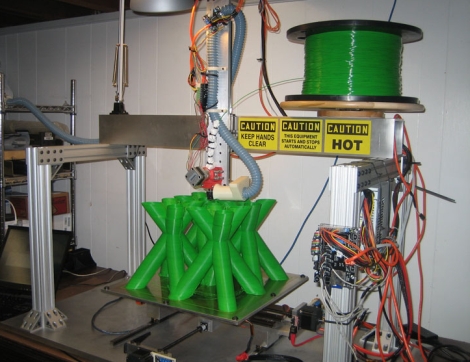
Well, if we ever need something huge built on a RepRap, now we know who to call. [Jim] over at Grass Roots Engineering wrote in to share a large 3D print he just finished, which was extruded by an equally impressive home-built 3D printer.

The part he built consists of a bunch of hollow green tubing in a criss-cross pattern and was printed in just under 2 days. He never mentions what the part is going to be used for, but at 376 x 376 x 250mm (14.8 x 14.8 x 9.84in), he estimates that this is the biggest single part printed with a DIY 3D printer.

The printer itself is based on the RepRap, but is obviously far larger. It prints using ABS plastic utilizing a maximum build area of 403 x 403 x 322.7mm (15.86 x 15.86 x 12.7in). Built over the course of 3 years, it was fully operational in 2010 but has undergone several improvements as [Jim’s] needs have changed.

It’s a fantastic looking machine, and it seems to print quite nicely. We would sure love to have one of these in our workshop.

Continue reading to see [Jim’s] 3D printer in action.

Continue reading “Huge DIY 3D Printer Predictably Prints Huge 3D Items”

DIY Portable Charger/generator

portable_charger_generator

[Glenn] from The Back Shed has built a lot of windmills and stationary generators over the years, but recently decided to try his hand at building something a bit more portable.

The charger is based of a relatively simple design, employing a 5.2 HP Kubota 4 stroke motor and a 12v car alternator to provide power. While you might be inclined to point out that his charger does exactly what an alternator and motor are built to do, there was a bit more to it than simply slapping the two parts together.

A laser cut adapter plate holds the motor and alternator together, but once [Glenn] wrapped things up and gave the motor a spin, he realized that he was driving the alternator backwards. This would eventually cause the alternator to overheat since the cooling fan was running the wrong way. He removed the fan and reversed the fins with a hammer so that he could get the cooling he needed without having to reinstall the alternator in the opposite orientation.

The whole kit was mounted on a hand truck for portability, and [Glenn] says that the charger/generator only needs to run about 5 minutes before a dead battery has enough juice to crank an engine.

[via HackedGadgets]

Security System Gives You A Call When It Senses Intruders

gsm_motion_detector_alarm_system

[Dimitris] decided to build a homemade alarm system, but instead of triggering a siren, sending an SMS message, or Tweeting about an intrusion, he preferred that his system call him when there was trouble afoot. He says that he preferred a call over text messaging because there are no charges associated with the call if the recipient does not pick up the line, which is not the case with SMS.

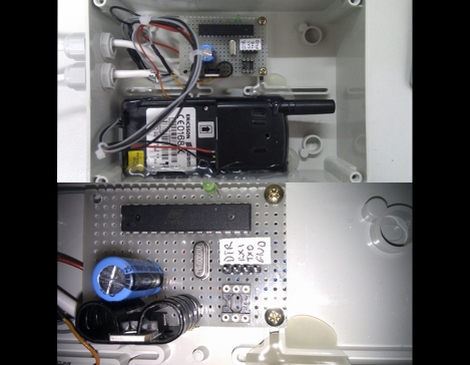
The system is based around an off the shelf motion detector that was hacked to work with an old mobile phone. The motion detector originally triggered a siren, but he stripped out the speaker and wired it to a bare bones Arduino board he constructed. The Arduino was in turn connected to the serial port of an unused Ericssson T10s mobile phone. This allows the Arduino to call his mobile phone whenever the motion detector senses movement.

The system looks to be quite useful, and while [Dimitris] didn’t include all of the code he used, he says others should be able to replicate his work without too much trouble.

This Marriage Proposal Is The Best PCB Design Ever

best_pcb_design_ever

While you will often see hacks on this site that feature high voltage, fire, and metal, that doesn’t mean that hackers, makers, and electronics geeks don’t have a soft side. In fact, we find the opposite to be true the vast majority of the time.

Take for instance [Bill Porter].

You may have seen his projects and tutorials featured here a time or two, and though I have never met him, he seems like a great guy whose heart is in the right place.

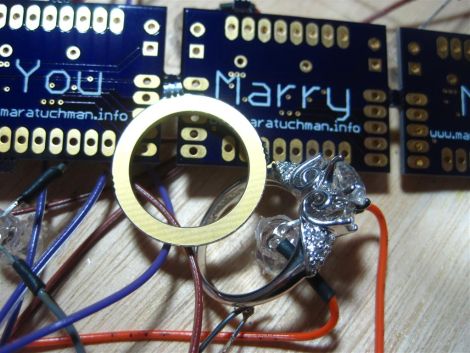
He recently decided that his college sweetheart was “the one” and had to think of a clever and surprising way to pop the question to a girl who is always one step ahead of the curve. [Mara (soon to be) Porter] was working on a project that required a custom PCB, and having never ordered one before, [Bill] was happy to help her get things in order. After sending the schematics off to [Laen] at DorkbotPDX, [Bill] fired off another email asking to have his proposal silk screened on the boards. [Laen] said he was happy to help, and so the wait began.

The boards arrived a few weeks later, and the rest, they say, was history.

How did it go? We’re guessing you’ve figured it out by now, but be sure to swing by [Bill’s] site to see how it all went down.

You know you want to…you big softie!

Broken Vintage Record Player Reborn As A Portable MP3 Cabinet

old_record_player_pc_jukebox

[Julian] picked up an old record player that was sitting in somebody’s trash pile, and brought it home to see if it could be restored to working order. When he got it home he discovered that it didn’t work at all, so he and his wife decided to modernize it a bit.

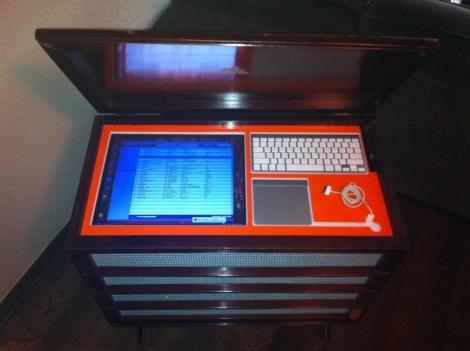
In an effort to simultaneously reunite himself with his music collection and piss off audiophiles/antique collectors in the process, he gutted the radio and began rebuilding it to serve as an MP3 jukebox. Once the innards were removed, his wife refinished the cabinet and gave the front grill a new cloth cover.

An old PC was installed inside the cabinet, along with a set of relatively cheap (but better than paper cone) speakers. A pair of custom cut plexi panels were used to cover the computer, while providing space for the monitor and Apple wireless keyboard + trackpad [Julian] uses to manage the jukebox.

The refurbed record player came out looking quite nice, and although it likely raises the ire of several different groups of purists, we think it’s pretty cool.

Light Up Your Workshop With This Arcade Button Light Switch

arcade_button_light_switch

[Pete Mills] was browsing around online when he came across an arcade button light switch and immediately wanted one. He didn’t however want to pay the $35 asking price for the switch, so he decided to build it himself.

He says that his solitary arcade machine doesn’t warrant its own room, so he figured he would wire the switch up to an extension cord in his workshop instead. The switch was made with parts he had on hand, so seeing as he didn’t have any triacs, he opted to use a relay in its place. He thought about how he would construct a simple flip flop circuit for the switch, and settled on using a simple 555-based circuit instead of a pair of transistors.

The end result looks every bit as nice as the version available for sale online, and it works great as you can see in the video below. [Pete] has circuit schematics available on his site should you want to build your own, so if you do, let us know in the comments – we’d love to see different variations on the circuit design.

Continue reading “Light Up Your Workshop With This Arcade Button Light Switch”