Open Source Ear Monitoring Platform Listens To Your Ears

All sorts of exciting things happen in your ears, and now there is a good open source way to monitor them. Open Earable is a new project from a group of researchers and companies that monitors and records what is going on in your ear.
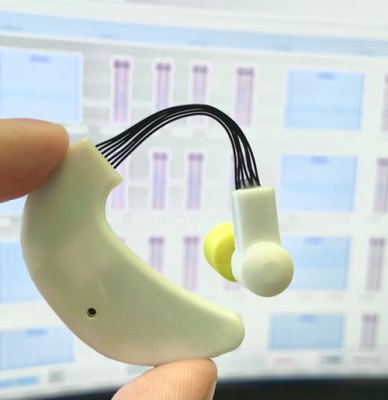
The project is designed as an easy-to-build, cheap way for audiologists and others to capture data about what is happening inside and around the ear. It’s a clip-on device that looks like a small hearing aid but has a six-degree Inertial Measurement Unit (IMU) and several other sensors to measure things around your ear and inside the ear canal. A pressure and temperature sensor measures the air pressure and temperature just inside the ear canal, and a small speaker can squirt sound right in there.

A button on the outside allows the user to control the device, and it can play back or record sound to the internal SD card memory. These are all controlled by an Arduino that includes Bluetooth Low Energy. The existing design only allows you to play a stored WAV file, not streaming audio. That’s a solvable problem, though, so it could also be turned into a set of hacker headphones.

Joking aside, this looks like an exciting research project and a useful tool for researchers. The GitHub repository for version 1.3 of the project lays it all out, including a full BoM and code, and the STL files for the case and PCB designs are in the Resources section of the site.

[Updated 18/10/2023 to correct IMU to Measurement, not Management. Intertial management needs a different set of devices]

Solar Camera Built From Raspberry Pi

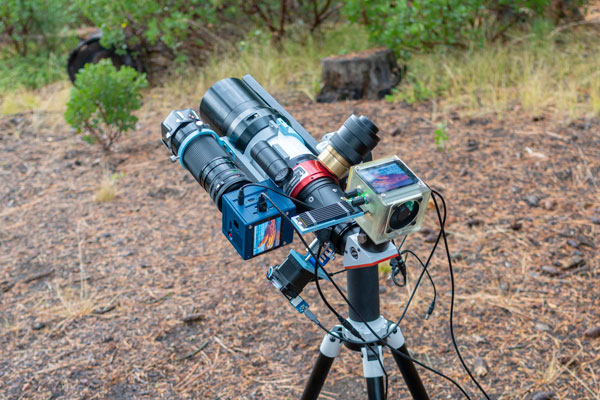
Ever since an impromptu build completed during a two-week COVID-19 quarantine back in 2020, [Will Whang] has been steadily improving his Raspberry Pi solar photography setup. It integrates a lot of cool stuff: multiple sensors, high bandwidth storage, and some serious hardware. This is no junk drawer build either, the current version uses a $2000 USD solar telescope (an LS60M with 200mm lens) and a commercial AZ-GTi mount.

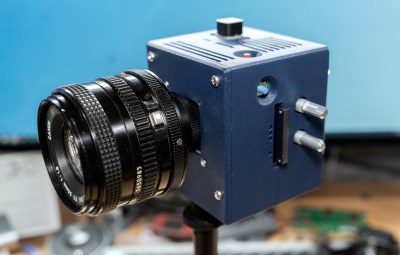
He also moved up somewhat with the imaging devices from the Raspberry Pi camera module he started with to two imaging sensors of his own: the OneInchEye and the StarlightEye, both fully open source. These two sensors feed data into the Raspberry Pi 4 Compute Module, which dumps the raw images into storage.

Because solar imaging is all about capturing a larger number of images, and then processing and picking the sharpest ones, you need speed. Far more than writing to an SD Card. So, the solution [Will] came up with was to build a rather complex system that uses a CF Express to NVME adapter that can keep up, but can be quickly swapped out.

Unfortunately, all of this hard work proved to be in vain when the eclipse came, and it was cloudy in [Wills] area. But there is always another interesting solar event around the corner, and it isn’t going anywhere for a few million years. [Will] is already looking at how to upgrade the system again with the new possibilities the Raspberry Pi 5 offers.

Continue reading “Solar Camera Built From Raspberry Pi”

Restoration Of A Thinkpad 701C

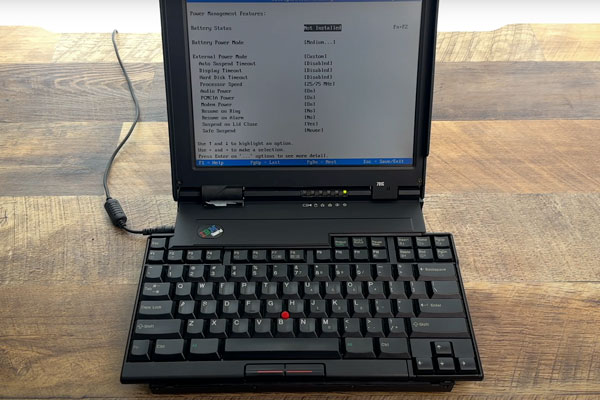
This is like ASMR for Hackers: restoration specialist [Polymatt] has put together a video of his work restoring a 1995 IBM Thinkpad 701c, the famous butterfly keyboard laptop. It’s an incredible bit of restoration, with a complete teardown and rebuild, even including remaking the decals and rubber feet.

[Polymatt] runs Project Butterfly, an excellent site for those who love these iconic laptops, offering advice and spare parts for restoring them. In this video, he does a complete teardown, taking the restored laptop completely apart, cleaning it out, and replacing parts that are beyond salvaging, like the battery, and replacing them. Finally, he puts the whole thing back together again and watches it boot up. It’s a great video that we’ve put below the break and is well worth watching if you wonder about how much work this sort of thing involves: the entire process took him over two years.

We’ve covered some of his work in the past, including the surprisingly complicated business of analyzing and replacing the Ni-Cad battery that the original laptop used. Continue reading “Restoration Of A Thinkpad 701C”

An In-Depth Comparison Of Hobby PCB Manufacturers

[Icamtuf] has been working on a prototyping run of a project, which involves getting PCBs made by several low volume PCB manufacturing companies. After receiving the boards, he analyzed the results and produced an interesting analysis.

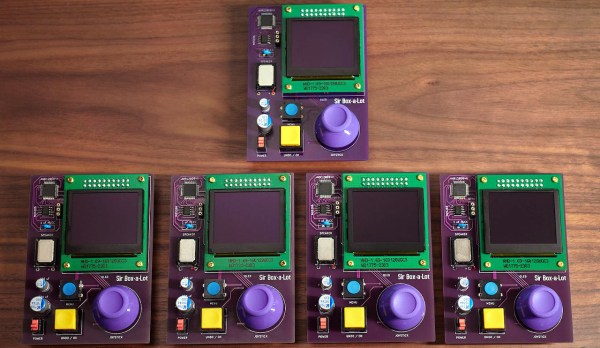
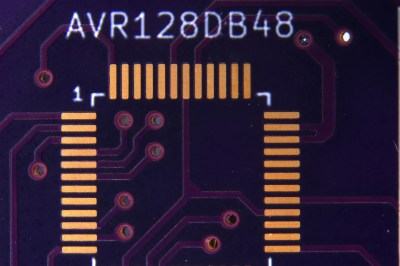
The project he is working on is Sir-Box-A-Lot, a Sokoban gaming console clone that we’ve covered before. It uses an AVR128DA28 microcontroller to emulate the original box-pushing game and drive the OLED display. He ordered PCBs from OSHPark, DigiKey Red, JLCPCB, PCBWay and Aisler.

OSHPark boards are gorgeous, but you pay for it.

There were pros and cons for each of the services: OSHPark produced the nicest-looking boards, but at the highest cost. DigiKey Red had a flawless solder mask, but a rather sloppy-looking silkscreen and shipped the boards covered in adhesive gunk. JLCPCB was fast, shipping the boards in less than 7 days, but the smaller details of the silkscreen were blurry and the solder mask was thinner than the others. The solder mask from PCBWay was very slightly misaligned but was thicker than most, and they were the only ones who queried a badly shaped hole to see what [Icamtuf] wanted to do: the others just made assumptions and made the boards without checking.

To be fair, this analysis is based on a single PCB design ordered once and it is possible that some companies were having a bad day. These were also delivered to the US, so your delivery times may vary. So, there are no clear winners and I wouldn’t make a choice based on this alone. But the analysis is well worth a read if you want to know what to look out for on your own PCBs.

Dumping Spacecraft In The Middle Of Nowhere

The BBC has an interesting article on Point Nemo, AKA the Oceanic Pole of Inaccessibility, AKA the spacecraft graveyard. This is the place in the ocean that is furthest from land, in the middle of the usually stormy South Pacific. It’s as far out there as you can get without leaving the planet: about 2,688 kilometers (1670 miles) from the nearest dry land. Even the ocean floor is 4 km (2.5 miles) down; the closest human life is the International Space Station (ISS) astronauts flying 415 km (260 miles) above it. It is not near any shipping lanes or transport routes. It is, to put it bluntly, the middle of goddam nowhere. So, it is a perfect place to dump derelict spacecraft.

Since 1971, over 160 spacecraft have met their end in these chilly waters, from the fiery public end of the Mir space station to the secret death of numerous secret spy satellites. The article in question focuses on the Soviet satellites, but plenty of other countries dump their end-of-life satellites there, including trash from the ISS. The Chinese Taingong-1 space station crashed nearby, although that was more by accident than design. The ISS is scheduled to join its trash in a few years: the current plan is that the massive space station will be de-orbited and crashed near Point Nemo in 2030.

Will there be anyone to see it? When the Mir space station was de-orbited, some entrepreneurial companies offered flights to the area to catch a glimpse, but the best view was from the island of Fiji. So, start planning your trip now…

Continue reading “Dumping Spacecraft In The Middle Of Nowhere”

Giant LED Matrix Fills Blank Space In The Kitchen

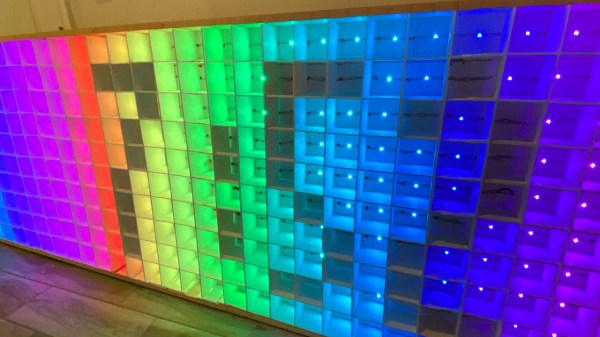
We’ve all got one: a blank space somewhere in our home that we don’t know what to do with. [James Miller] had one above his kitchen cabinets, so he filled it with a giant LED matrix. The result is a large but surprisingly attractive LED screen that can send messages, provide illumination, or while away the idle hours of the night playing Conway’s Game of Life.

[James] built the matrix using the usual suspect for these builds: several strings of WS2812 lights . He initially ran this from a Raspberry Pi, but realized that there was no need for such a dizzying amount of computing power, so he switched to an ESP32 instead. The frame is built from wood and foam board.

The first version he built used a fabric diffuser, but after a close encounter with a flaming steak, he switched over to commercial ceiling light diffusers cut down to size. We might have been tempted to keep going and try an “egg crate” style ceiling light panel for a the smaller pixel size, but [James] thinks he has reached the “good enough” point of this project. It’s certainly a fun build, and it looks very cool with minimal materials.

Continue reading “Giant LED Matrix Fills Blank Space In The Kitchen”

3D Printed Mini Drone Test Gimbal

Drones are a pain, especially mini ones. When you are designing, building (or even reviewing) them, they inevitably fly off in some random direction, inevitably towards your long-suffering dog, hit him in the butt and send him scuttling off in search of a quieter spot for a nap.

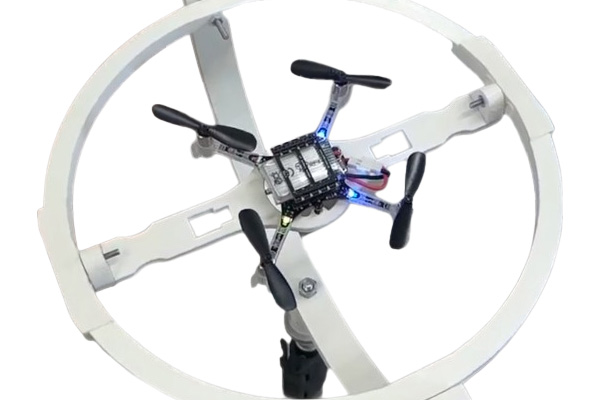
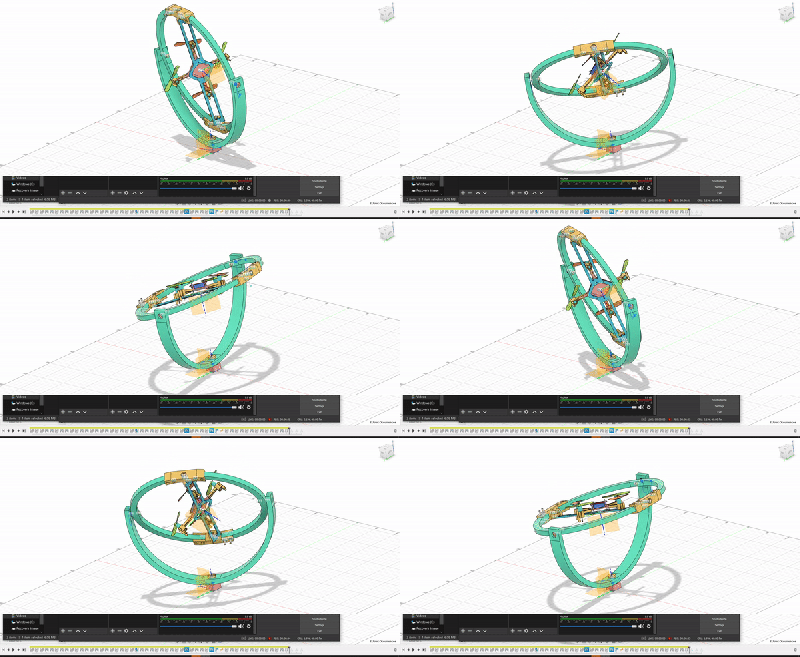
[Tristan Dijkstra] and [Suryansh Sharma] have a solution: a mini-drone test gimbal. The two are in the the Networked Systems group and the Biomorphic Intelligence Lab who use CrazyFlie drones in their work, which require regular calibration and testing. This excellent design allows the drone to rotate in three dimensions, while still remaining safely contained. That means I could test the flight characteristics of a drone without endangering my dogs important napping schedule.

Efforts involved attaching a light tether that restricts the drone until we know how the it flies, but what usually happens is that the tether gets trapped in a rotor, or the tether gets tight and the drone freaks out and crashes into the ground.

Using a gimbal is far more elegant, because it allows the drone to rotate freely in three dimensions, so the basic features of the drone can be established before you let it loose in the skies.

The gimbal was designed with the CrazyFlie in mind, but as there’s nothing more exotic holding the craft down than a zip tie, it should work with similarly sized quadcopters.

Continue reading “3D Printed Mini Drone Test Gimbal”