OSHW Model Rocket Kit Embraces The Hexagon

If you’ve ever built a model rocket, you’ll know there’s not a whole lot to them. Essentially it’s a cardboard tube, a plastic nosecone, some fins, and a little clip that will keep it riding the launch rail as it accelerates off the pad. Extra points awarded if you add in a parachute, but strictly speaking, even that’s a luxury. Stick an Estes motor in that thing and send it.

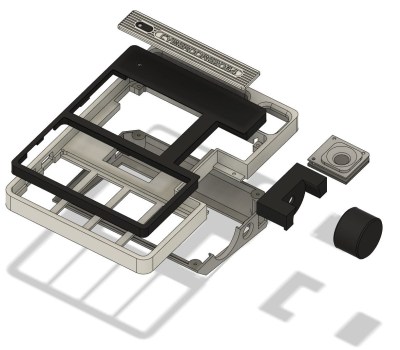
But pointing out that lightweight cardboard tubes can be tricky to ship without getting crushed, [Concrete Dog] has come up with HEXA, a clever model rocket kit that uses pre-scored cardstock instead. The immediate advantage is that this allows the rocket to be shipped as flat sheets of material, but as a secondary bonus, once folded into its final shape the rocket has an awesome hexagonal cross section.

HEXA is certified Open Hardware

As with a traditional kit, both the nosecone and fins are plastic. Except here they’ve been 3D printed in either PLA or PETG depending on their proximity to he hot and fiery area of the rocket. [Concrete Dog] says the printed parts are largely ready to fly as-is, but that some quality time with a piece of sandpaper and a coat of paint could improve the aerodynamics a bit if you were so inclined.

Ready for the best part? [Concrete Dog] has decided to release all of the design files for the rocket under the CERN Open Hardware Licence, meaning you’re free to reproduce and modify the rocket as you see fit. In fact, on July 24th, the HEXA rocket was officially certified as Open Hardware by the Open Source Hardware Association (OSHWA) — a first for a DIY rocket, as far as we can tell.

Continue reading “OSHW Model Rocket Kit Embraces The Hexagon”

George Washington Gets Cleaned Up With A Laser

Now, we wouldn’t necessarily call ourselves connoisseurs of fine art here at Hackaday. But we do enjoy watching [Julian Baumgartner]’s YouTube channel, where he documents the projects that he takes on as a professional conservator. Folks send in their dirty or damaged paintings, [Julian] works his magic, and the end result often looks like a completely different piece. Spoilers: if you’ve ever looked at an old painting and wondered why the artist made it so dark and dreary — it probably just needs to be cleaned.

Anyway, in his most recent video, [Julian] pulled out a piece of gear that we didn’t expect to see unleashed against a painting of one of America’s Founding Fathers: a Er:YAG laser. Even better, instead of some fancy-pants fine art restoration laser, he apparently picked up second hand unit designed for cosmetic applications. The model appears to be a Laserscope Venus from the early 2000s, which goes for about $5K these days.

Now, to explain why he raided an esthetician’s closet to fix up this particular painting, we’ve got to rewind a bit. As we’ve learned from [Julian]’s previous videos, the problem with an old dirty painting is rarely the paining itself, it’s the varnish that has been applied to it. These varnishes, especially older ones, have a tendency to yellow and crack with age. Now stack a few decades worth of smoke and dirt on top of it, and you’ve all but completely obscured the original painting underneath. But there’s good news — if you know what you’re doing, you can remove the varnish without damaging the painting itself.

In most cases, this can be done with various solvents that [Julian] mixes up after testing them out on some inconspicuous corner of the painting. But in this particular case, the varnish wasn’t reacting well to anything in his inventory. Even his weakest solvents were going right through it and damaging the paint underneath.

Because of this, [Julian] had to break out the big guns. After experimenting with the power level and pulse duration of the 2940 nm laser, he found the settings necessary to break down the varnish while stopping short of cooking the paint it was covering. After hitting it with a few pulses, he could then come in with a cotton swab and wipe the residue away. It was still slow going, but it turns out most things are in the art conservation world.

This isn’t the first time we’ve covered [Julian]’s resourceful conservation methods. Back in 2019, we took at look the surprisingly in-depth video he created about the design and construction of his custom heat table for flattening out large canvases.

Continue reading “George Washington Gets Cleaned Up With A Laser”

Retro Inspired Cyberdeck Scrolls Around Cyberspace

It’s difficult to nail down exactly what counts as a “real” cyberdeck in this brave new era of bespoke computing. But at the minimum, most in the community would agree that a proper deck should have a non-traditional form factor, and be designed to meet the unique needs of the builder. If you’re looking for a fantastic example of both concepts, check out the Cyberdore 2064 from [Tommi L].

At first glance the 3D printed enclosure of the Cyberdore looks a bit like a Speak & Spell, but it’s really more of an amalgamation of everything that made 1980s computers so unique. You’ve got the vents, the chunky switches, the undersized display, and of course, the handle. The case might have been extruded in 2024, but it’s doing a fantastic impression of a piece of tech from 40 years ago.

One of the key external features of the Cyberdore 2064 is the side-mounted rotary encoder that allows for smoothly scrolling through online feeds (such as your favorite hardware hacking site) or long documents. The cheap and easy to work with KY-040 encoder has been converted to a USB input device by way of a Pi Pico, and has been paired with an over-sized 3D printed knob that really makes this build stand out — not only visually, but in terms of usability. These cyberdeck builds often rely on touch screens for input, but we always appreciate a physical interface.

Under the hood you’ve got a Raspberry Pi Zero and an 18650 cell to keep the whole thing running while on the go. Though the Zero is certainly showing its age compared to the more modern variants of the Pi, for a device like this, raw computing power isn’t really the driving concern. A mechanical keyboard usually rounds out these cyberdeck builds, but in this case, [Tommi] went with a fairly common Rii 518BT portable board that’s been skillfully integrated into the front of the Cyberdore.

All of the STL files necessary to print out your own Cyberdore 2064 are available on Printables, and while [Tommi] didn’t exactly provide build instructions, the write-up provides plenty of information to get you started.

So is it just us, or does looking at Cyberdore 2064 make you think it’s time for another Hackaday Cyberdeck Challenge?

Supercon 2023: Bringing Arcade Classics To New Hardware

The processing power of modern game consoles is absolutely staggering when compared to the coin-op arcade machines of the early 1980s. Packed with terabytes of internal storage and gigabytes of RAM, there’s hardly a comparison to make with the Z80 cabinets that ran classics like Pac-Man. But despite being designed to pump out lifelike 4K imagery without breaking a virtual sweat, occasionally even these cutting-edge consoles are tasked with running one of those iconic early games like Dig Dug or Pole Position. Nostalgia is a hell of a drug…

As long as there are still demand for these genre-defining games, developers will have to keep figuring out ways to bring them to newer — and vastly more complex — systems. Which is precisely the topic of Bob Hickman’s 2023 Supercon talk, The Bits and Bytes of Bringing Arcade Classics to Game Consoles. Having spent decades as a professional game developer, he’s got plenty of experience with the unique constraints presented by both consoles and handhelds, and what it takes to get old code running on new silicon.

Continue reading “Supercon 2023: Bringing Arcade Classics To New Hardware”

A Look At The DEC VT220, A Proper Serial Terminal

If you’re reading Hackaday, we’re willing to bet that if somebody asked you about a serial terminal, you’d immediately think about a piece of software — a tool you run on the computer to communicate with some hardware gadget over UART. You might even have a favorite one, perhaps minicom or tio. You’d be technically correct (which we all know is the best kind of correct), but if you wind back the clock a bit, there’s a little more to the story.

You see, the programs we use these days to talk to microcontrollers and routers are more accurately referred to as serial terminal emulators, because they are doing in software what used to be the job of hardware. What kind of hardware? Why beauties like this DEC VT220 for example.

Continue reading “A Look At The DEC VT220, A Proper Serial Terminal”

Linksys Velop Routers Caught Sending WiFi Creds In The Clear

A troubling report from the Belgian consumer protection group Testaankoop: several models of Velop Pro routers from Linksys were found to be sending WiFi configuration data out to a remote server during the setup process. That would be bad enough, but not only are these routers reporting private information to the mothership, they are doing it in clear text for anyone to listen in on.

Testaankoop says that while testing out the Pro WiFi 6E and Pro 7 versions of Velop routers, they discovered that unencrypted packets were being sent to a server hosted by Amazon Web Services (AWS). In these packets, they discovered not only the SSID of the user’s wireless network, but the encryption key necessary to join it. There were also various tokens included that could be used to identify network and user.

While the report doesn’t go into too much detail, it seems this information is being sent as part of the configuration process when using the official Linksys mobile application. If you want to avoid having your information bounced around the Internet, you can still use the router’s built-in web configuration menus from a browser on the local network — just like in the good old days.

The real kicker here is the response from Linksys, or more accurately, the lack thereof. Testaankoop says they notified them of their discovery back in November of 2023, and got no response. There’s even been firmware updates for the affected routers since then, but the issue is still unresolved.

Testaankoop ends the review by strongly recommending users avoid these particular models of Linksys Velop routers, which given the facts, sounds like solid advice to us. They also express their disappointment in how the brand, a fixture in the consumer router space for decades, has handled the situation. If you ask us, things started going downhill once they stopped running Linux on their hardware.

Simple Version Of Pong Played On A Row Of LEDs

As far as video games go, Pong is already about as simple as it gets. But if even two dimensions is a bit more than you’re looking to tackle, [mircemk] shows how you can distill the core gameplay of this iconic title to its absolute minimum using an Arduino and a row of LEDs.

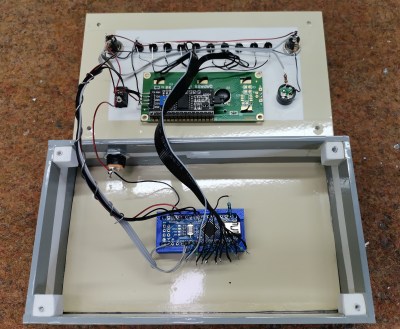
While [mircemk] brings their usual design aesthetic and flash to the project, this one could truly be done as a parts bin build. All you really need is a microcontroller with enough I/O pins (here, an Arduino Nano is used), a couple of buttons, and the aforementioned LEDs. A 16×2 LCD and a buzzer have been added to improve on the user interface a bit, but even that isn’t strictly required.

To play, each user holds their button and gets ready to hit it as soon as the LED closest to them lights up. Again, [mircemk] spruces this build up by offering both integrated buttons on the front panel of the game, as well as a pair of external “controllers” so you don’t have to crowd around the main unit. In this incarnation the score is shown on the LCD, but swapping that out for a pair of seven-segment LEDs could give the whole thing a bit more of a retro flair.

This isn’t the first time [mircemk] has tackled 1D Pong — if you can spring for addressable LEDs, you can pull the whole thing off with significantly less wiring.

Continue reading “Simple Version Of Pong Played On A Row Of LEDs”